My Handmade Sensory Bored Book
The biggest concern I had when planning our first family trip to Disneyland was how we were going to try and keep our 1 year old son entertained while driving for 6 hours. That's a long time to keep anyone entertained, but seemingly impossible for a young toddler.
Our drive to Anaheim passes through the Grapevine. For those not familiar with the drive, the Grapevine is a large and long set of mountains you have to cross over in order to get down towards LA County. Most Californians know it as a sort of death valley area (not to be confused with the actual Death Valley) because there used to be virtually nothing in those mountains. You would have to make sure you got your last fill up of gas before going over because there would be nothing until you got out. Now there are gas stations and small towns you can go into. Not easily, but they're there.
When looking up ideas on Pinterest, I saw that a lot of people made sensory books out of what looks to be felt or fleece. Unfortunately, the cost of premade books was way out of my price range, so I decided to do some DIY-ing!
The best idea I can give you is to keep in mind that your child literally has no frame of reference to things like "quality" and "craftsmanship", so if you're worried about it looking ugly, don't. As long as it doesn't fall apart and it entertains your child, you're doing great!
Since I was very short on the amount of time I had each day to be able to work on this, I saved myself the hassle of changing thread and only used white thread for everything. Additionally, I used E6000 to make sure the googly eyes stayed on the animals. I don't have to worry about Miles licking the books or trying to eat the pages. If this is still a concern for your child, I 100% DO NOT RECOMMEND you use this glue. The most my kid will do is poke the eyes a couple of times and move on. I'm extremely lucky that Miles grew out of putting things in his mouth early on.
The Supplies I Used
Assuming I had to buy everything from scratch and I had nothing but a glue gun & sticks, a sewing machine and basic white thread available, this project cost:
- Felt Sheets ($5*)
- Velcro ($5)
- Ribbon ($6*)
- Zippers ($12)
- Beads ($5)
- Various Trim & Fabric ($12)
- Googly Eyes ($5*)
- Embroidery Floss ($2*)
- Heat Transfer Vinyl ($8*)
- Pom poms ($3*)
- Buttons ($2)
- Binder Rings ($2*)
- Eyelets ($5*)
- Poly Fill ($3*)
- Total = $75
I starred the items that I already had in my inventory. The actual cost for this project was about $25 with using coupons. The cost of this project only gets as high as you let it get.

My Pages
I built my pages to be a 6" x 6" book. This made scaling everything fairly easy for me. Below is a breakdown list of the types of pages I made with brief explanations for anyone who needs them:
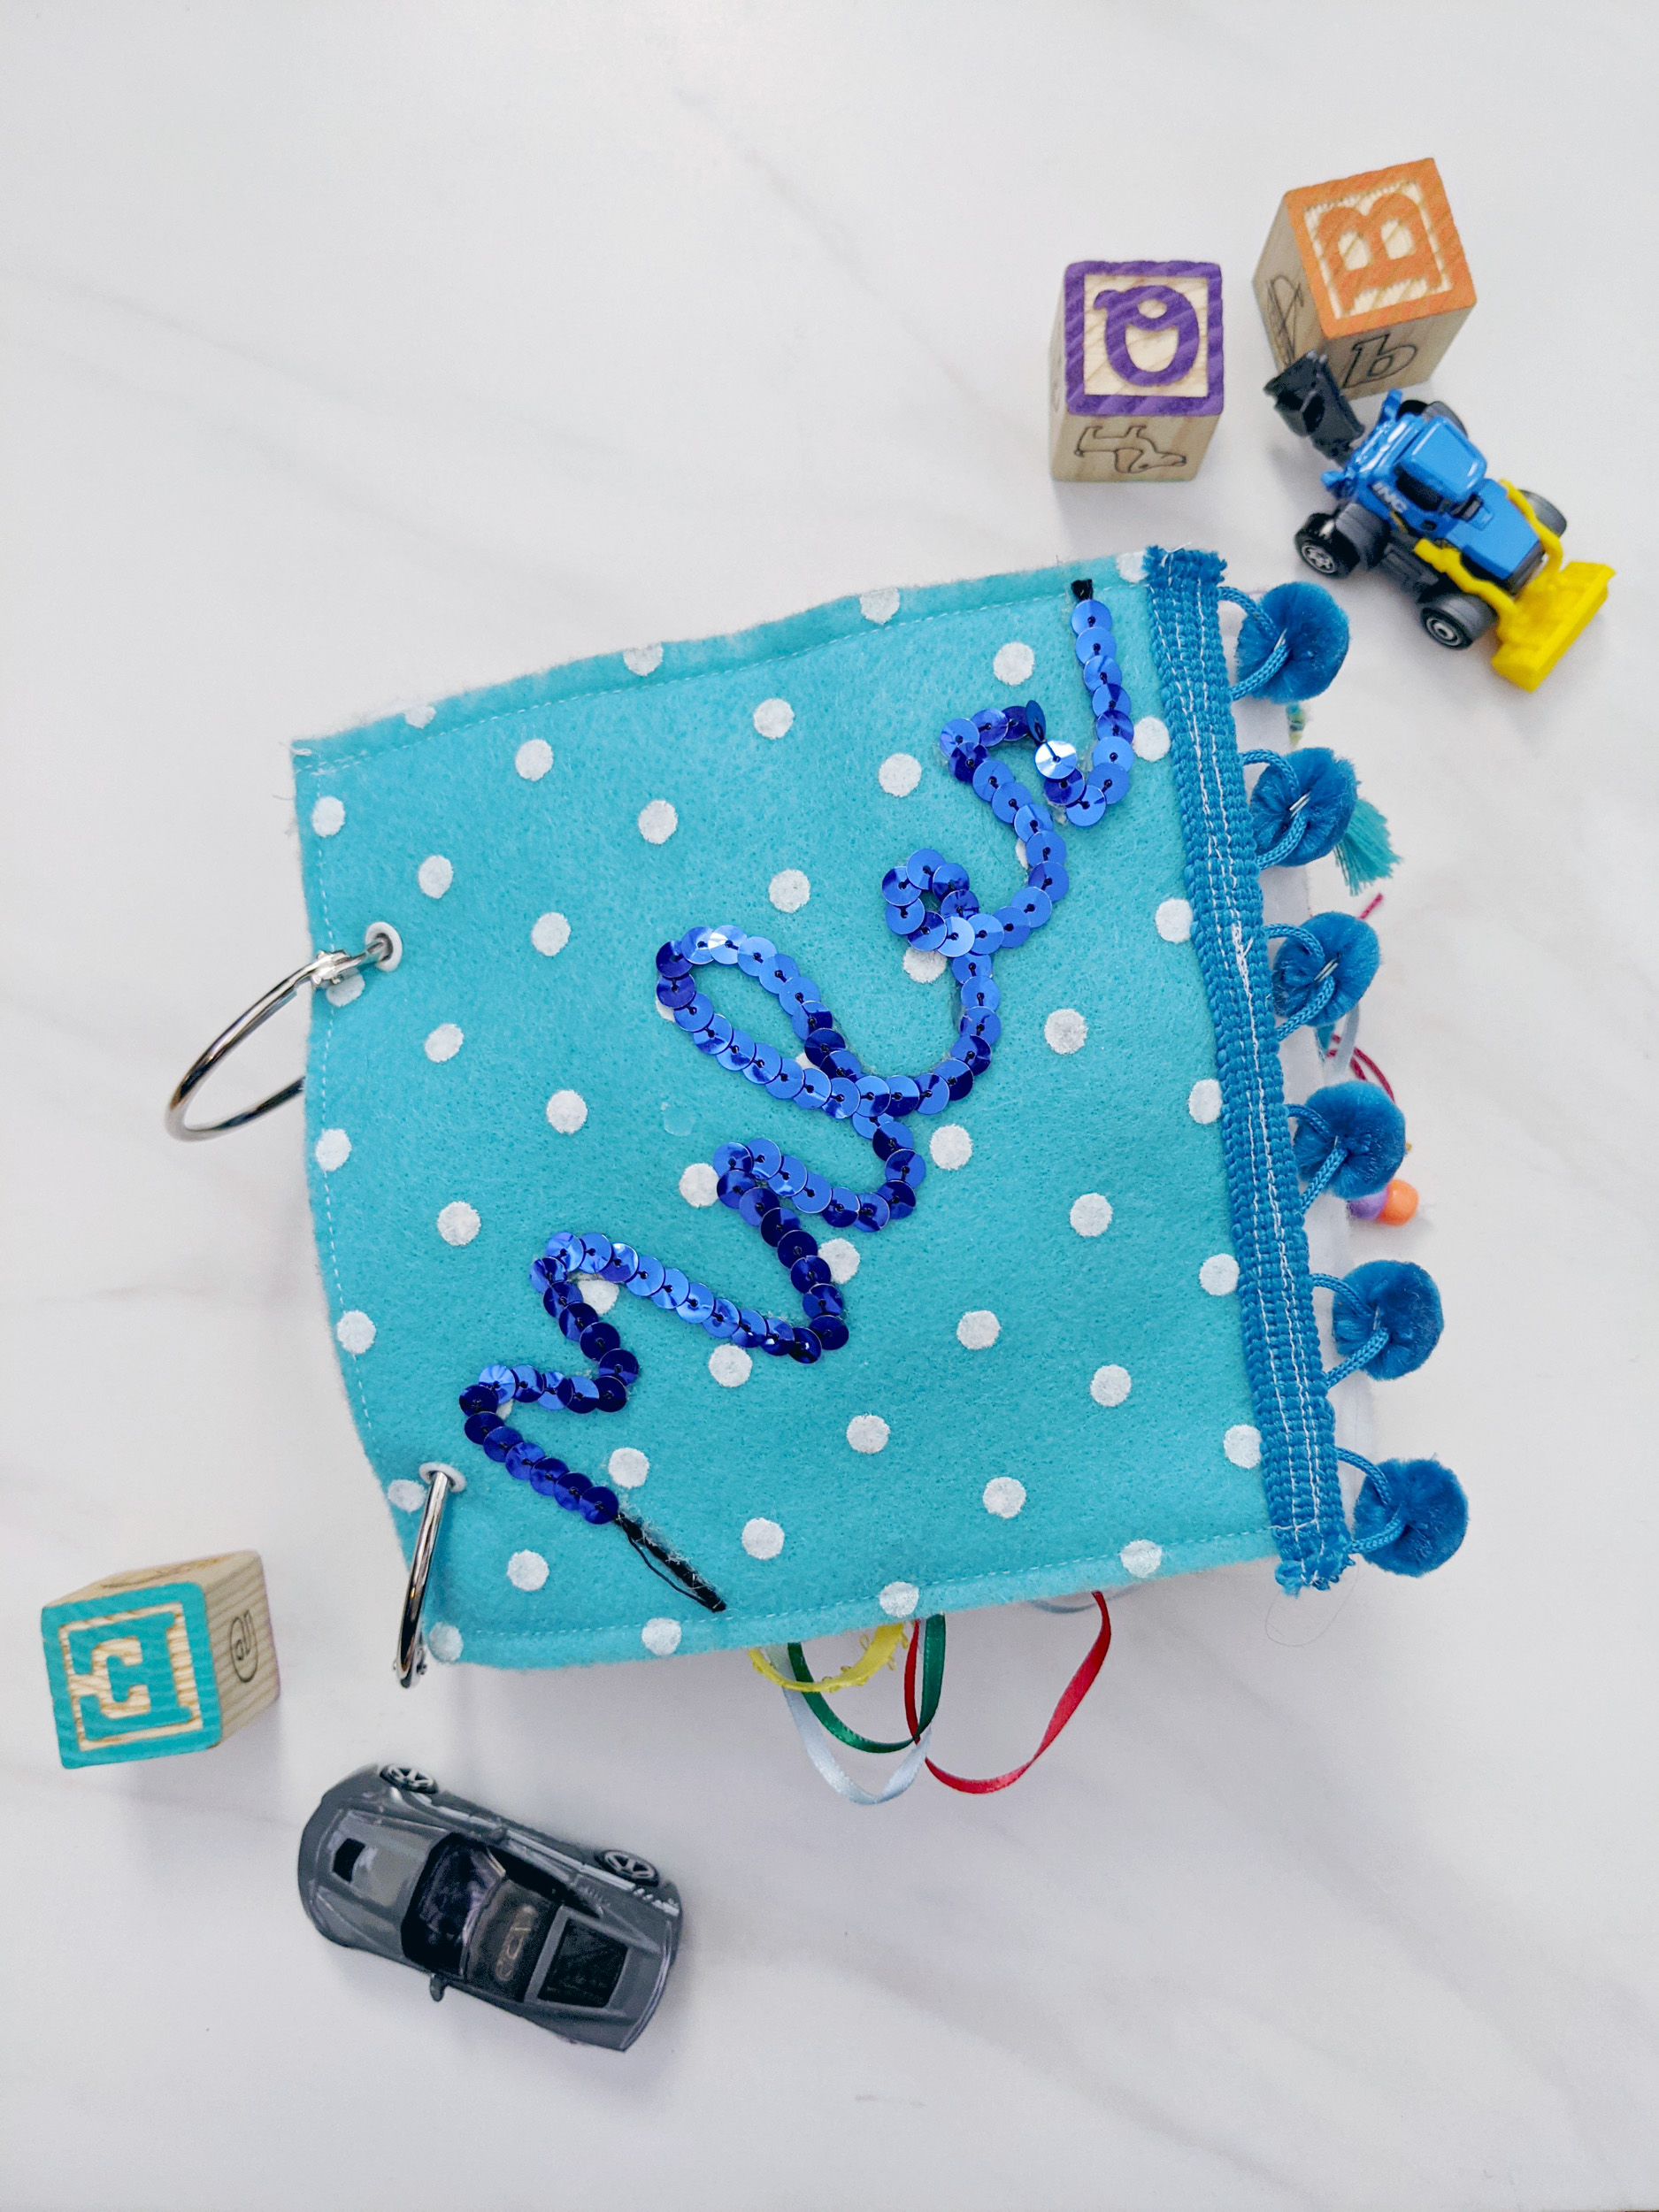
- Cover with pom pom ball trim and name spelt in sequins trim adhered with hot glue
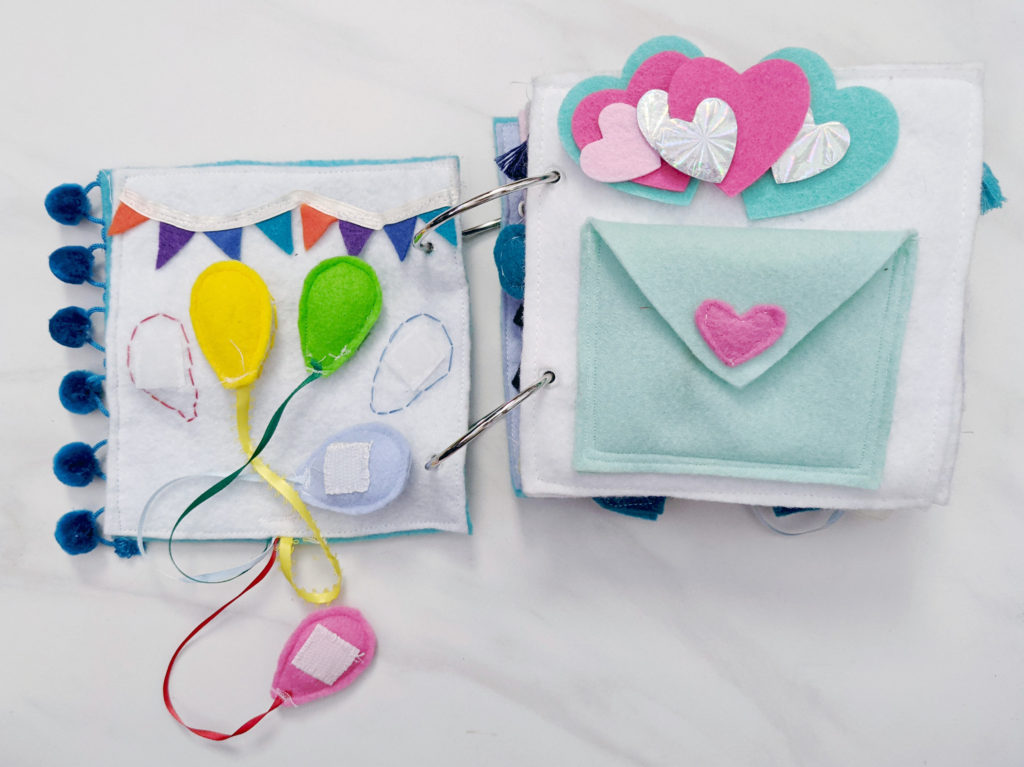
- Party scene with 4 different colored balloons and velcro backing (used embroidery floss to create an outline for color matching game and decorated "scene" with felt and ribbon bunting)
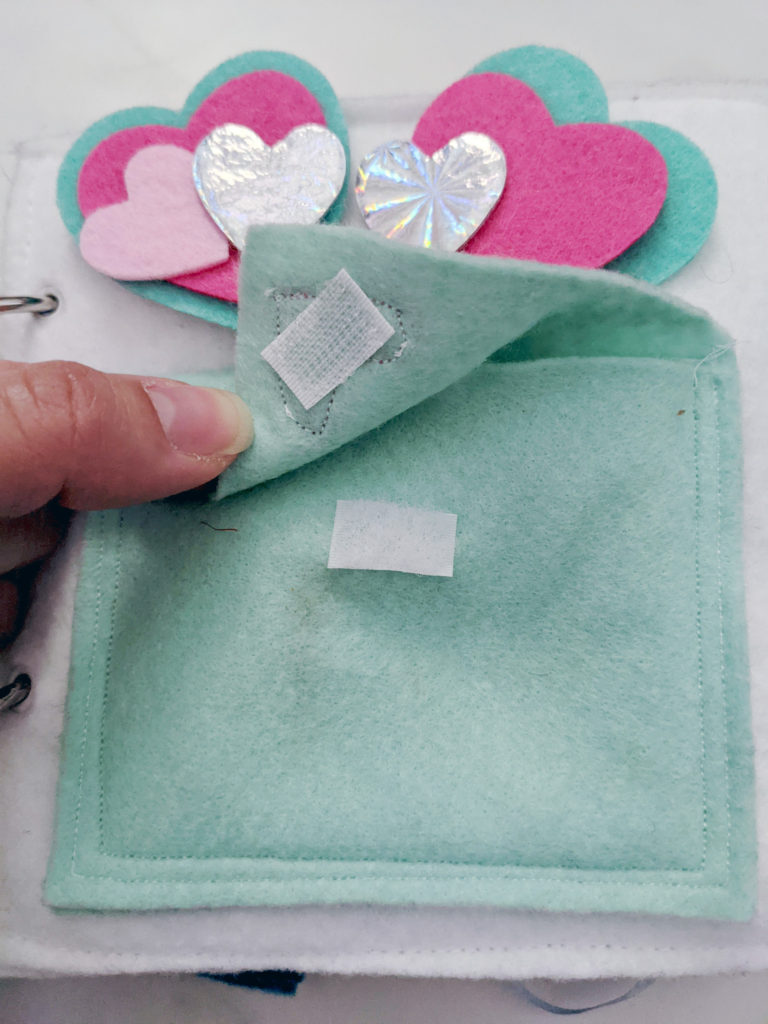
- "Love letter" envelope made from felt with velcro closure and old Valentine's Day felt hearts inside
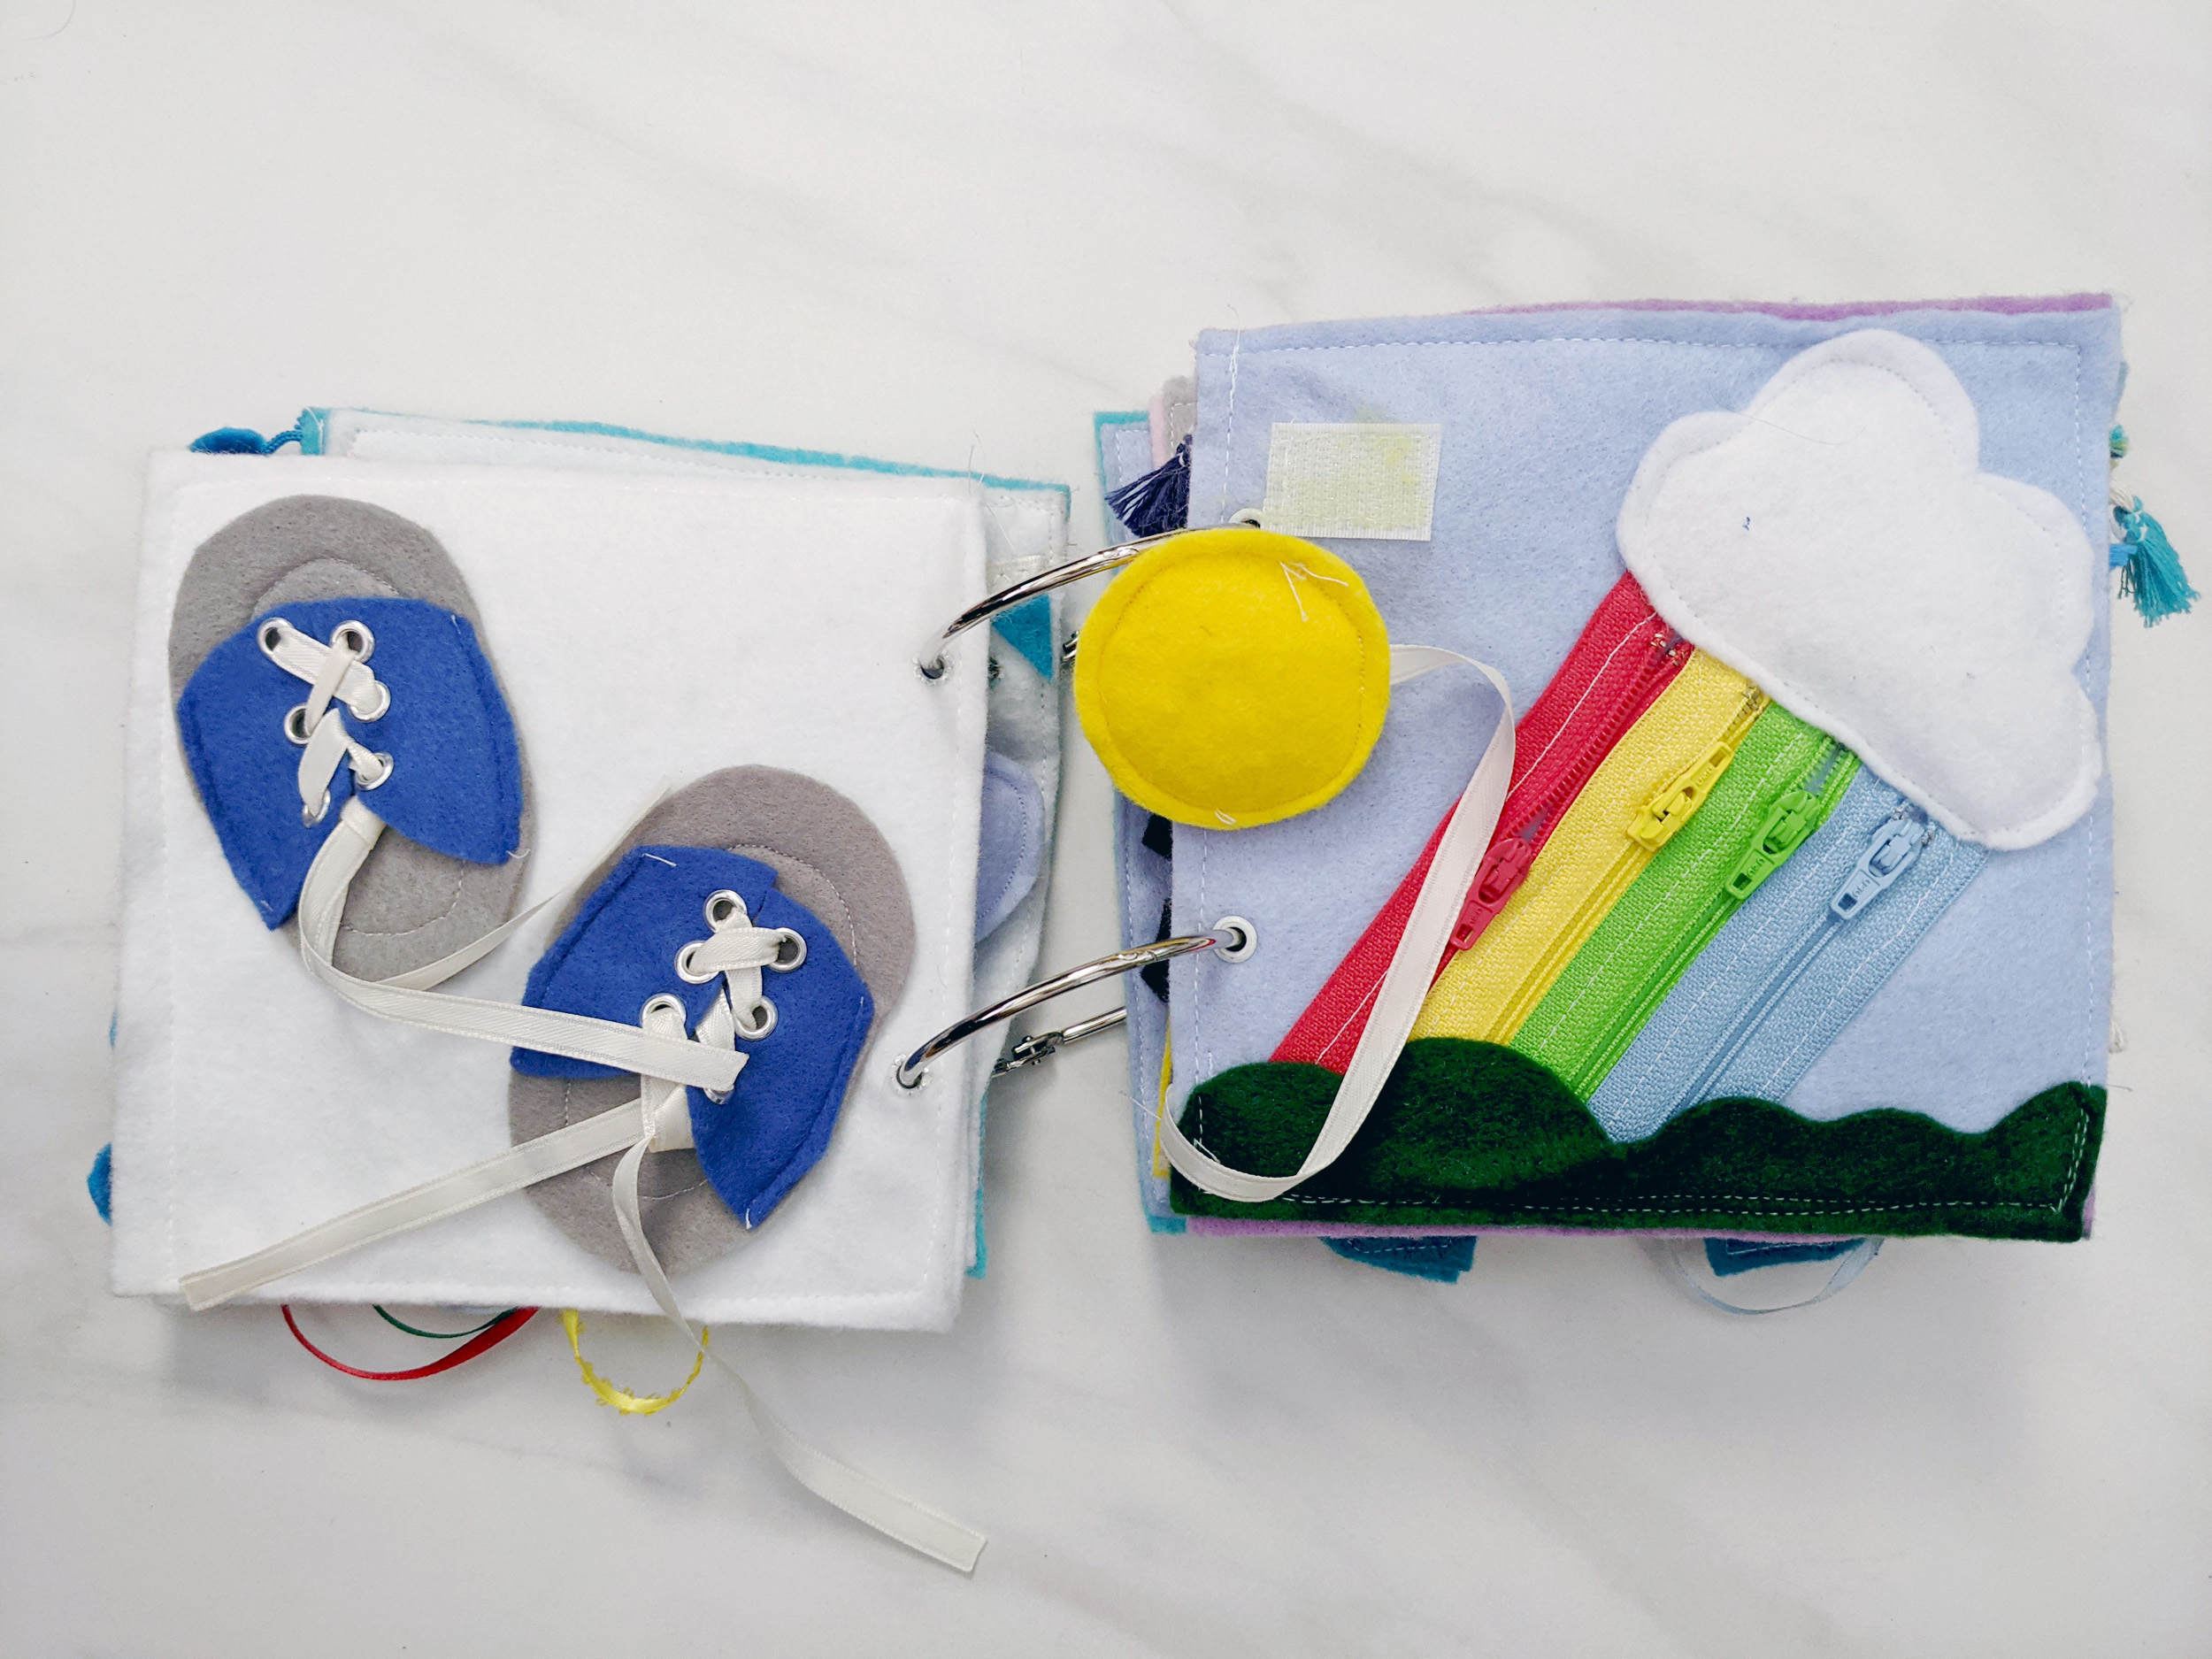
- Shoe lace tying activity with felt shoes, eyelets to reinforce holes, and ribbon for "shoe laces" (I don't expect him to learn to tie laces, but just to entertain him with untying the laces)
- Zipper rainbow with velcro sun kept attached via ribbon (try to get 4" zippers while they're on sale) and a stuffed cloud
- Beaded guitar using white trim string (get this from the fabric area) and a rainbow of beads
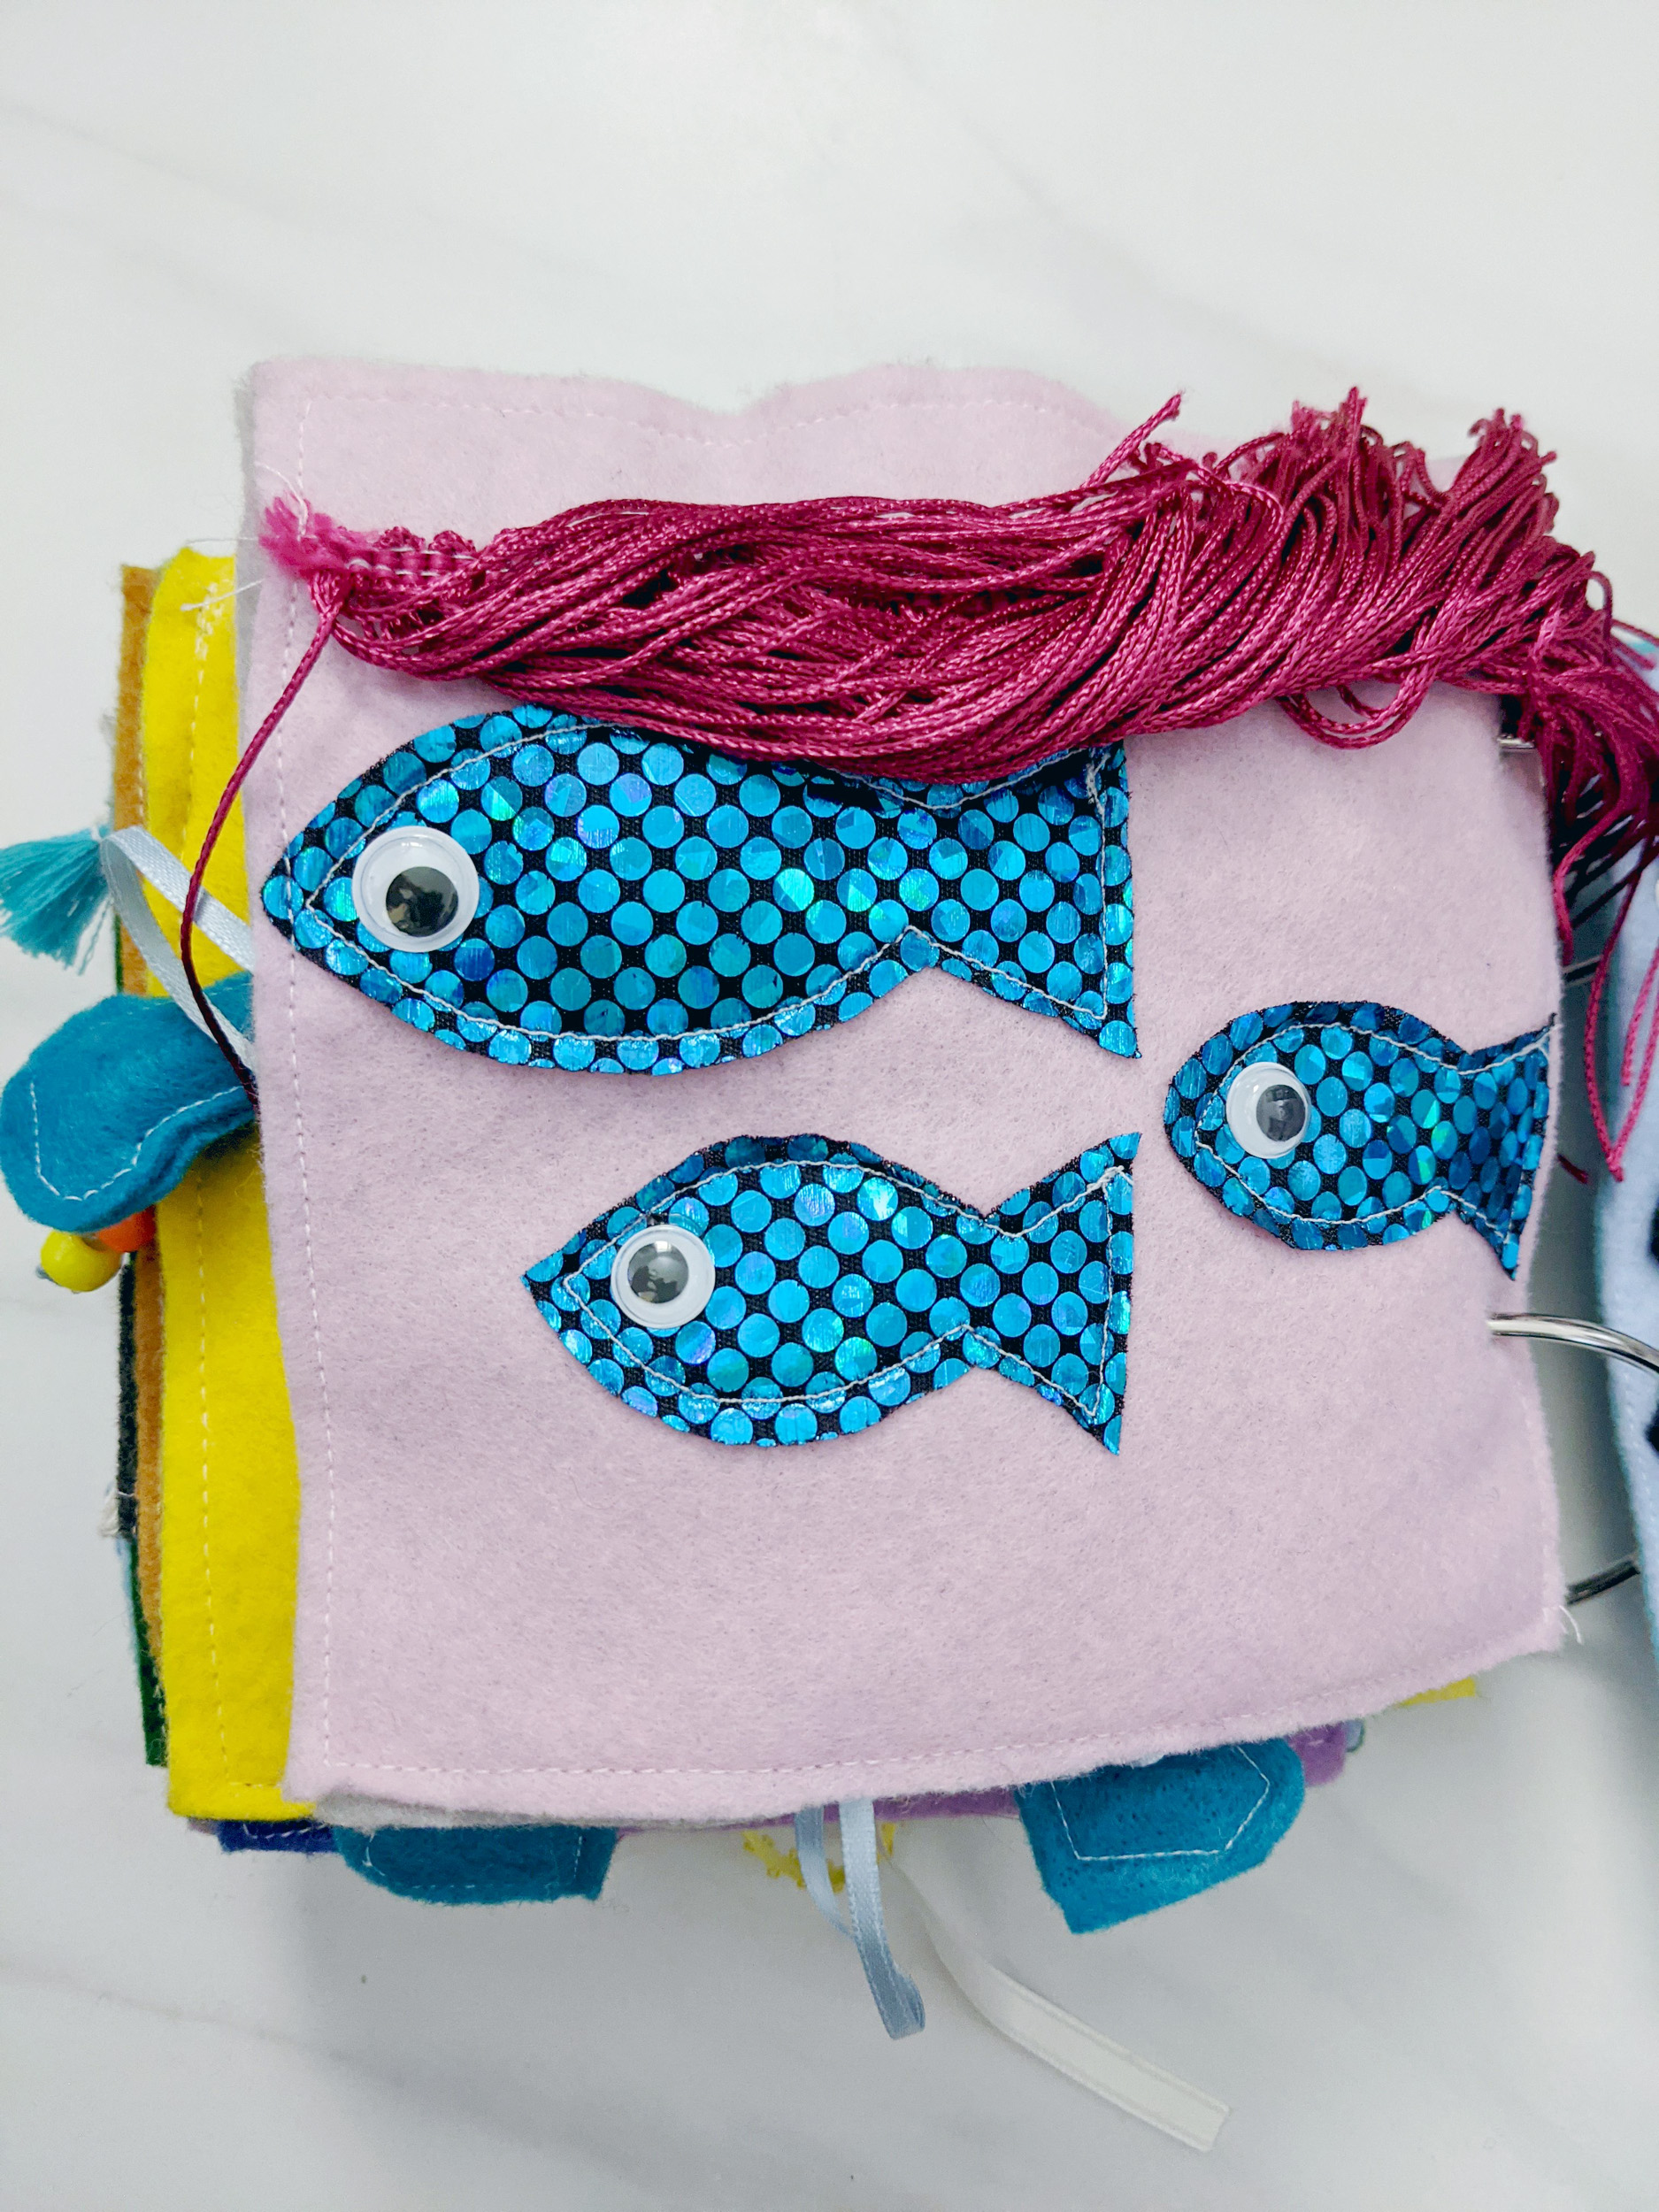
- Fish and Trim using some color-shifting spandex material, googly eye, and trim that just happened to match
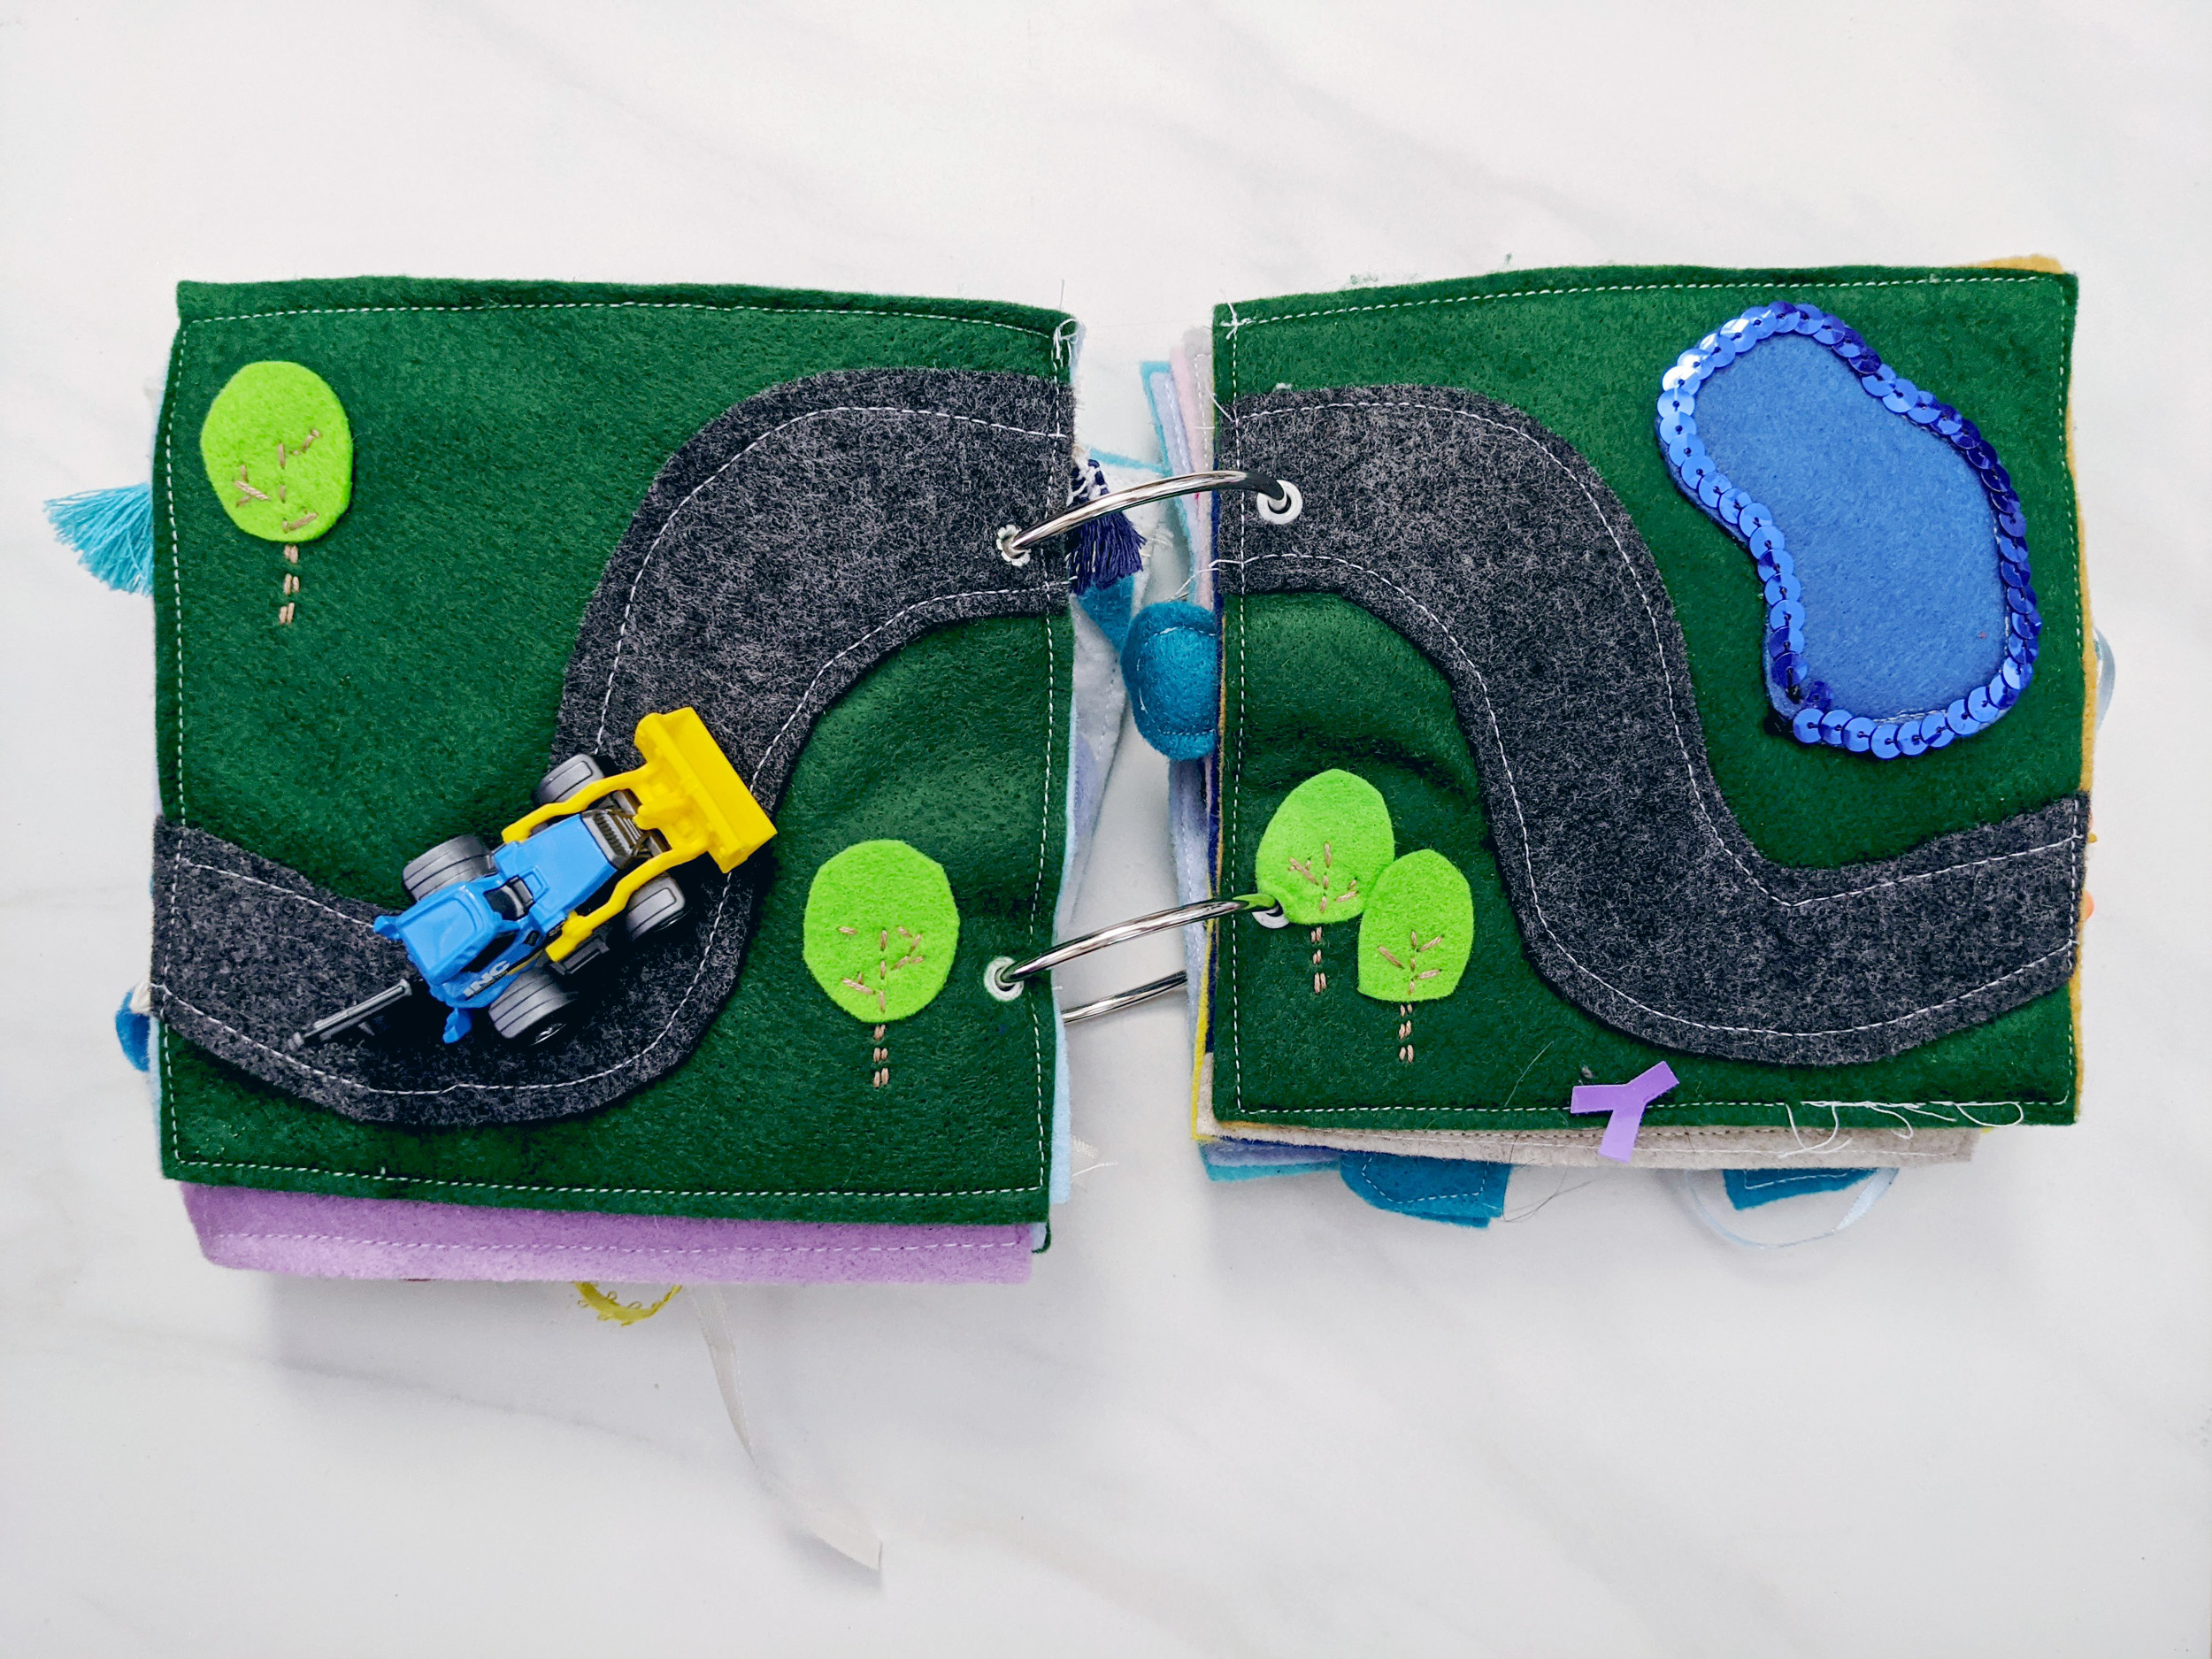
- 2-page landscape road for playing with mini cars (I made this specifically for his new Hot Wheels that he just got into; I made sure the trees were only held on by the embroidery floss I used to decorate so he could mess with them if he wanted to and trimmed the lake with leftover blue sequin trim that I had)
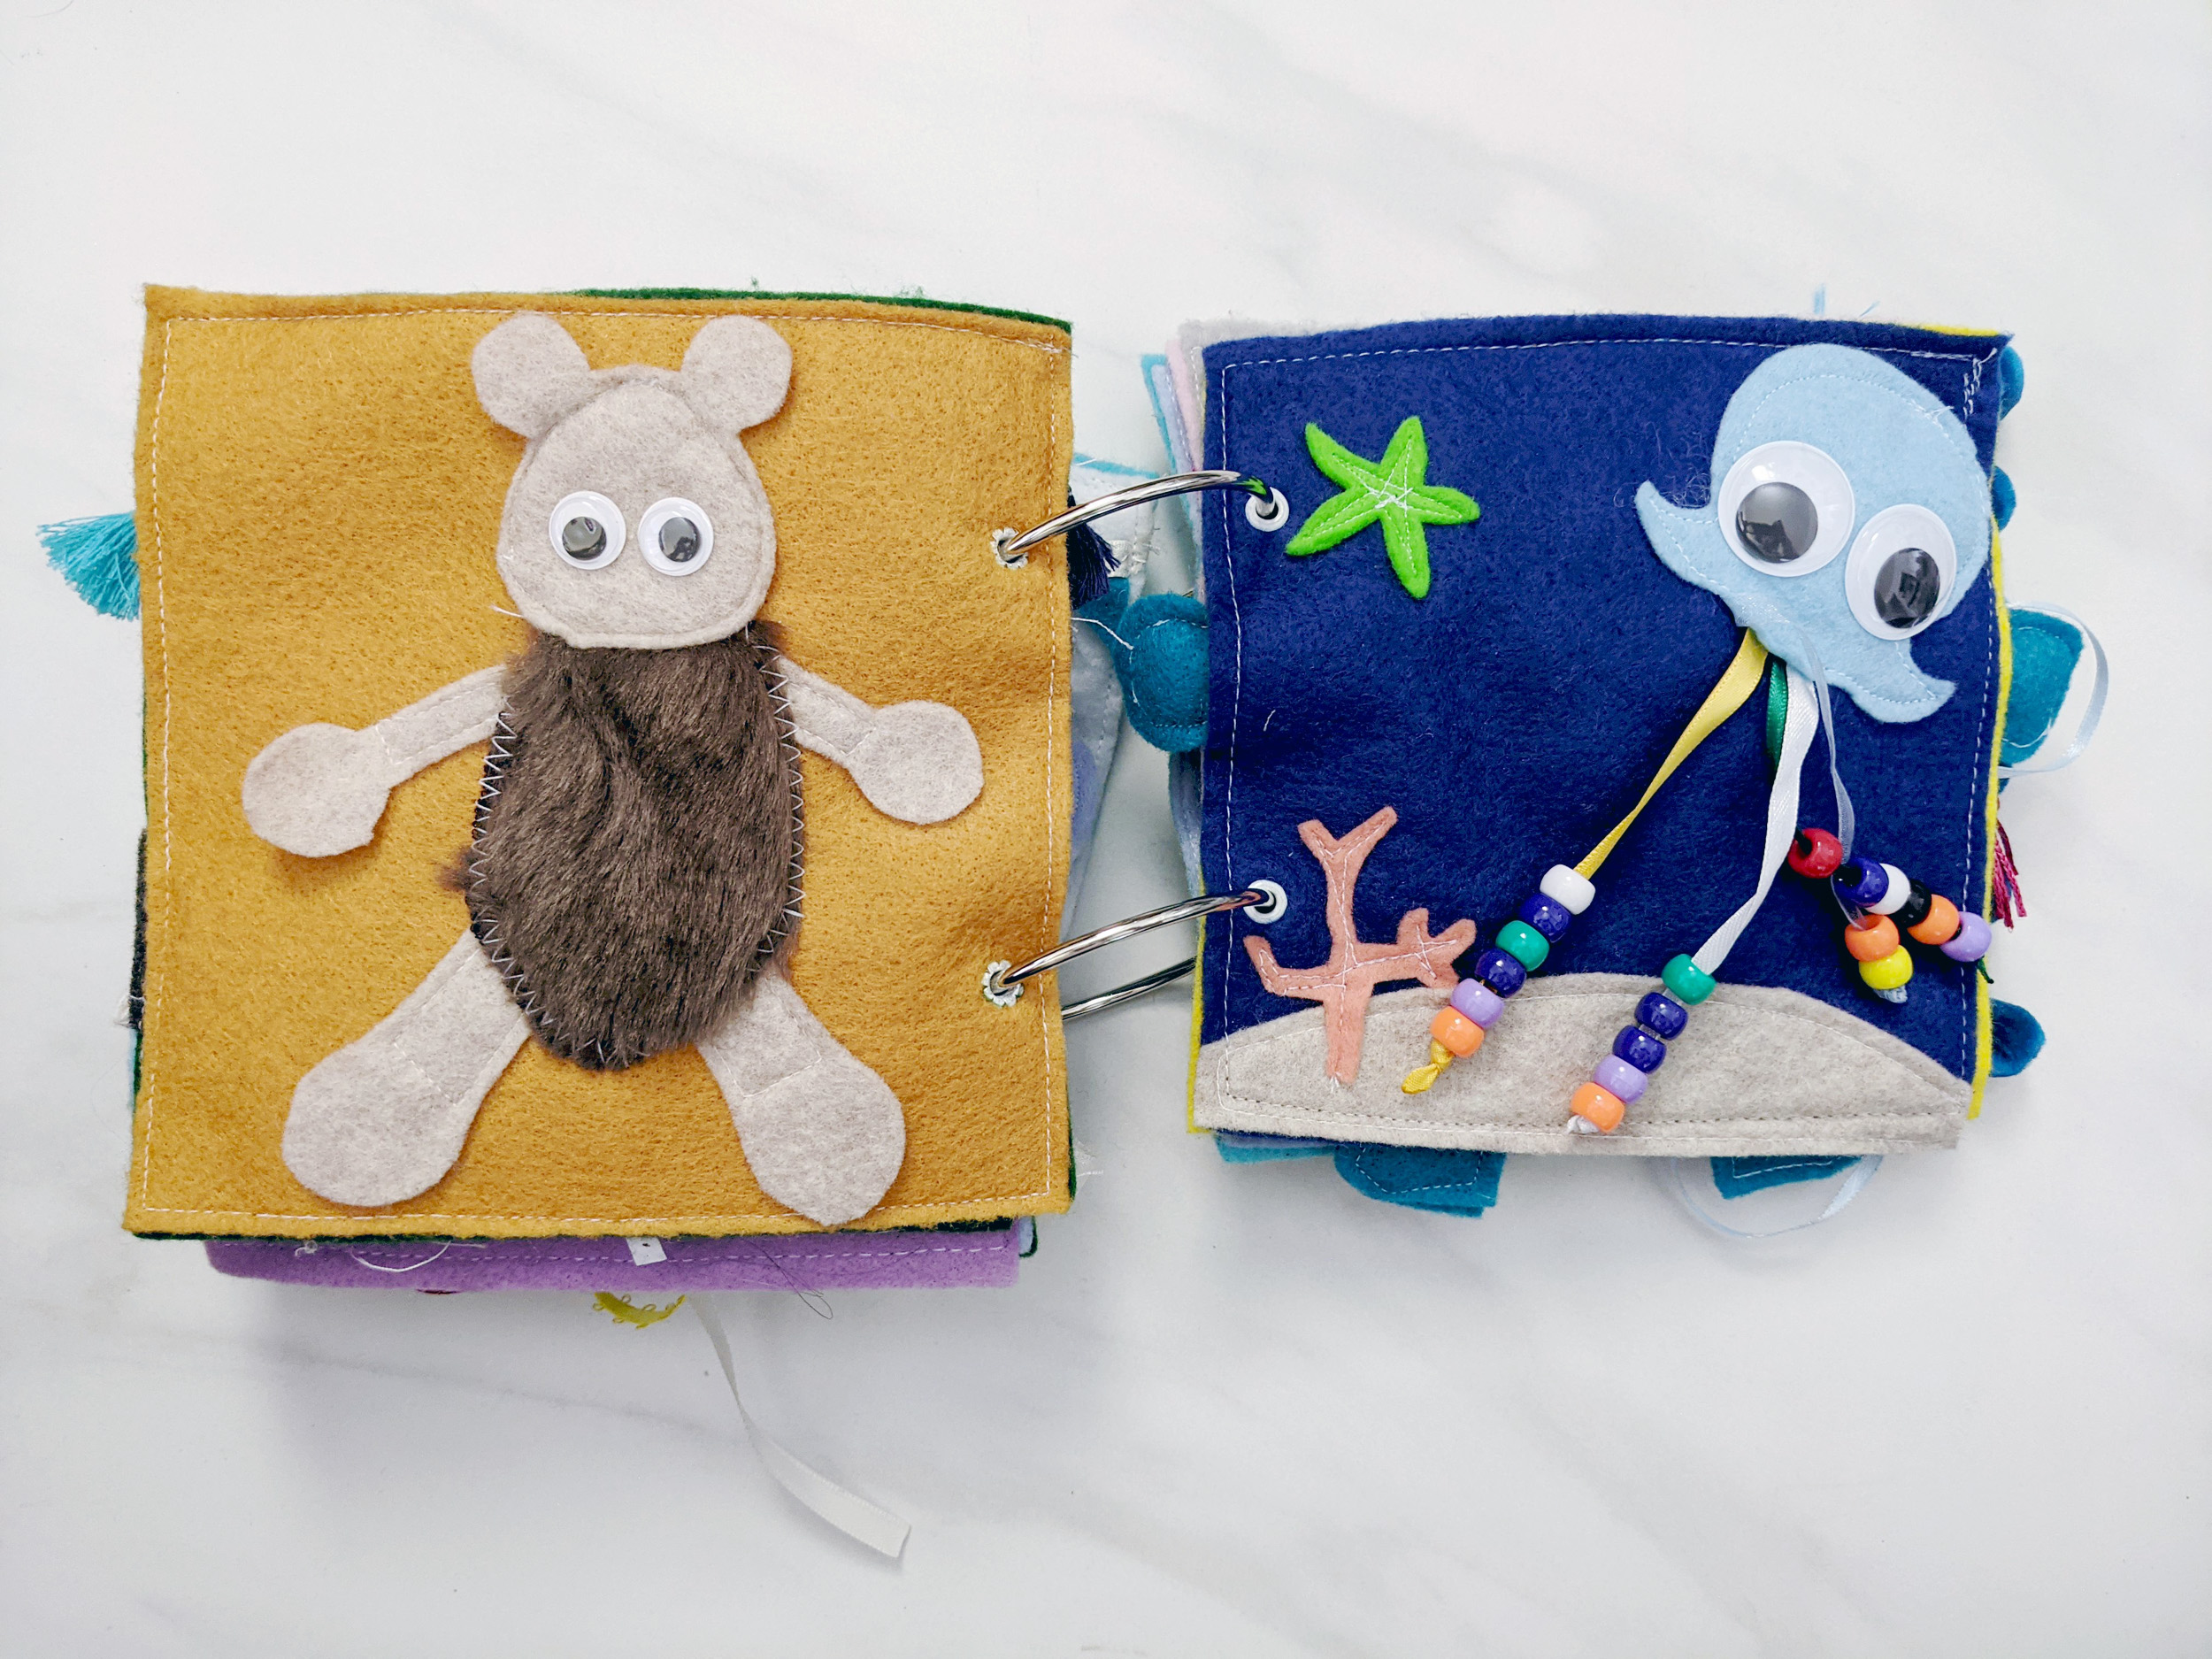
- Fuzzy teddy bear using brown faux fur trim and googly eyes (I left the ears, hands and feet loose because he likes to flick things)
- Underwater beaded jellyfish with a starfish and coral with ribbon and beads for the dangly bits (this was the first page that I made for the book)
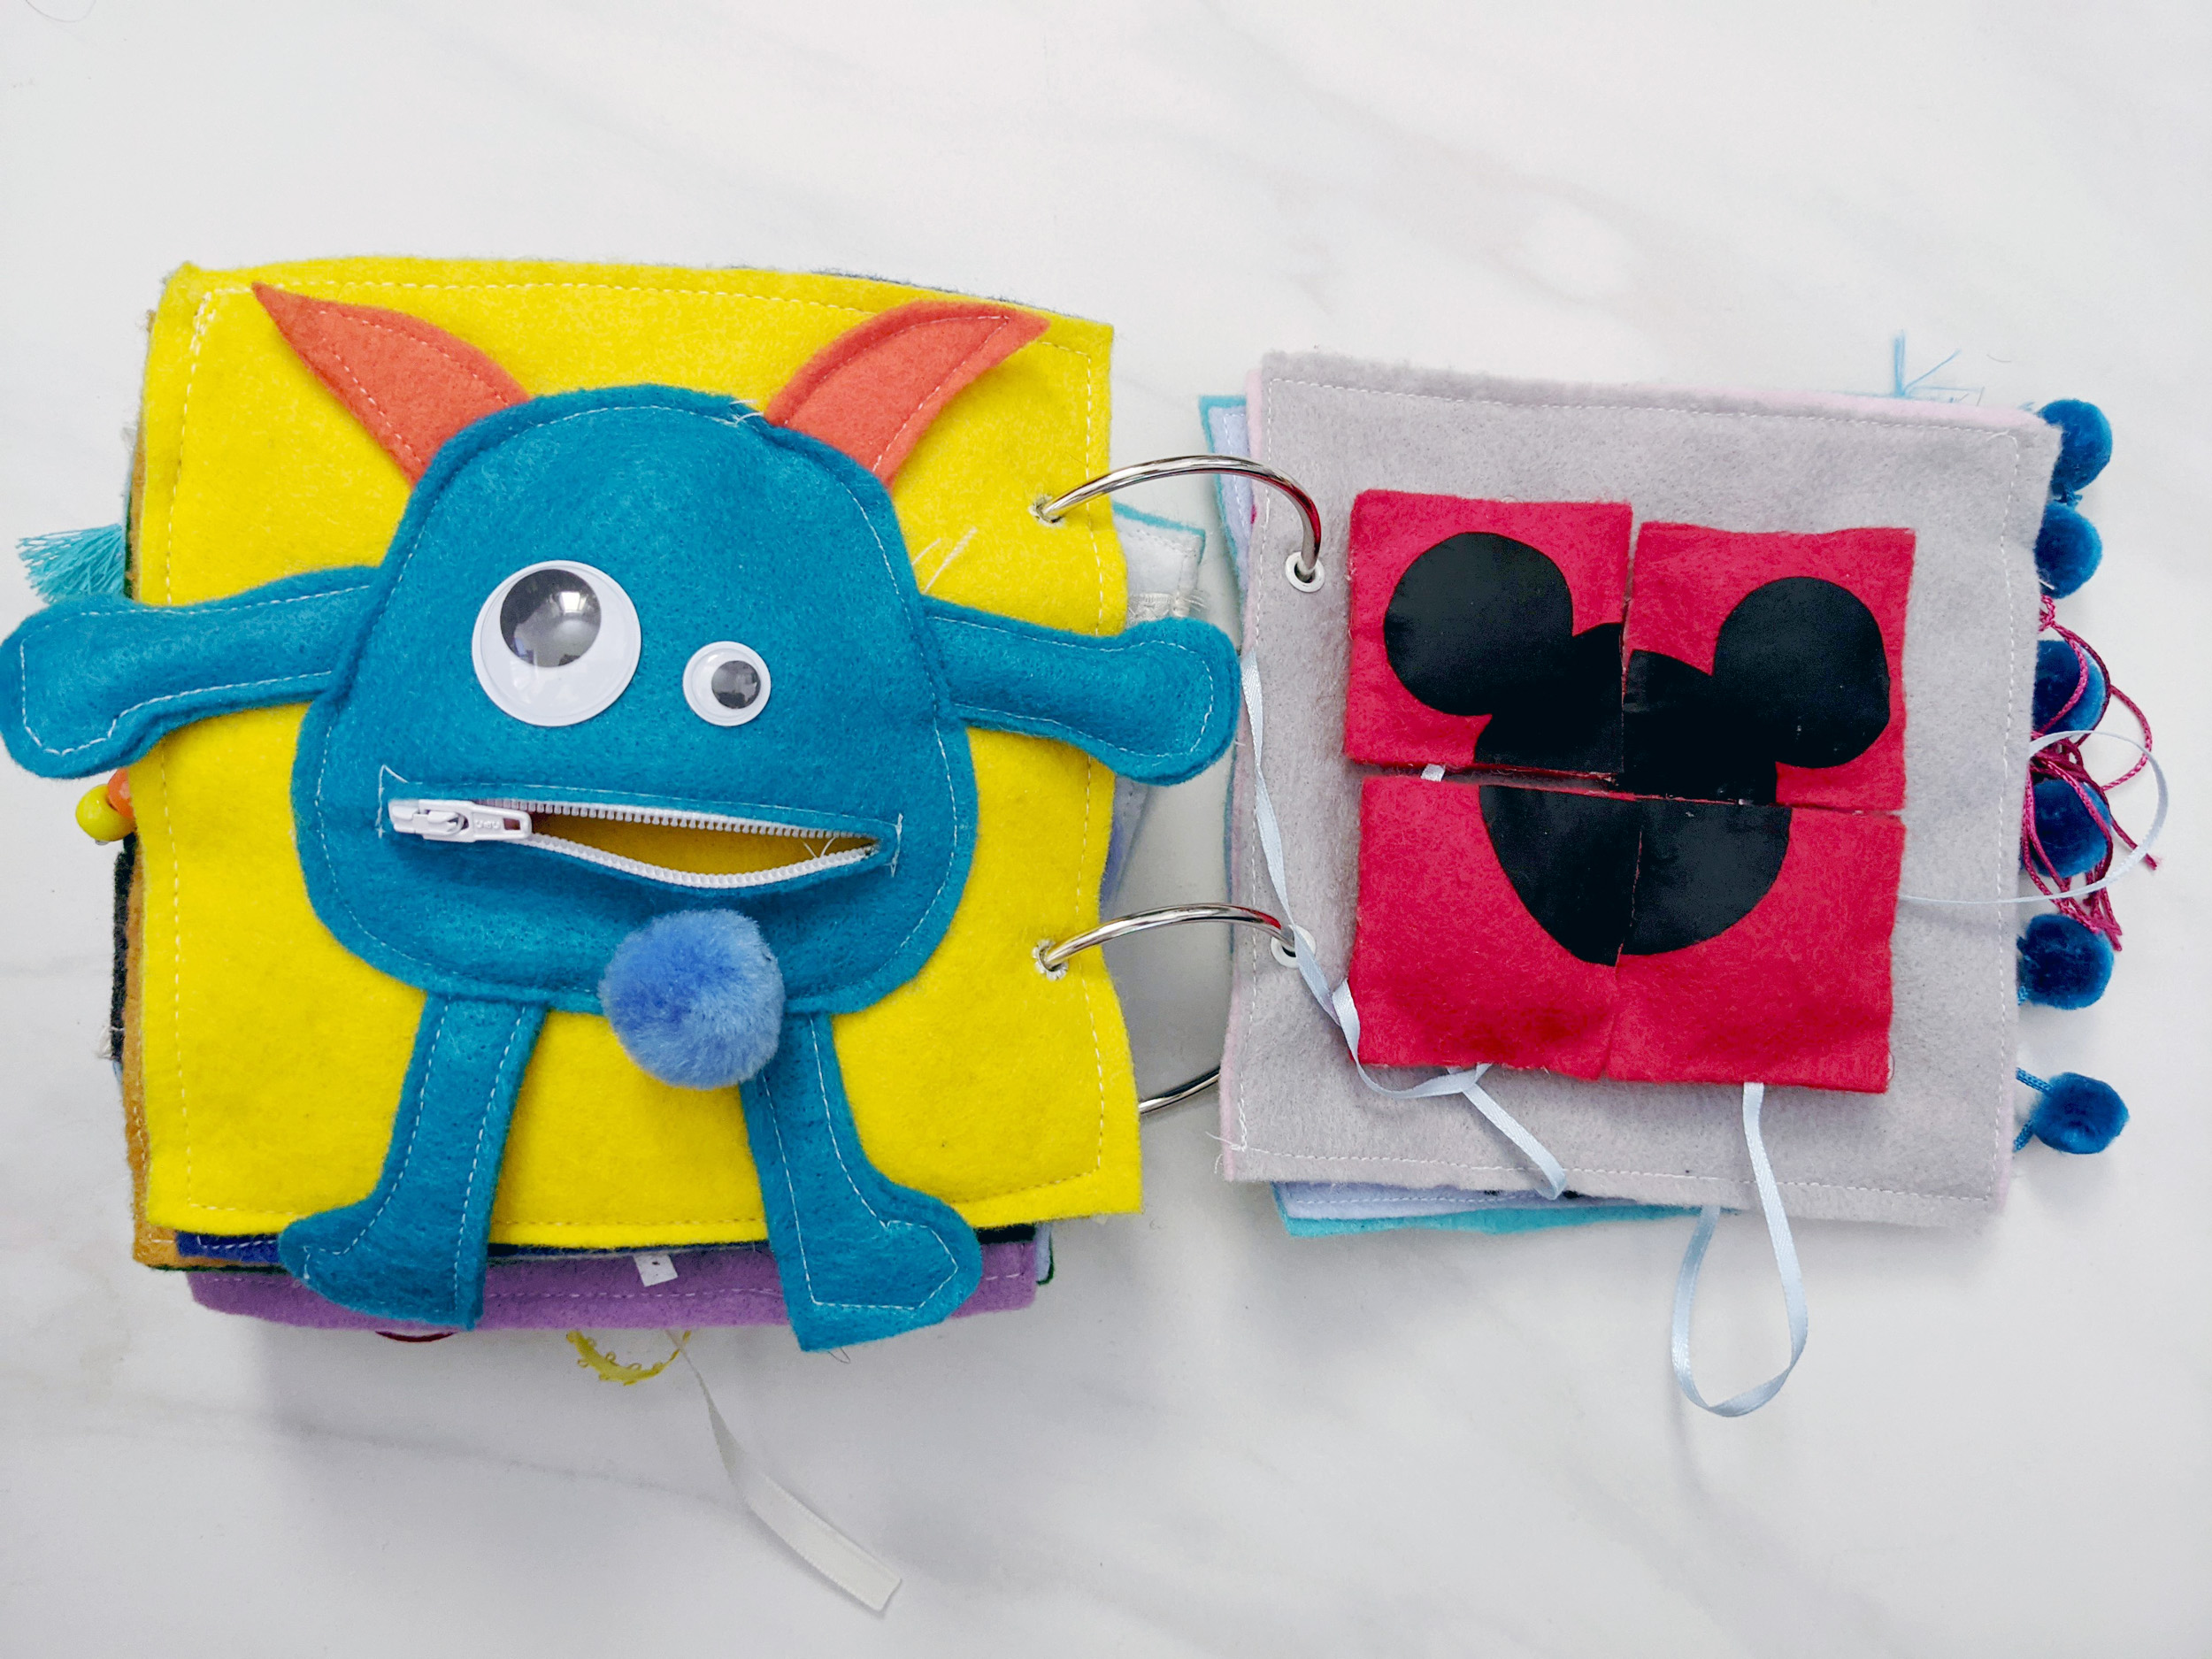
- Pom Pom monster with zipper for mouth that has a bunch of pom poms stuffed inside of him that can be pulled out and played with (he loves how soft and tiny they are)
- Mickey Mouse head puzzle (I cheated and used heat transfer vinyl that I ironed onto 4 stuffed squares and kept them attached via ribbon so they wouldn't get lost)
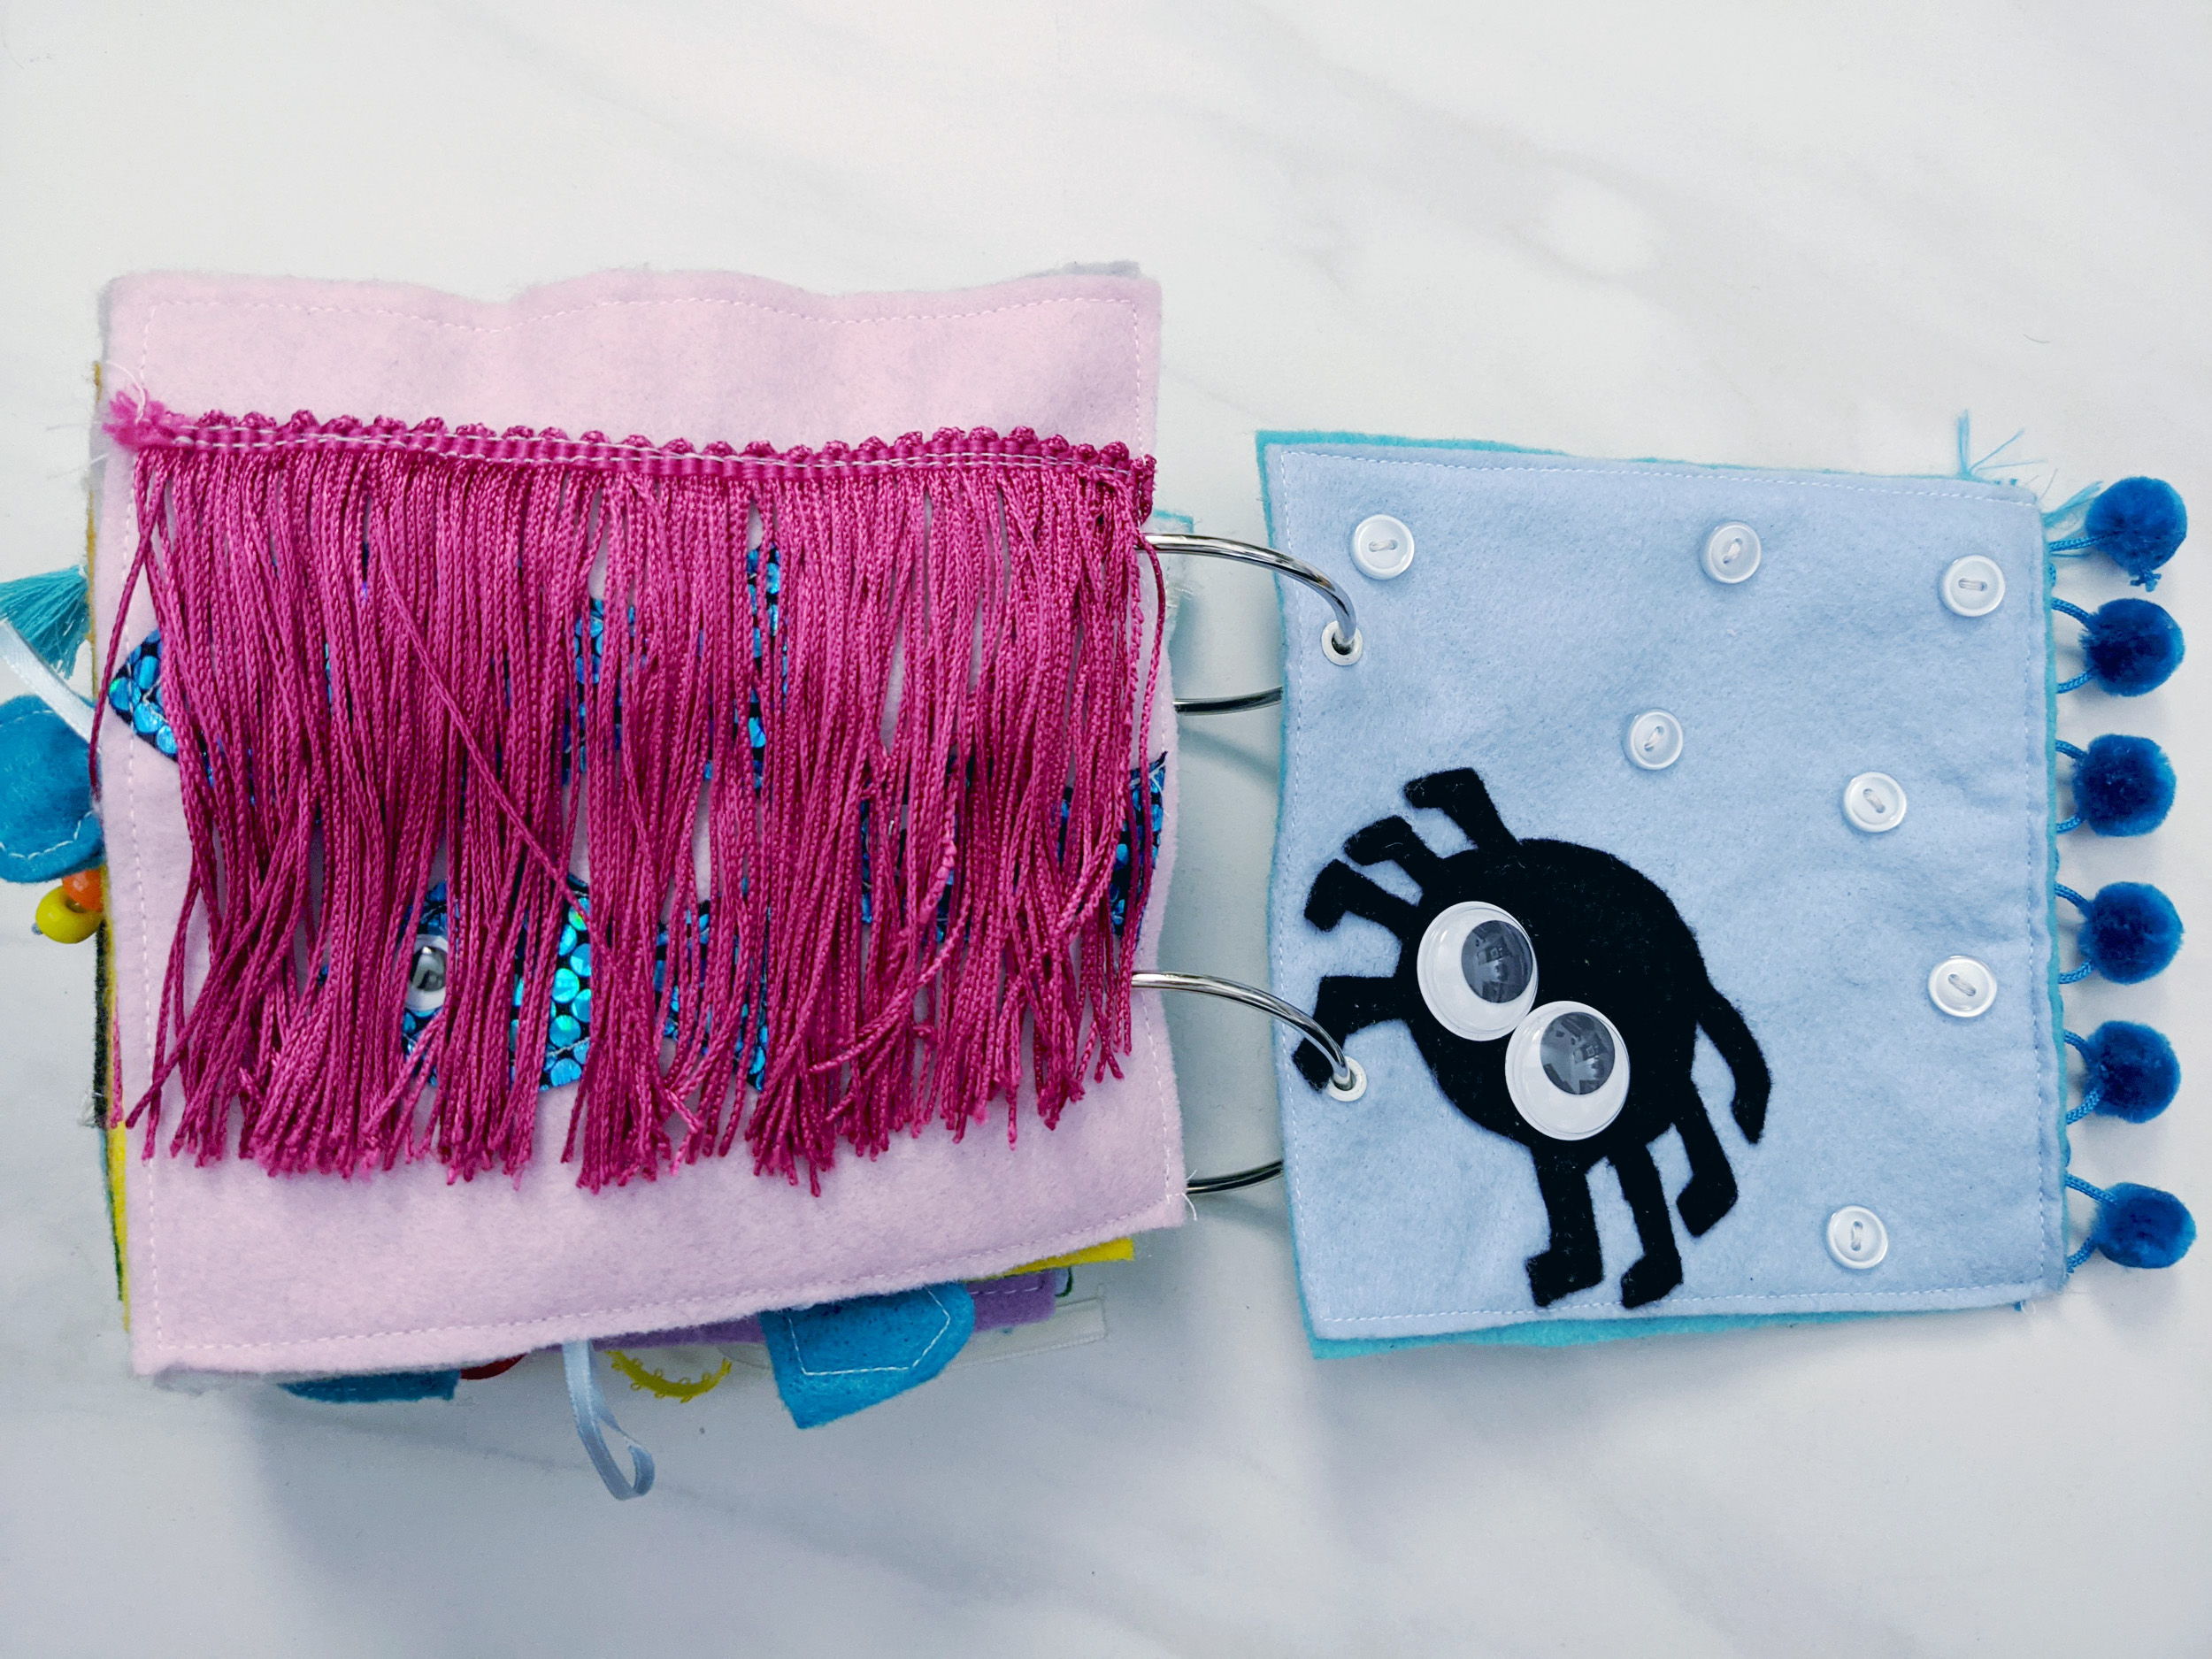
- Fish family behind a tassel reef (used same material of first fish with 2 different sized googly eyes and trim that I found in a clearance bin at Joanns)
- Build-a-web with embroidery floss and buttons (make sure that the buttons are not sewn too flush with the felt or the "webbing" won't easily hook around the button and get undone, which was my problem)
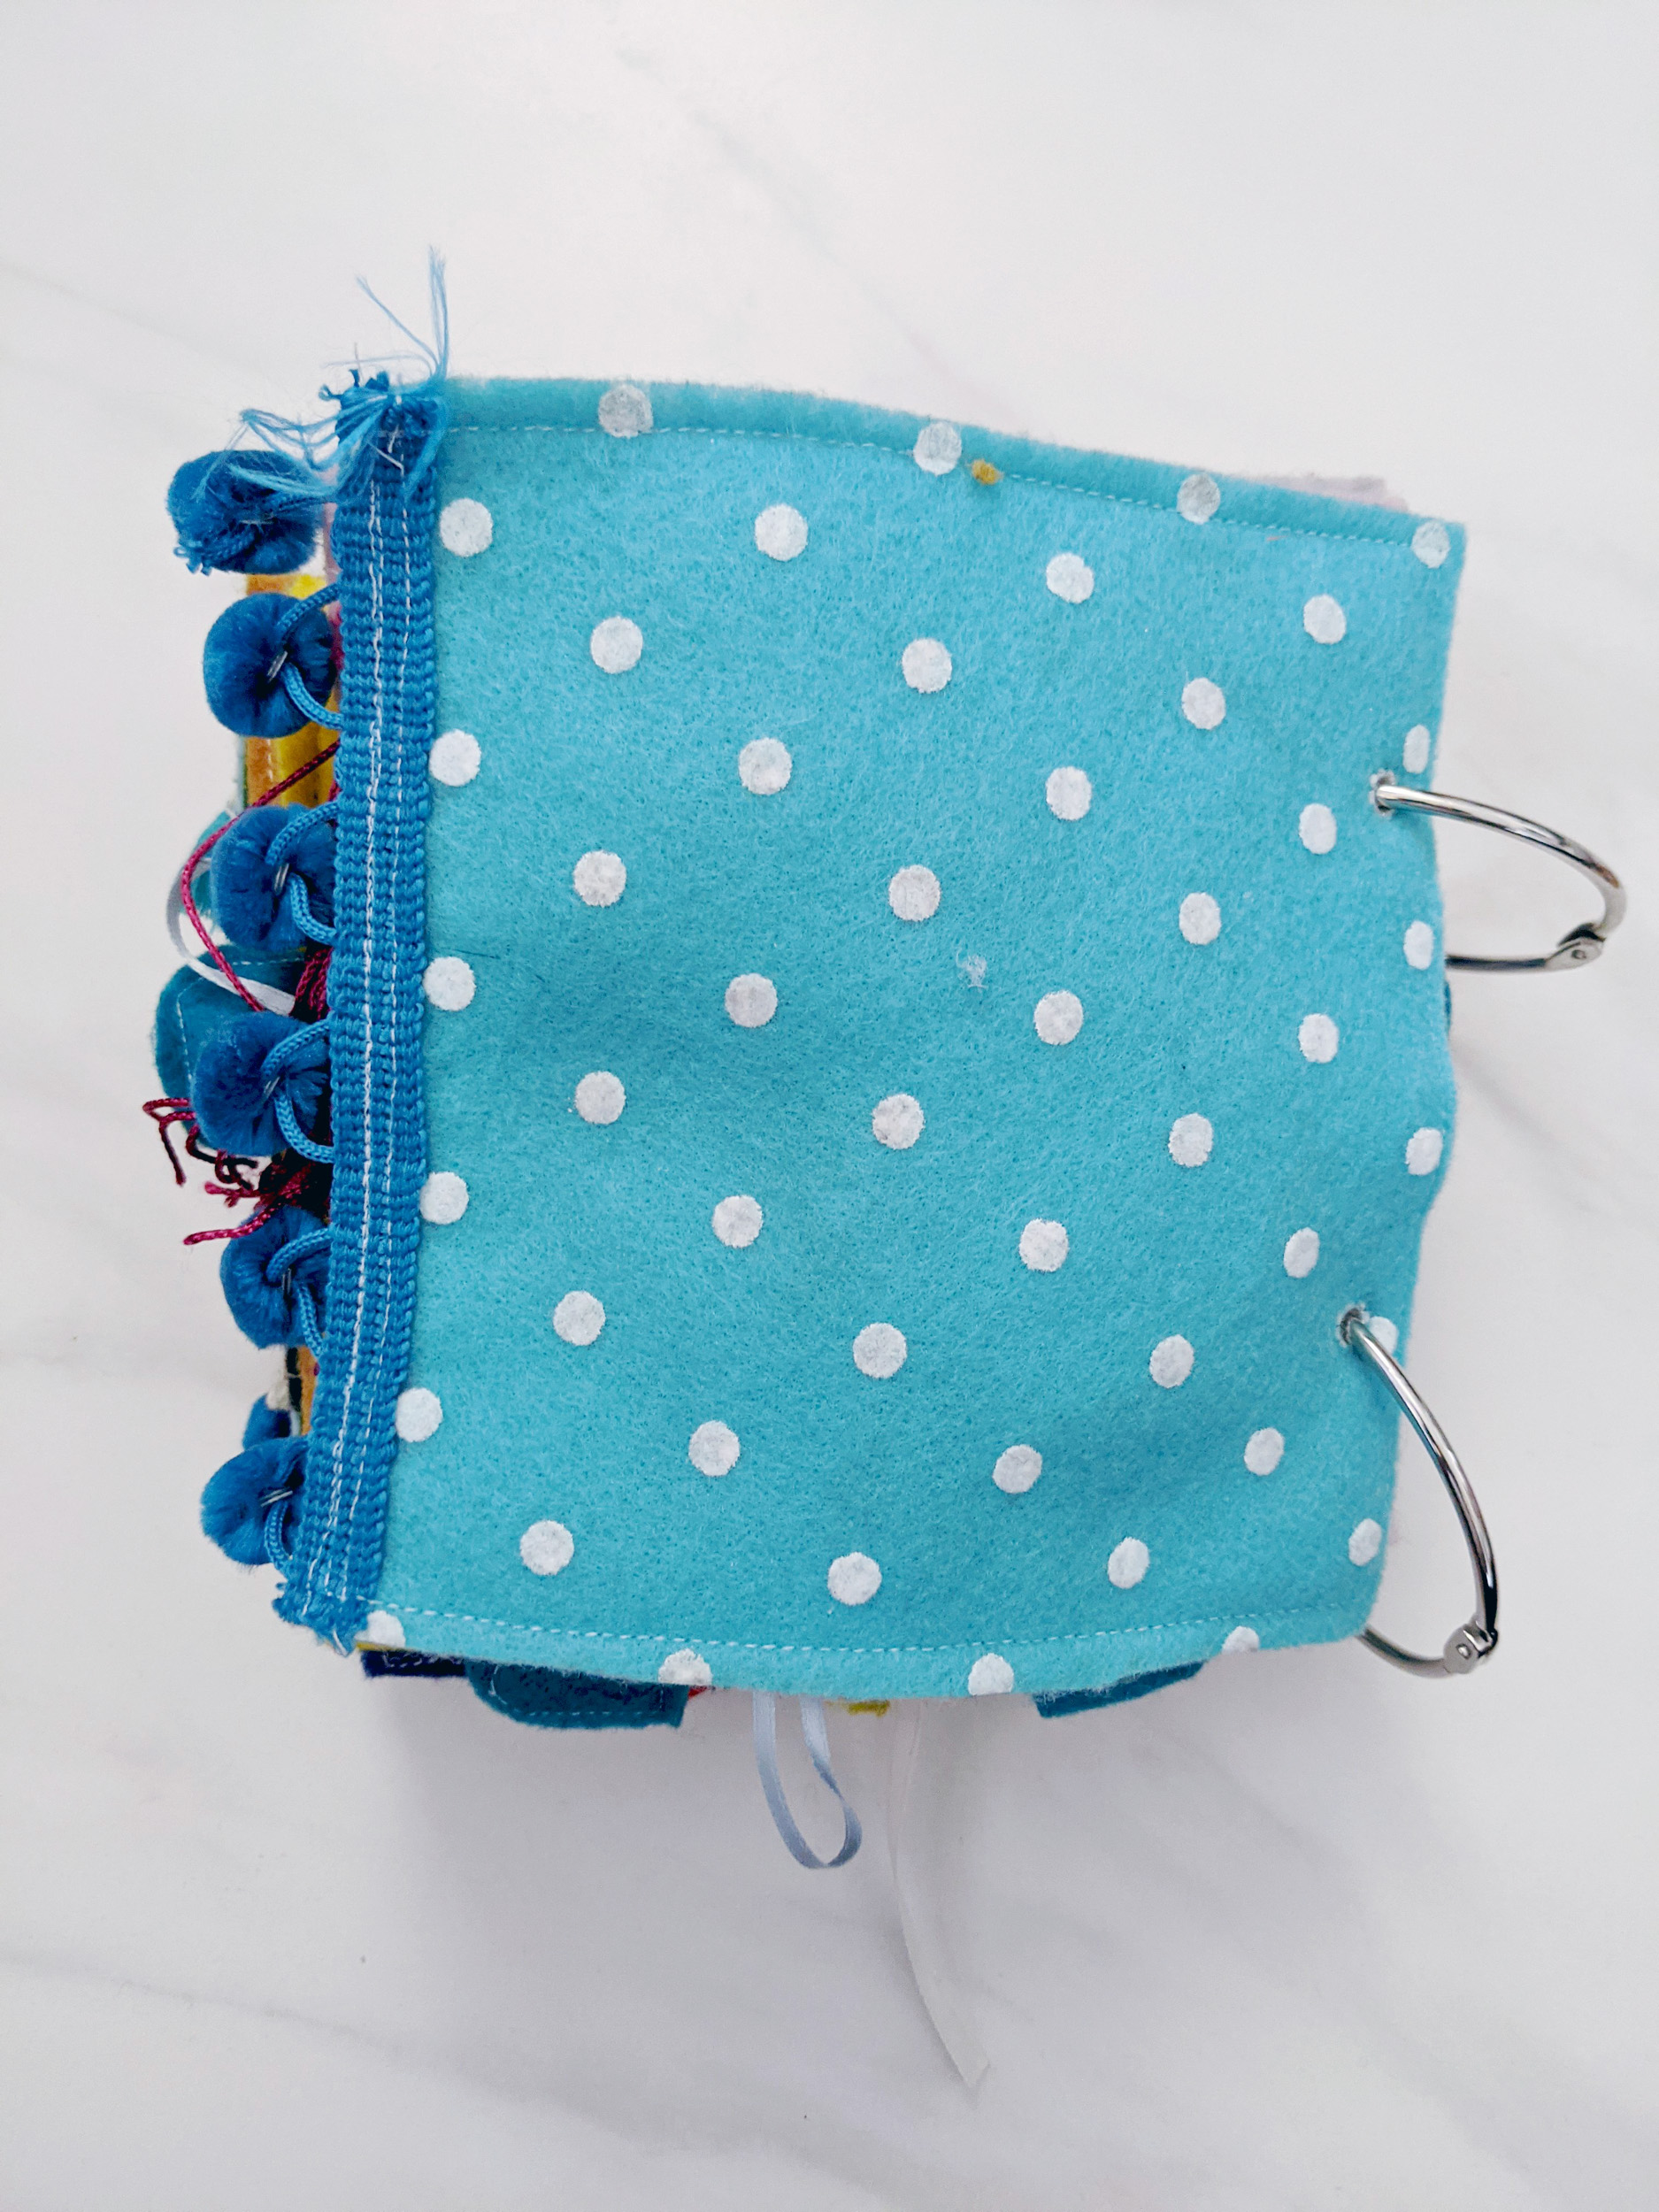
- Back cover with pom pom trim
Tips
If you're looking to make this as low cost as possible, stick with felt sheets or use a coupon on a by-the-yard cut of a single color of felt fabric. Felt is much cheaper than fleece but thicker than cotton. Additionally, the trim I used ended up taking up 85% of my budget. If I could have changed anything, I would have gone an entirely different route with that, especially the pink tassel trim over the fish.
Instead of Poly Fill, use the scraps from your felt cuttings to stuff things like balloons, clouds, and more. Check out the remnants and clearance sections in the fabric department, as well as prepackaged cuttings near the general crafts sections. You can find a lot of good options for cheap to use in your books. You can also reuse the stuffing from an old throw pillow. This really doesn't require much fluff.
Download craft store apps before shopping in the stores. A lot of time you can get really great deals on supplies that way.
If you have a kid with a great gripe and strong fingers and hands, don't take the easy way out and try to hot glue everything together. Felt and fleece are fibrous and hot glue doesn't always get a good staying grip. Spending the extra effort to sew things down will make a huge difference.
Build pages based off what your kids likes to do. Miles is like a cat; he likes to flick things around with his finger tips, touch different textures and try to put things inside of things. But we also needed to work on color identification and numbers so I looked to find ways to incorporate that into the book; colored balloons, 2 shoes, 3 fish, 4 mickey head puzzle pieces, 4 zippers that where all different colors, 2 eyes on most of the creatures. I also made sure the bear had movable hands and ears to work on body parts.
If you're going to be using this in a car ride like we are, make sure that the objects used can't hurt them, especially in the case of an accident. The pages are 3D enough that if they were to fall on his face he'd still be able to breathe. Other than the zipper pulls and beads, there's nothing hard enough to fully hurt him. I know Miles wouldn't put the pieces in his mouth so I also don't have to worry about him trying to eat the book. Keep that in mind for how you assemble everything.
If you're worried about pieces getting lost, consider using thin ribbon to attach them to the pages.
Hopefully, this post helps you create something unique to you and your child that educates and entertains. If there are any specific pages you'd like me to make a full tutorial on, please let me know in the comments below. I'll update this post with links to those pages as they're created!