Elevating the Viral Walmart Stacked Pumpkin DIY Hack
Last year, I started working on doing the viral Walmart stacked pumpkin DIY hack to see if I could be just as successful as others. There were quite a few errors made along the way, but it ultimately ended well. With managing my last trimester and a baby shower, the post never ended up making it to the blog.
And, to be honest, I’m kind of glad it didn’t because the DIY didn’t hold up. In this post, I’m going to show you what I did, what I used, what went right and wrong, and how I’ll be elevating it for this year!
How to Do The Original Viral Walmart Stacked Pumpkin DIY Hack
Before I get into the good stuff, I’m going to show you how you can do the original DIY. Some of you will have the perfect porch for this project. Others will want to see where it started to understand how it went wrong.
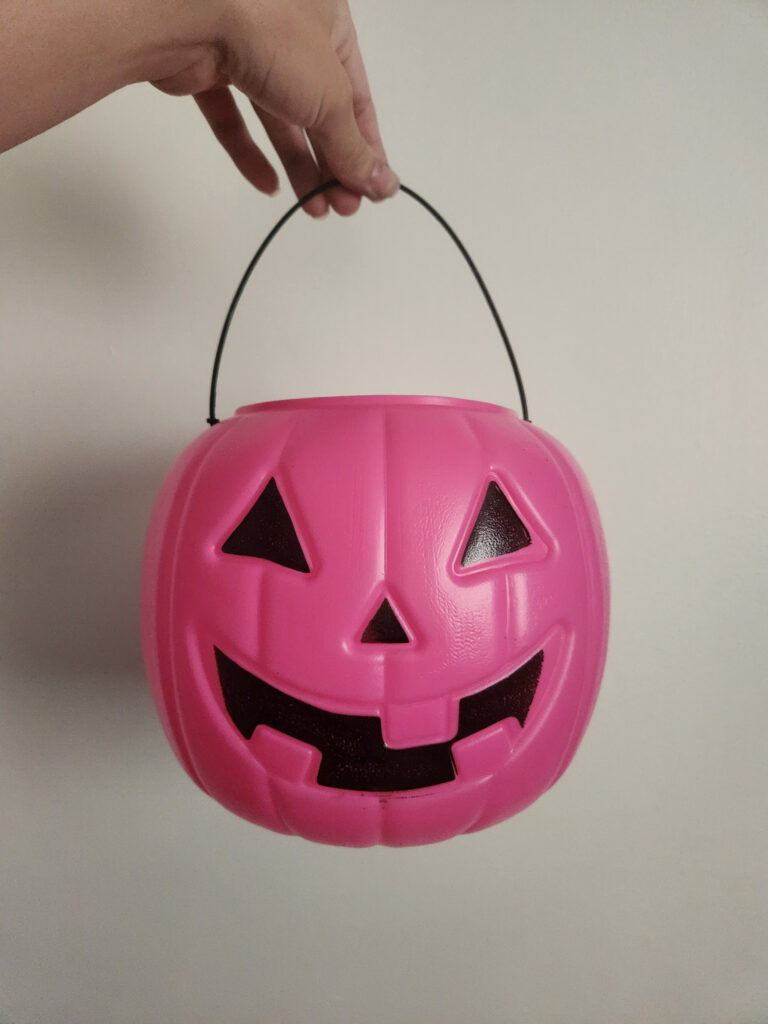
- Start by removing the handles from your pumpkins. These will leave small holes on the sides. I left mine alone, but there’s tons of options to sealing them up if you need to; joint compound, spackle, filler, tape. You can get as creative as you need to, or leave it alone completely.
- Glue your pumpkins together, making sure that the bottom pumpkin has some kind of weight placed inside like rocks or cement. If these will be placed in a space where they are not at risk of being knocked over, you can definitely skip the weights part. I accidentally skipped this step and will explain later why this added to this DIY’s failure.
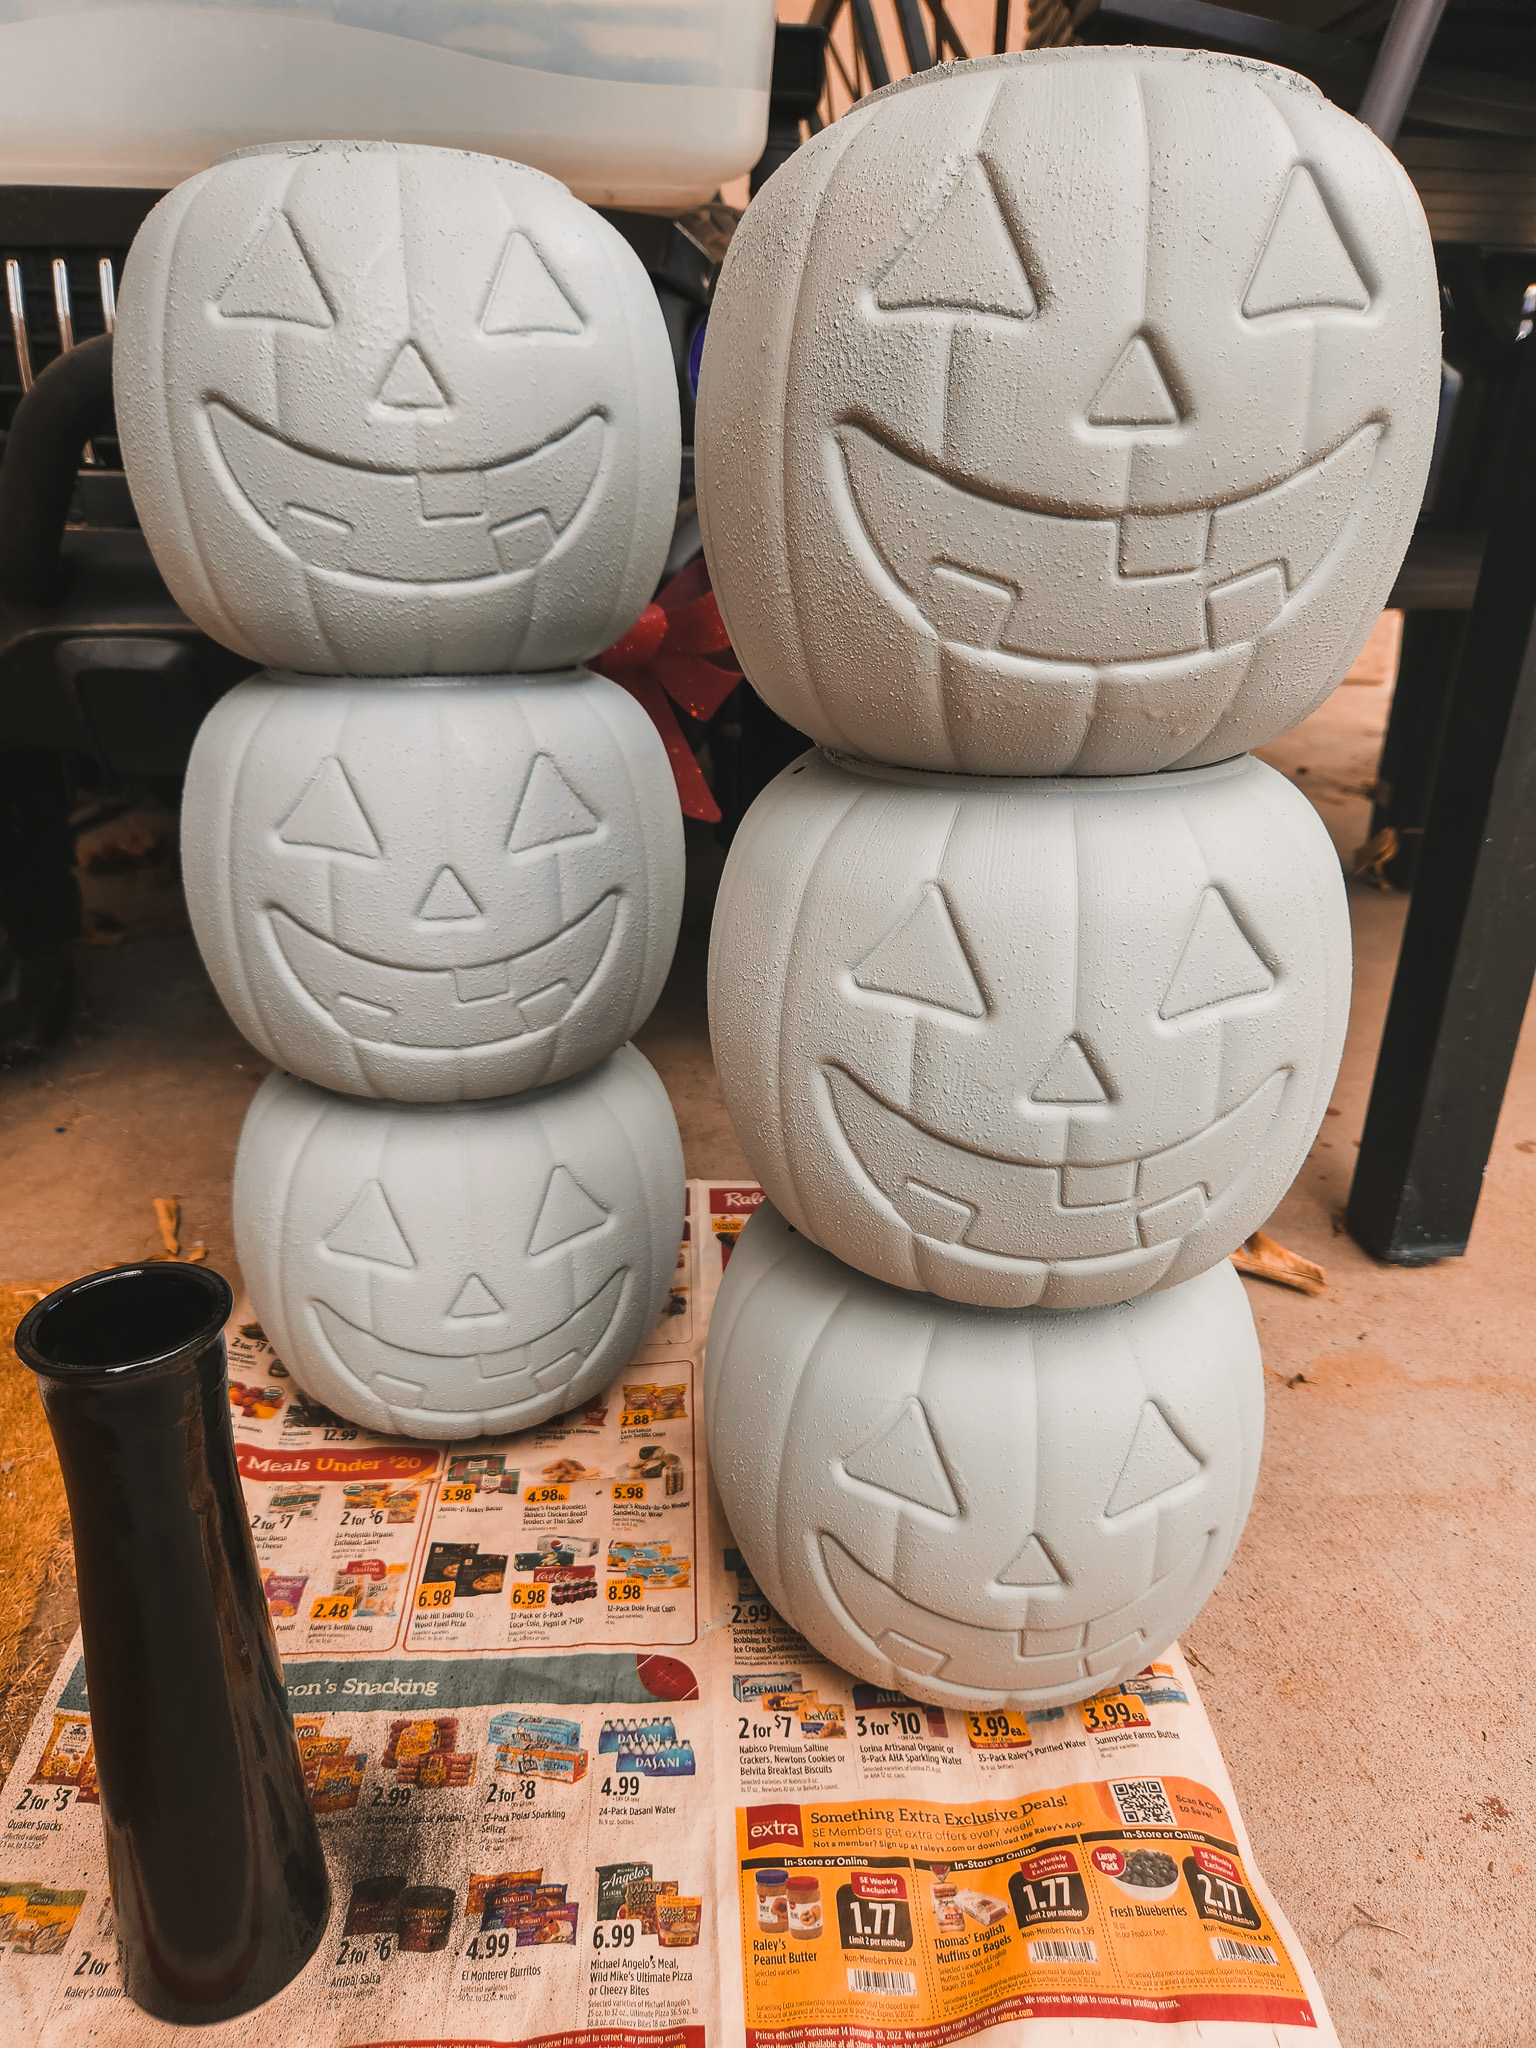
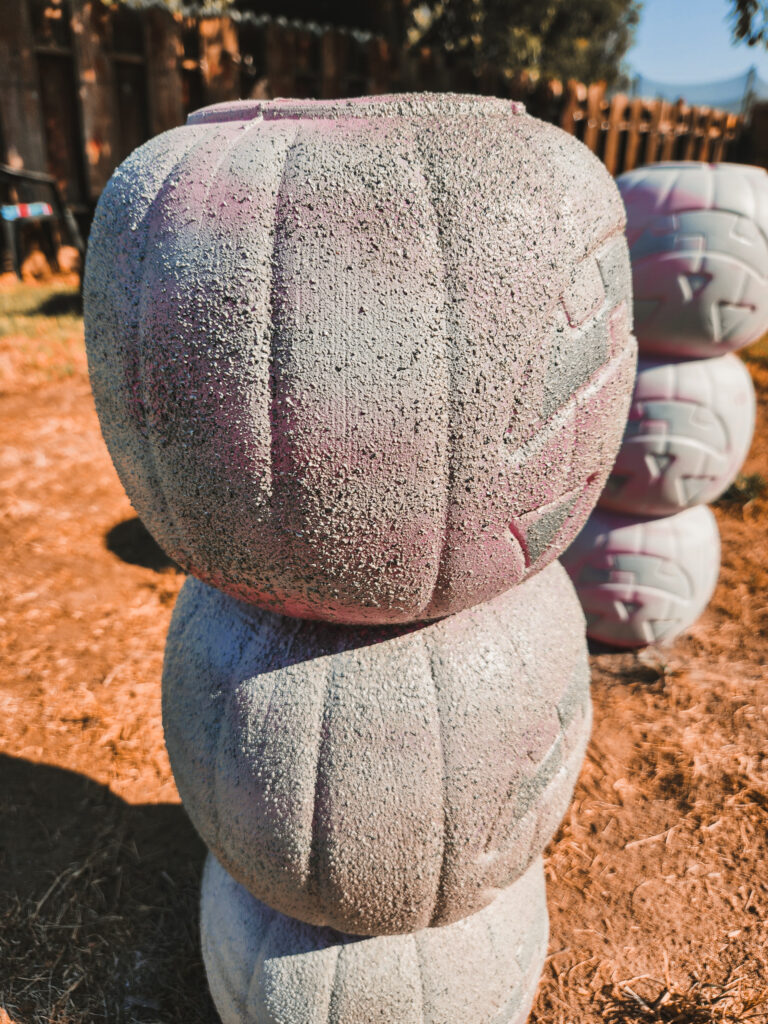
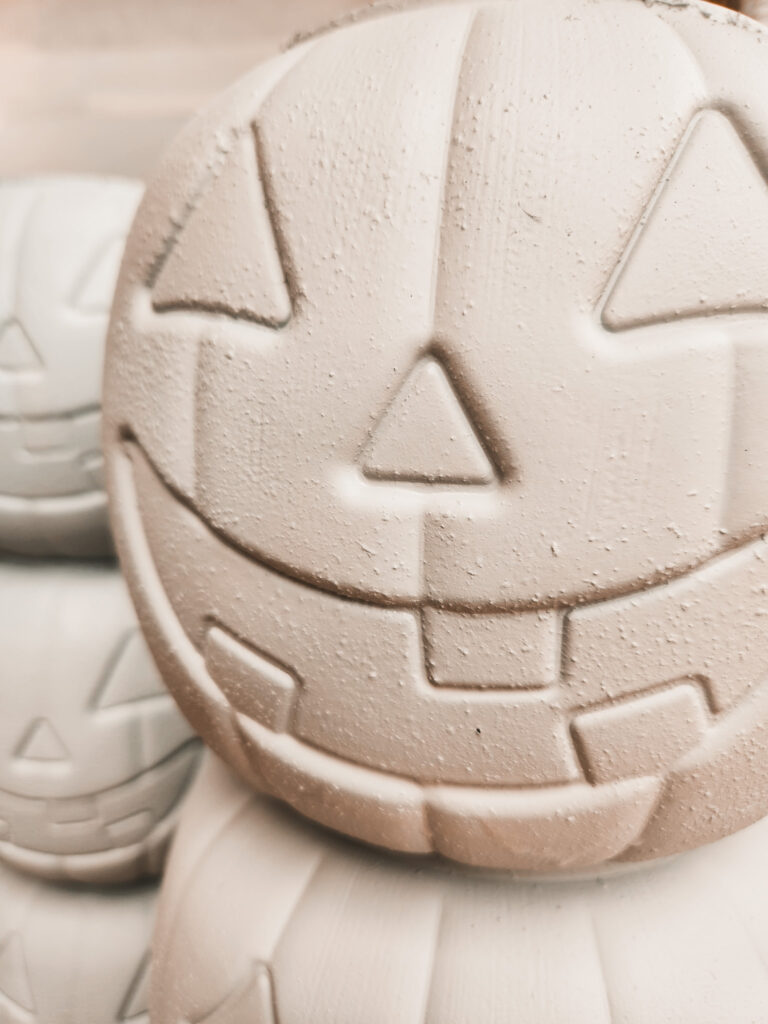
- Spray the pumpkins with some kind of primer. The plastic material is VERY slippery and will make it difficult for paint to adhere to.
- Once primer has dried, add a generous coat of texture spray. This spray really wants you to lay it on thiccc. It helps once you add the paint on top to really make it believable that its made of stone. Let dry completely.
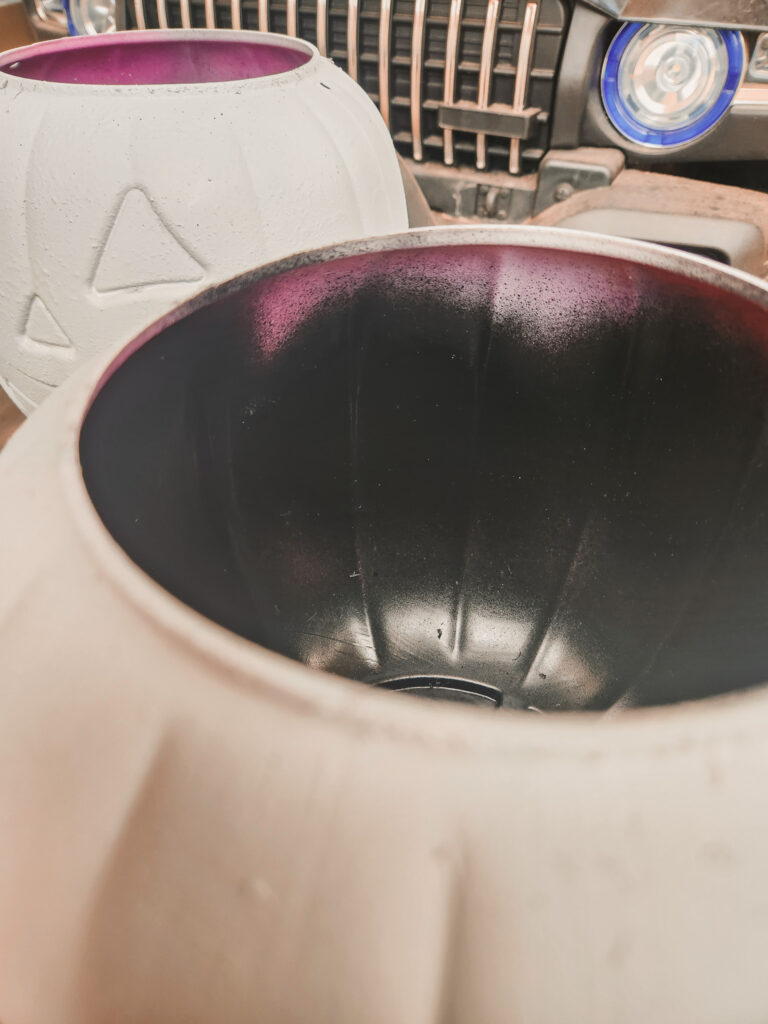
- Add 2-3 coats of paint on top. If you’re doing paint by hand, you can probably get away with 2 coats. The more coats of paint you do, the more believable the stone look will be. Optional: because I had to grab pink pumpkins, I sprayed the inside with some black paint. If you're able to grab orange ones or you plan on doing very full arrangements, I recommend skipping this step.
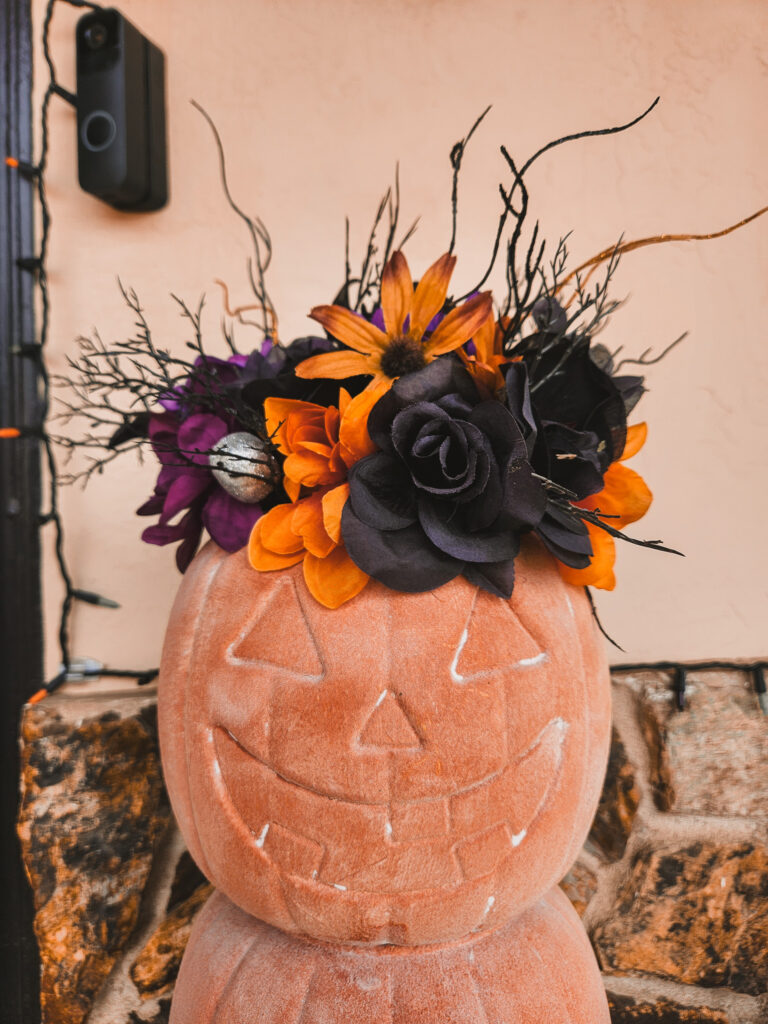
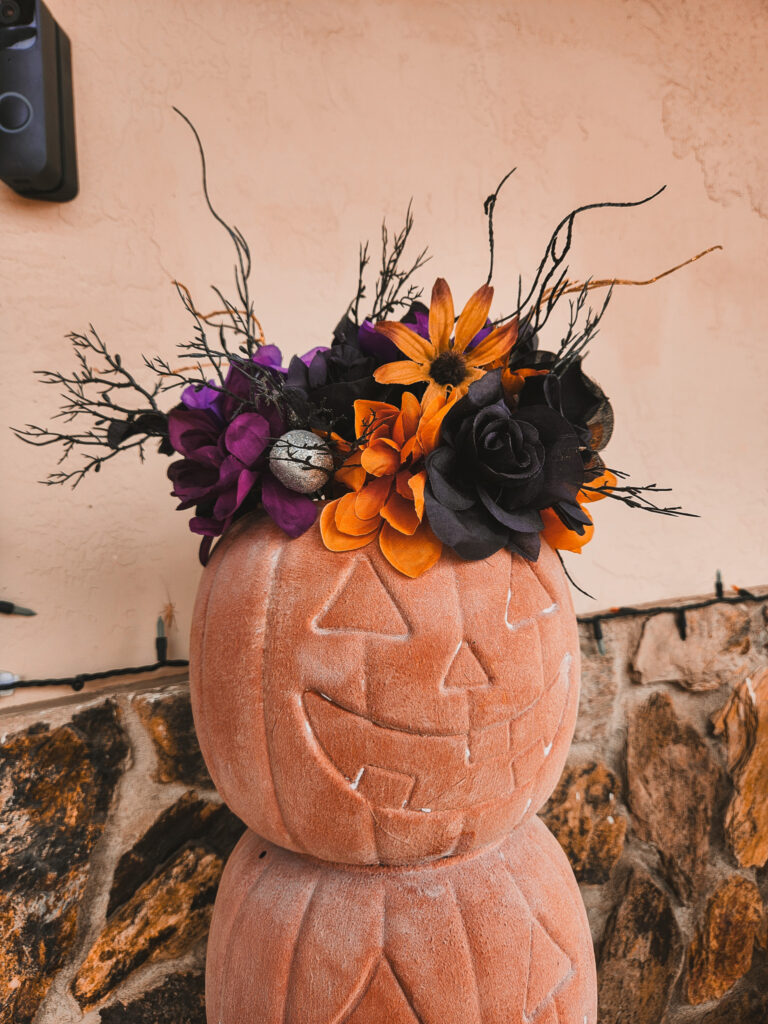
- Place your desired floral arrangement into a floral block. Place the arrangement into your top pumpkin opening. You can turn the pumpkins around and swap the floral arrangement once Halloween is over and it’s time to switch to basic Fall decor before the Winter season hits.

And that’s it! The DIY itself is super easy. I found that spray painting was significantly faster than hand painting, even though the cost was a bit more.
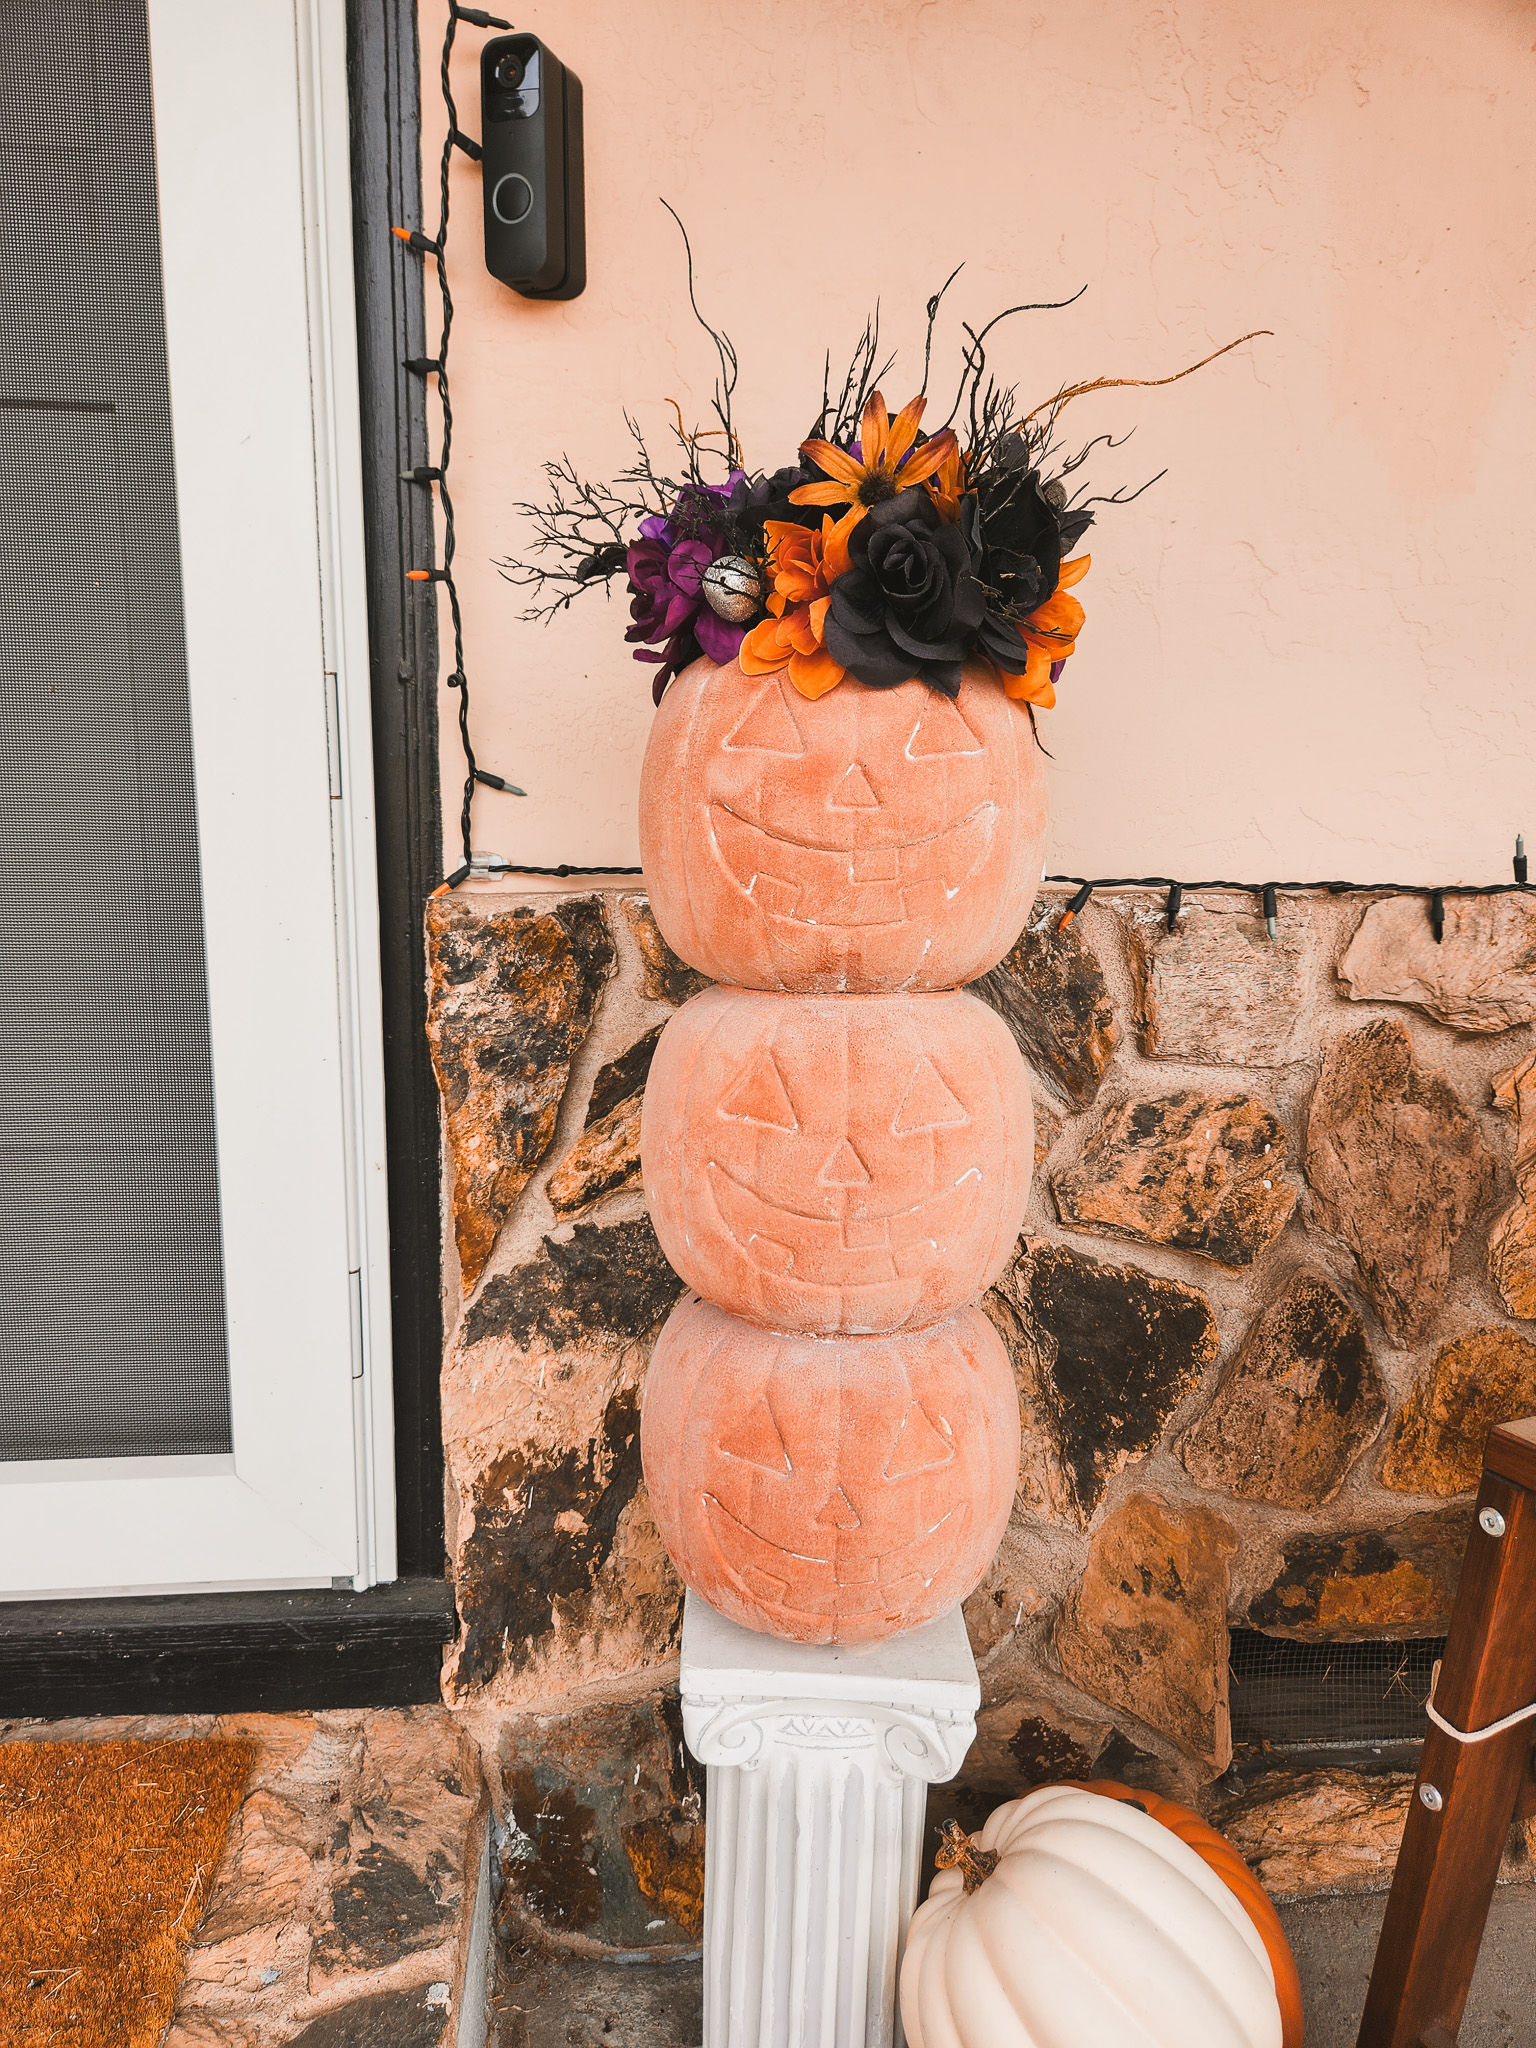
Part 1: How I Elevated The Viral Walmart Stacked Pumpkin DIY Hack
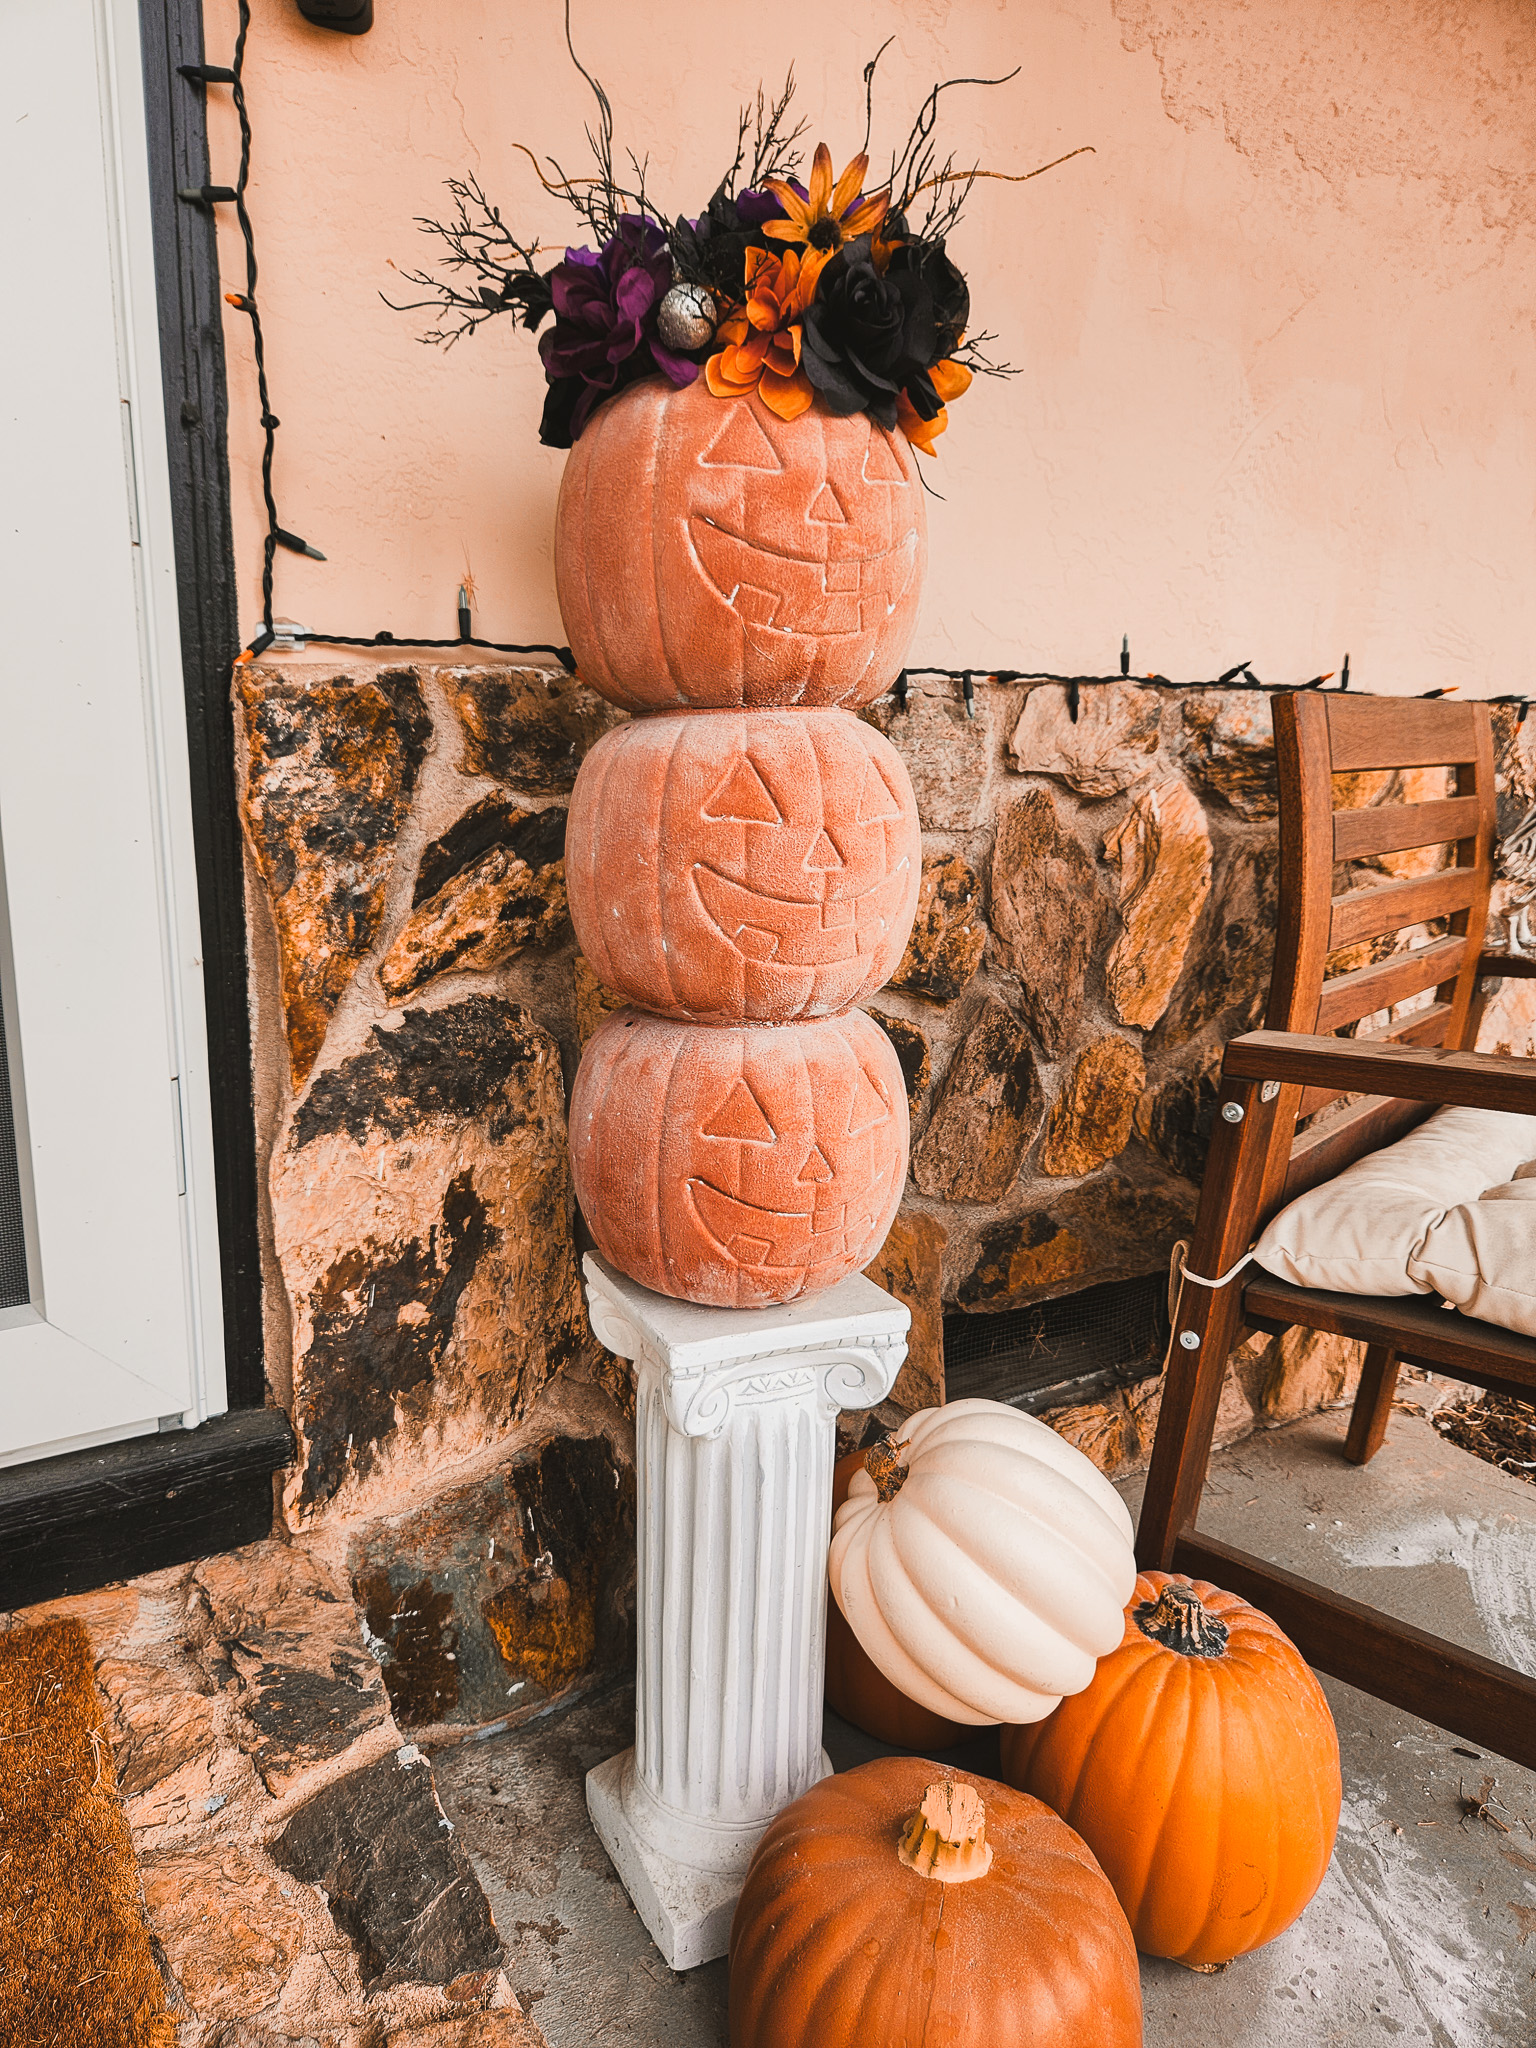
I originally elevated this DIY by purchasing 2 ceramic columns I found for $10 each and gluing the stacked pumpkins to the bases using E6000 glue. I highlighted the details of the columns with various gray acrylic paints that I had on hand. Additionally, I tried to stick with dried flowers in order to go for more of that dead look overall.
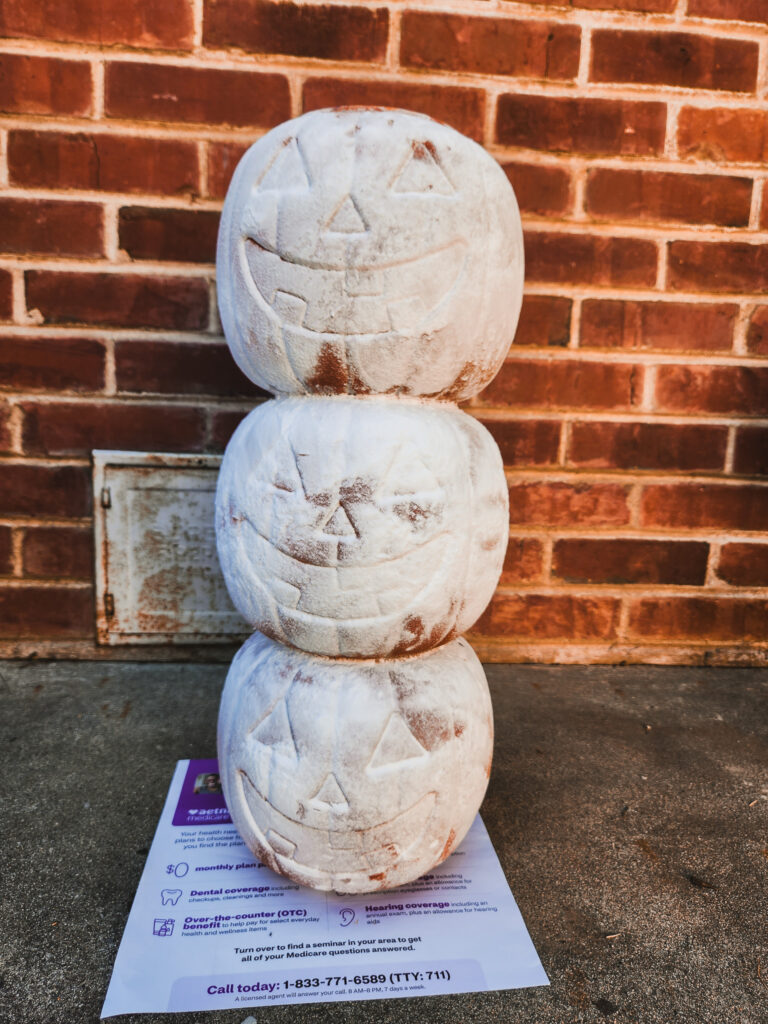
How This Project Failed
One thing that I frequently forget about with my porch decor is that I live in California, where Fall is mostly hot and windy, and my porch gets full sun after 2pm until sunset, the hottest point of the day. As a result, the heat caused weak points in the glue that I used to attach the stacked pumpkins to the column bases and the wind knocked them around a lot, which scratched up a lot of the paint.
Part 2: How I Combined the Stacked Pumpkins DIY Hack to Look Like a Pottery Barn Dupe
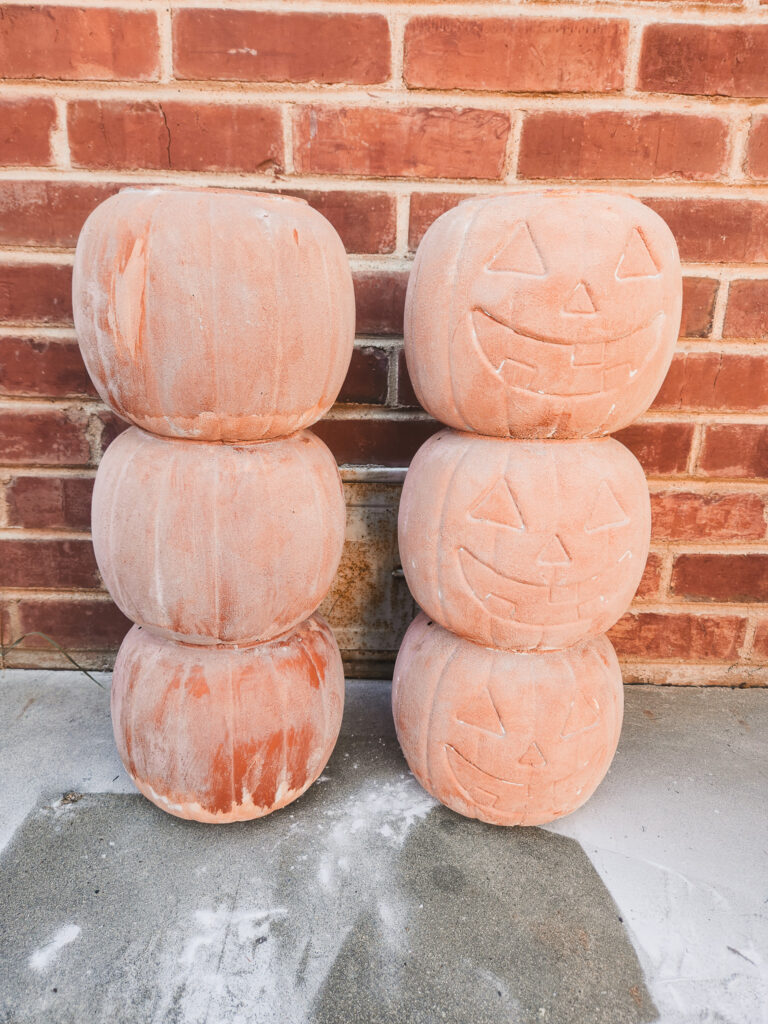
I decided that I was going to save this DIY fail because I believed in this decor piece for my home! I wanted this to work more than anything. I have such an awkward porch setup that anything I find that works becomes a hill I will die on. Another DIY trend that hit last year was the Pottery Barn Terracotta Pumpkin dupes. It was a great way for contemporary homes to have aesthetic pumpkins on extreme budgets, whereas the Pottery Barn originals were upwards of $90 a pumpkin. I love how this brings the orange back to the pumpkins and adds a bit of color and pop to them. So, I knew I needed to try this on my stacked pumpkins.

Here’s What You Do
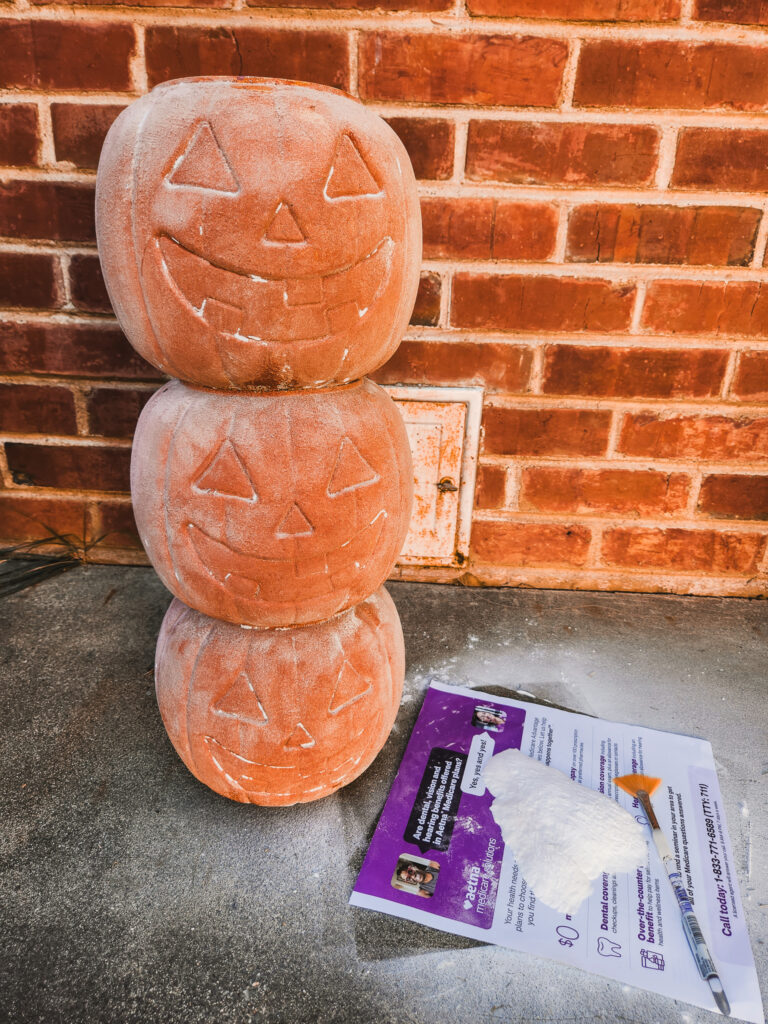
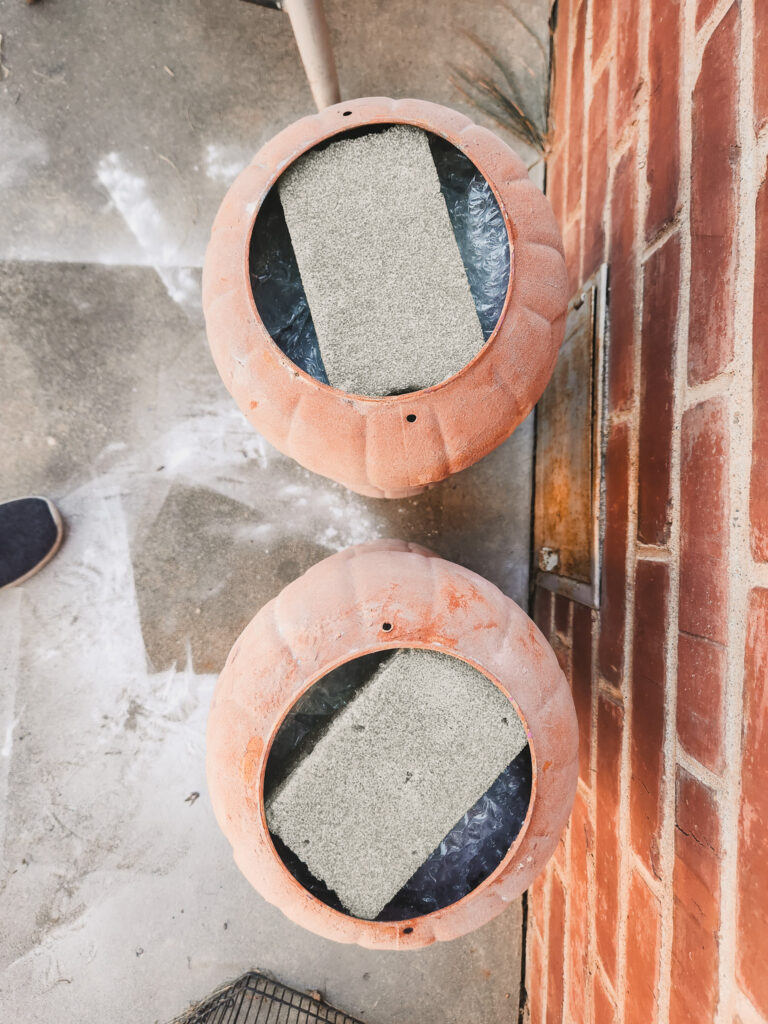
If you’ve already assembled your stacked pumpkins from the first section, this next part will be a breeze. Put 1-2 coats of terracotta colored paint on your stacked pumpkins and, while they are still wet on the LAST COAT you apply, cover completely with baking soda. Once the paint has had a long time to dry completely, use a clean, dry brush to dust off the excess baking soda in vertical strokes only! For the best look, start from the tops and bottoms with your brush strokes. I ended waiting too long to add the baking soda to a few areas, but the color ended up a lot lighter when I tried to go back over it a 2nd time. It's much more noticeable in photos here than it is in real life, but still a bit of a bummer.
This absolutely saved this DIY investment, while also helping to elevate my overall setup. It makes me want to do this to all of my porch pumpkins because it’s just so chic and photographs so well! The flowers were originally from Dollar Tree a few years back for another failed DIY project. It makes me really happy knowing that I was able to reuse so many supplies that I already had on hand. The only thing I had to purchase was the terracotta acrylic paint. Two tubes did the trick, but I wish I had a third to really do it right. Unfortunately, this color was all out in multiple brands at my local craft store. I highly recommend this DIY trick for anyone wanting to try a change. I’ll update you guys next Halloween season if these hold up better in the end!