
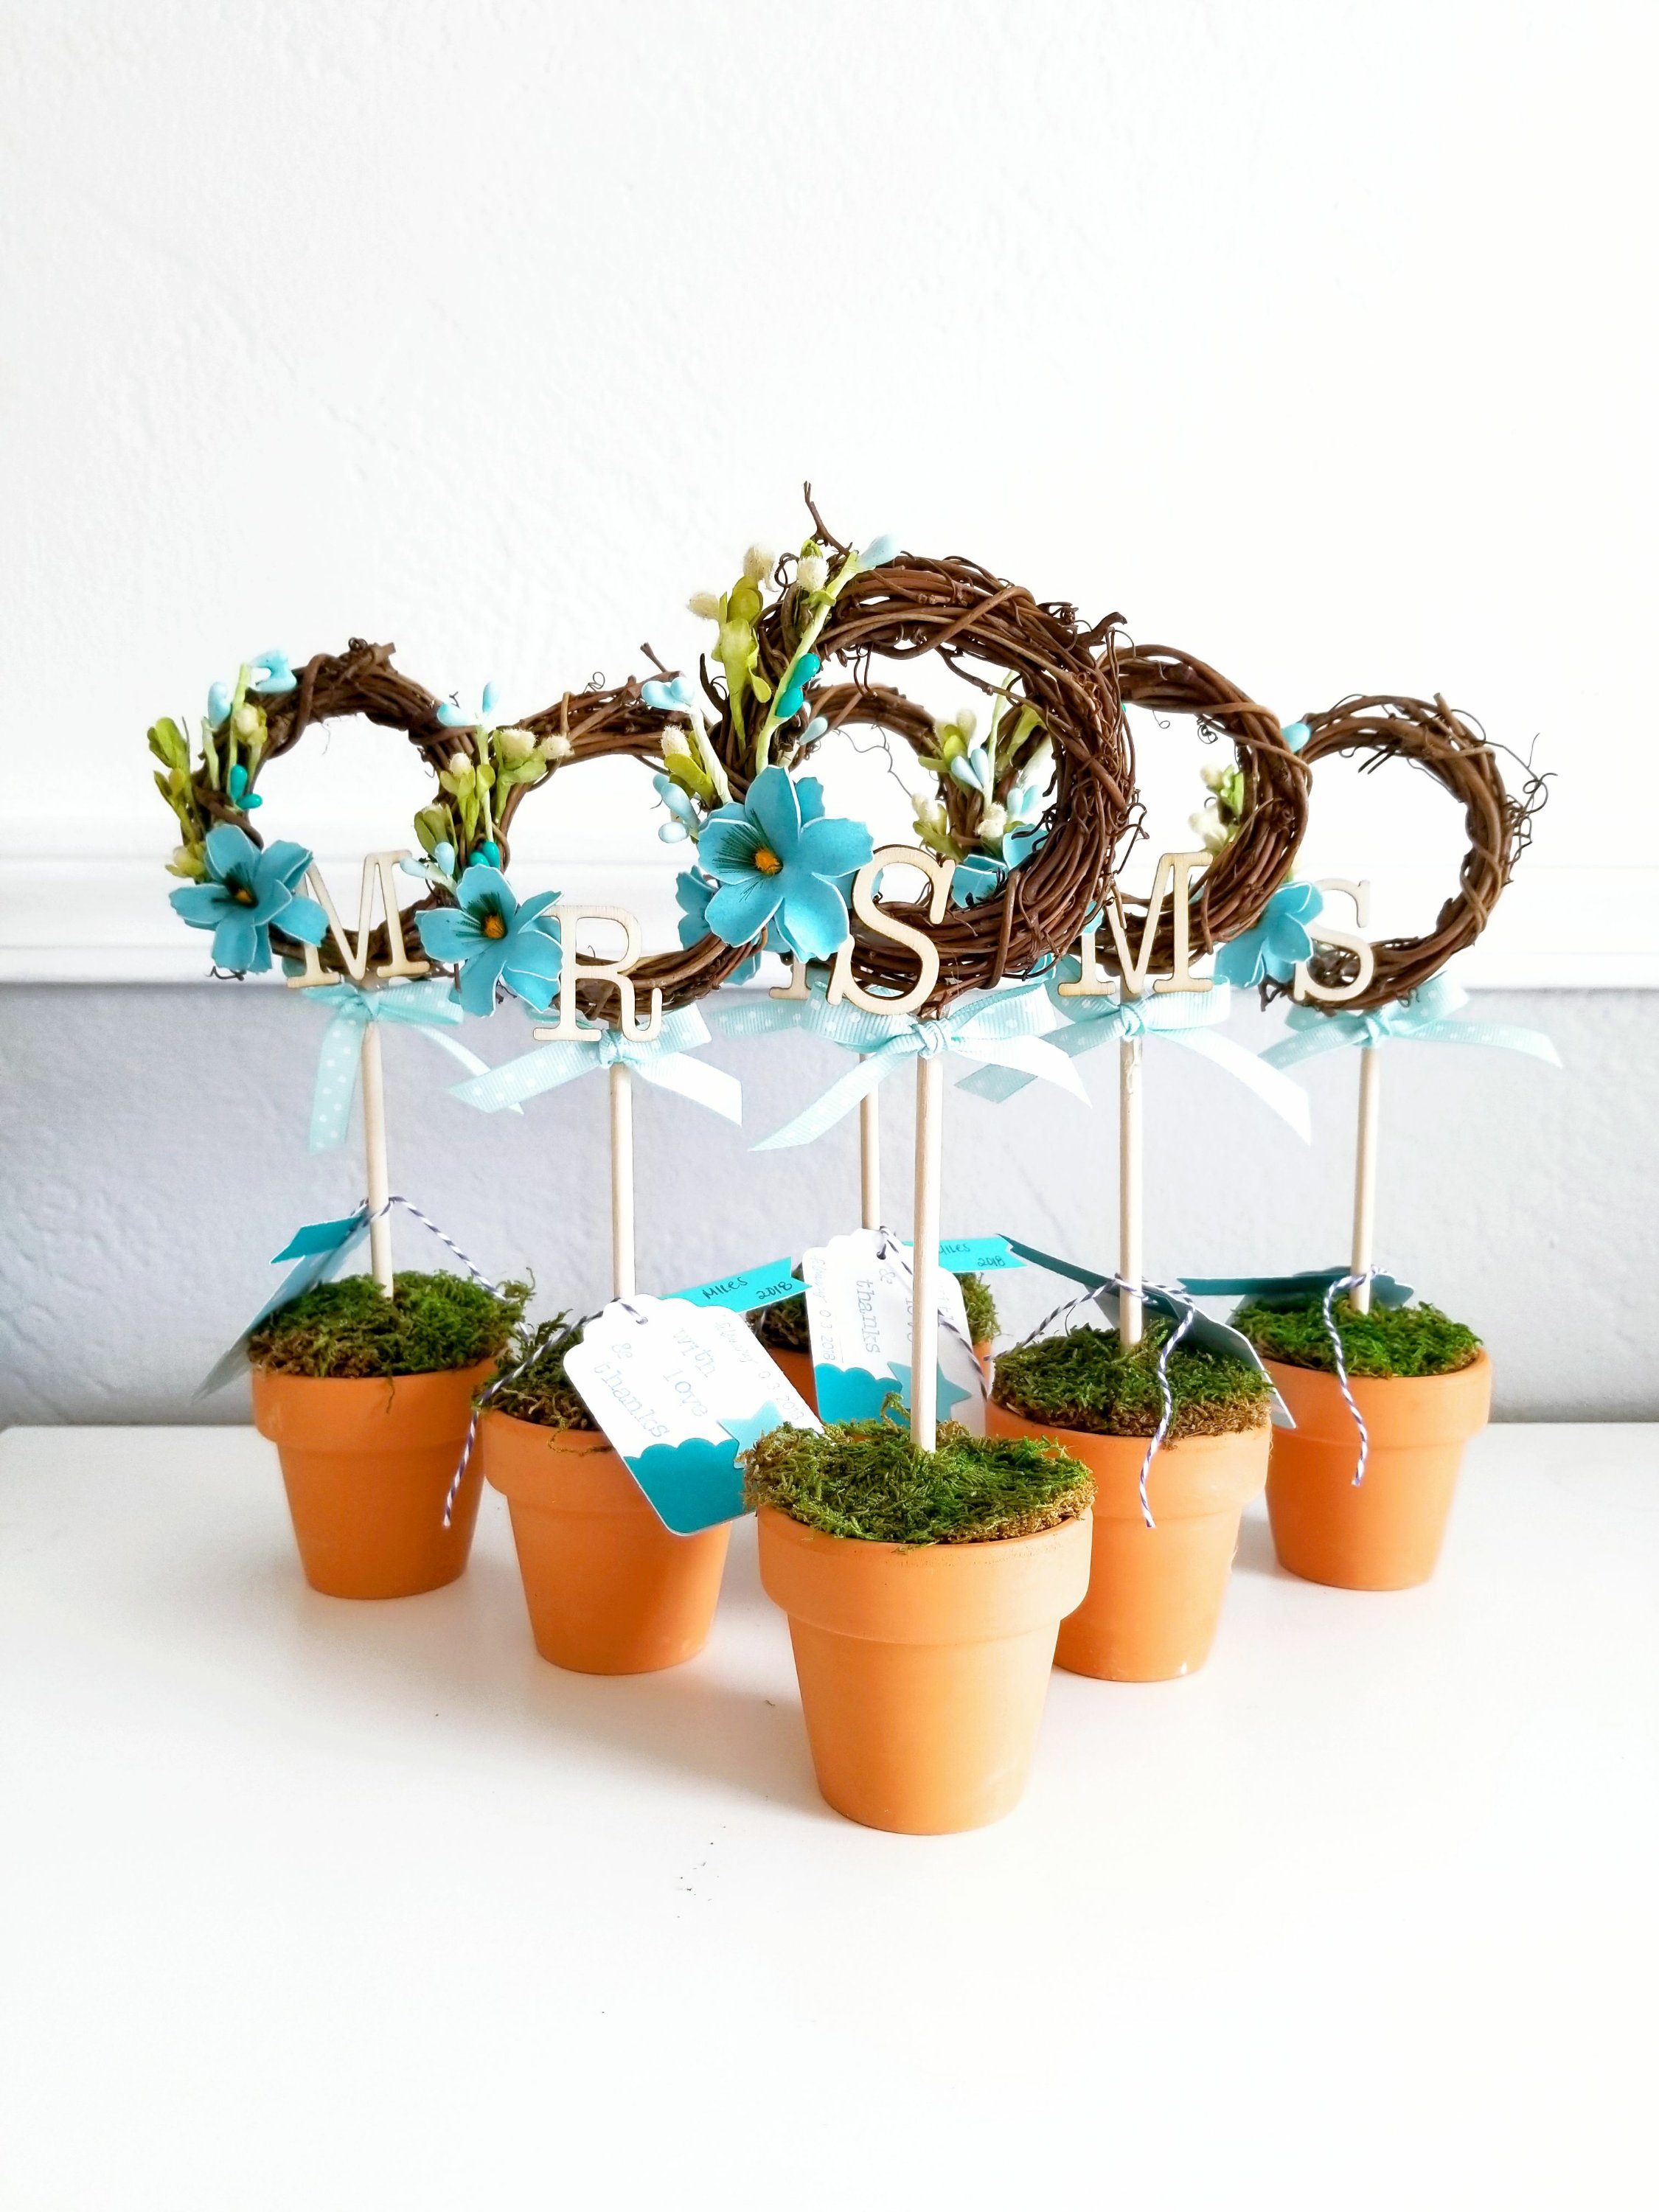
Mini Spring Potted Wreaths
Last year, I made these fun mini Spring potted wreaths as thank you gifts for the wonderful ladies that all contributed to making my magical baby shower happen. I knew there was no better way than with a little Spring gift from me and my little Spring baby!
These mini Spring potted wreaths make for the perfect decorations for anyone's home and are very easy to assemble. The best part is that you'll end up with plenty of extra material to use for other projects, even if you're not using them as gifts!
Here's what you'll need
- Miniature wreath(s)
- Miniature pot(s)
- Moss
- Ribbon
- Wooden dowel, round
- Silk flowers
- Wooden letter(s)
- Floral stryofoam (I used cones)
- Glue gun and sticks
- Craft knife
- Scissors
- Optional: gift tags and twine
I used the smallest size wreaths and pots I could find at my local craft stores. For the wooden dowel, I got one long dowel that you can find in the craft wood sections. I believe mine was 3/16" and it was more than enough for all 5 of my potted wreaths.
What you'll need to do
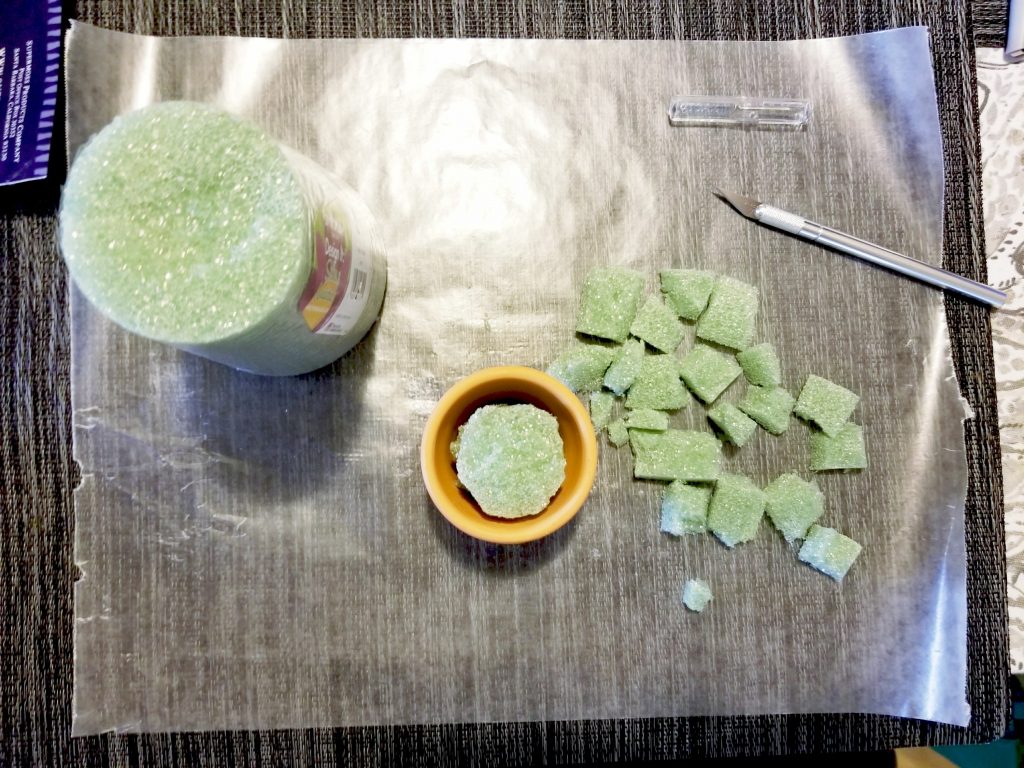
First, cut your floral styrofoam to size for your pot. Some parts of the foam will fit perfectly in the pot. If you're looking to use all of the cone, you'll need to shave them down to fit (like you can see in the photo above). Place some hot glue to the bottom of the foam and attach the foam.
While the glue sets, cut your dowel to size (about 6") and insert about half an inch to an inch into the foam. Apply some glue to the stem to help with reinforcement. The easiest way to cut the dowels is to cut into them as far as you can with a craft knife and snap in half by hand. Sand edges or use scissors to cut away any stray wood pieces.
Next, attach your moss with glue to the foam. I used my scissors to cut a circle the same size as the top of the pot, then cut a single slit towards the center of the circle so I could easily wrap the moss around the stick. You could definitely use loose moss. It's a bit fluffier than sheet moss and you have more freedom with placing it down.
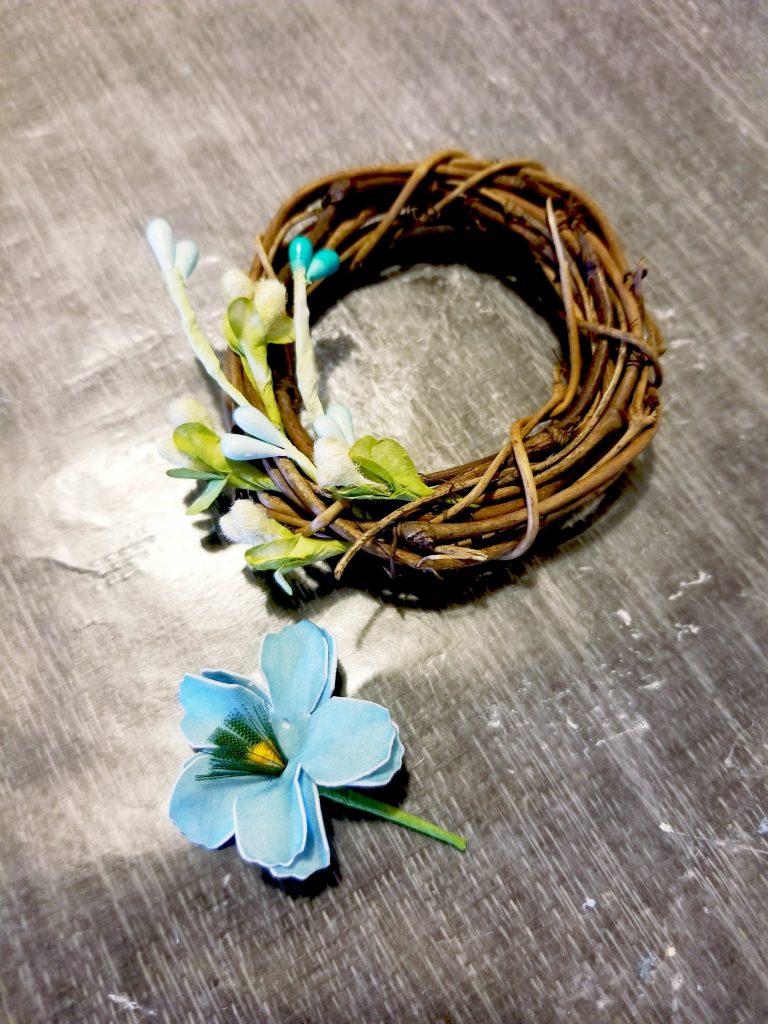
While the base sets, start on your wreath. I always recommend placing your flowers first before gluing them down as you can get a better idea of what you want before committing. Since I wanted a nice spread and the stems I chose didn't offer much bend, I cut them down to size and sporadically placed them on the left side of the wreath. You could repeat a similar layout on the right side as well, or have the buds and flowers go all the way around. Make sure you glue everything down.
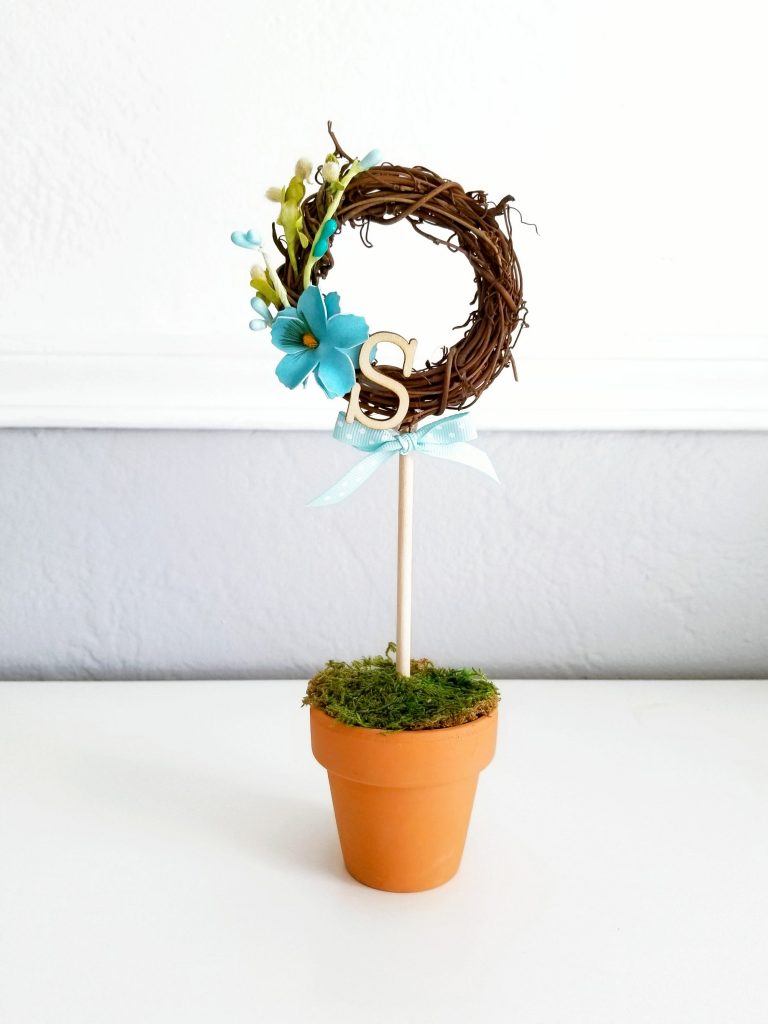
Once your flowers are set, glue down your wooden letter. I found this bag of wooden letters at my local Hobby Lobby and was so happy since I knew I would be repeating a few letters. For these gifts, I used the first letter of the last name for each recipient, including myself. You could paint the letters, but I loved how these looked as is.
Glue your wreath to the dowel using the vines to your advantage. On most of these wreaths, I was able to find spots on the back where I could stick the dowel in slightly to provide the glue more leverage and the stick more support. Placing the dowel in the vines a tiny bit in the back also helps with hiding the blob of glue that will be holding them together. You'll need to hold the wreath to the dowel while it dries.
Lastly, cut a piece of ribbon, tie into a bow, and glue to the dowel at the base of the wreath. You'll want the ribbon as far up and close to the wreath as you can manage. This also helps with hiding the glue used to hold the wreath to the stick.

Overall, this project took me about an hour or two to assemble all 5 pieces. Definitely something you could assemble the day before giving away. These double as name tags at the table for a holiday gather! Use the letters for their first names and place them in front of plates to use as name tags for the table. I can't wait to make winter ones this December!
If you make this adorable little wreath, be sure to tag @withlovejoey on Instagram, or link in the comments below! I would love to see what spin you take on these mini Spring potted wreaths!
Looking to copy my craft exactly?
Here are links to everything I used (or similar items):
- Wreaths - exact, 6-pack of 3" wreaths
- Wooden dowel - exact
- Moss - similar
- Wooden letters - exact
- Floral Styrofoam - exact
- Silk flowers - blue flowers | colored buds (similar in ivory)
- Ribbon - similar in Aqua

