
Halloween Beaded Mask Chains Tutorial
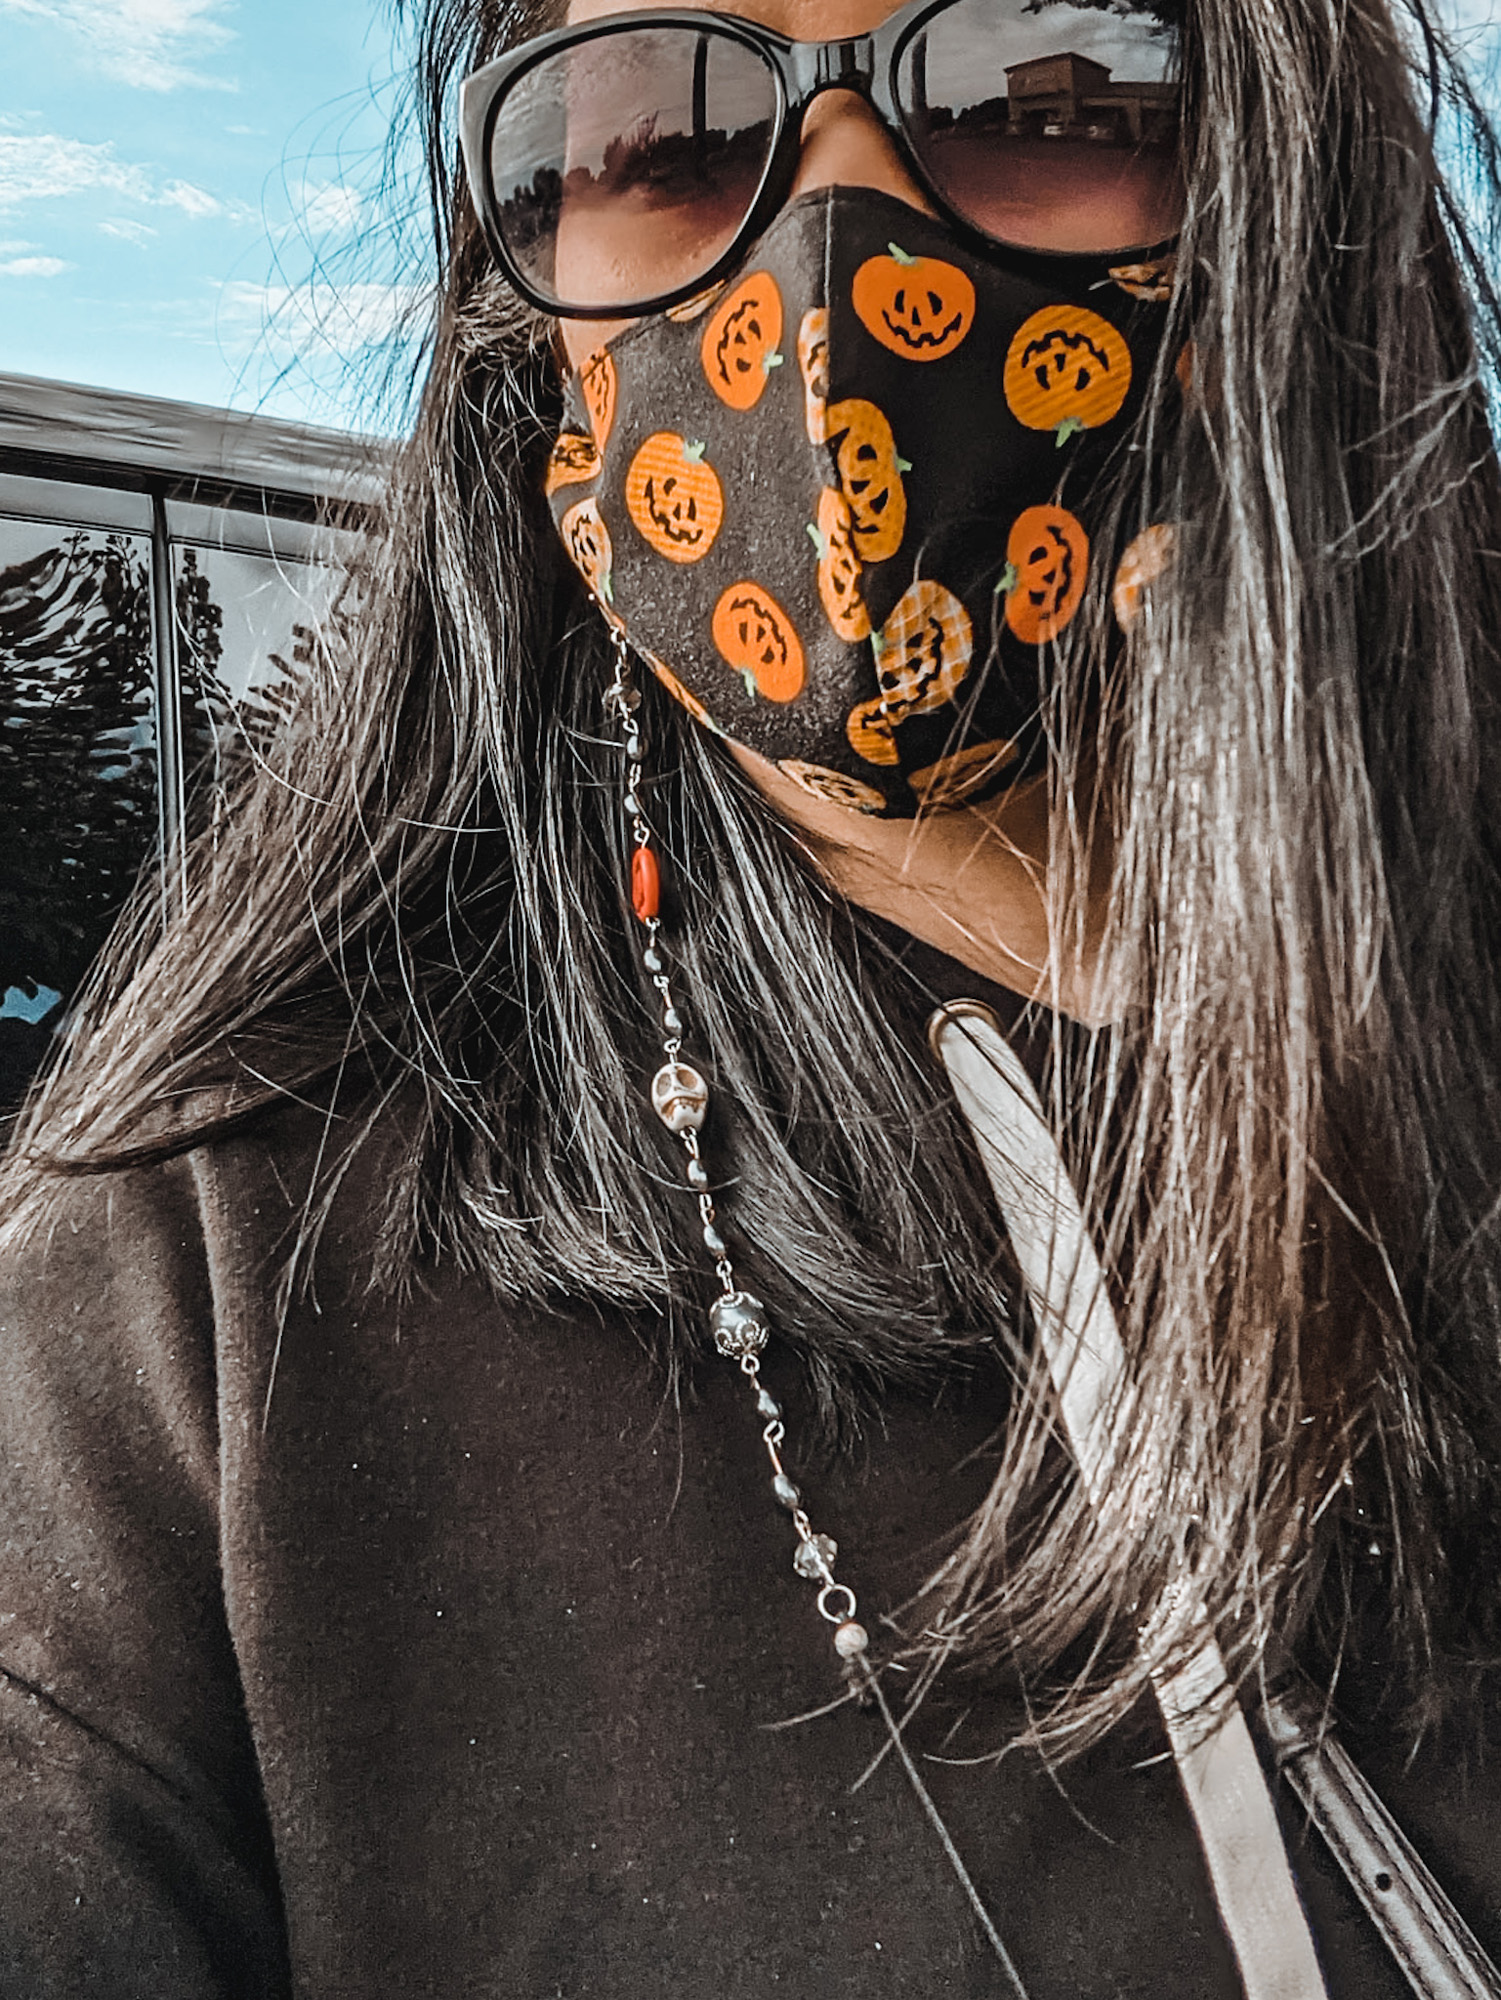
With our upcoming Halloween trip to Disneyland with my parents, I knew one thing that I really wanted to make was matching mask chains for my mom and I! My mom had bought me one from Apple Hill last year, and I've used it to the point of breaking it. It was time for some much needed spooky accessories. Today, I'm sharing with you how you can make your own beaded mask chains!
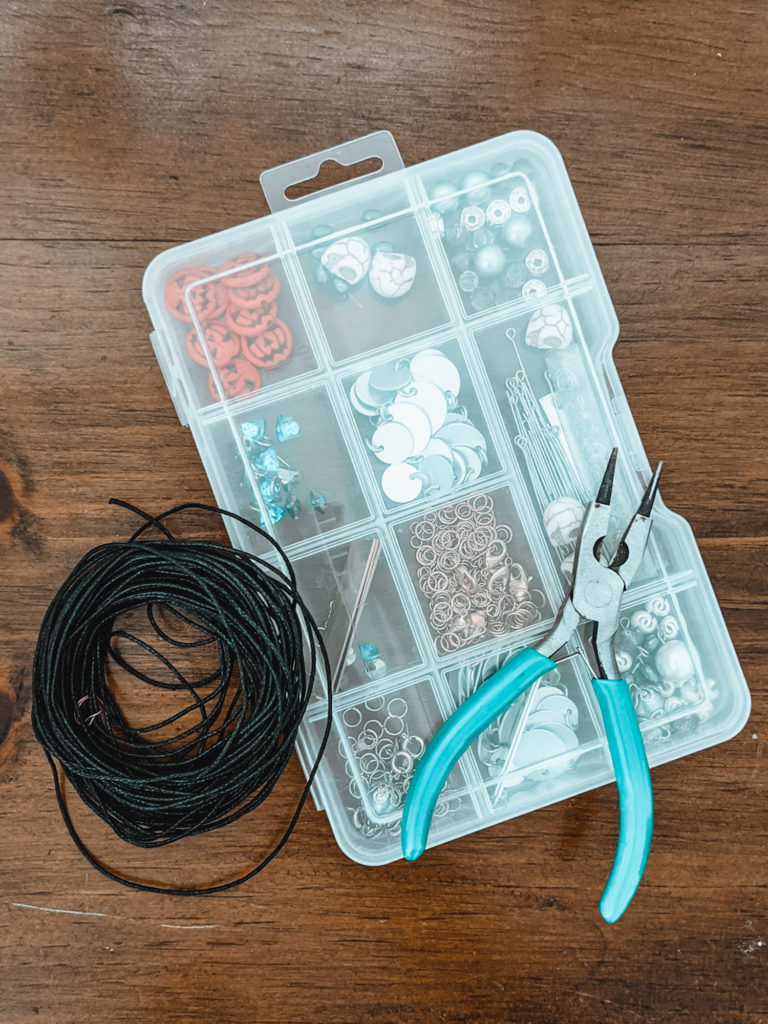
What You'll Need:
- Decorative Beads (pumpkins | skulls)
- Filler Beads (large | small)
- Jewelry Cord
- Jewelry Pliers
- Eyepins
- Lobster Clips
- Jump rings
- Metal Crimps
- Scissors
Because every body is built differently, you'll need to make sure you adjust the measurements accordingly to your body and your liking. This particular tutorial is designed for adults, but you could always modify it to be a small fit for teens, kids and toddlers (but make sure your tots are capable of using these gently and responsibly as these are absolutely choking hazards). That being said...
Here's What You Do
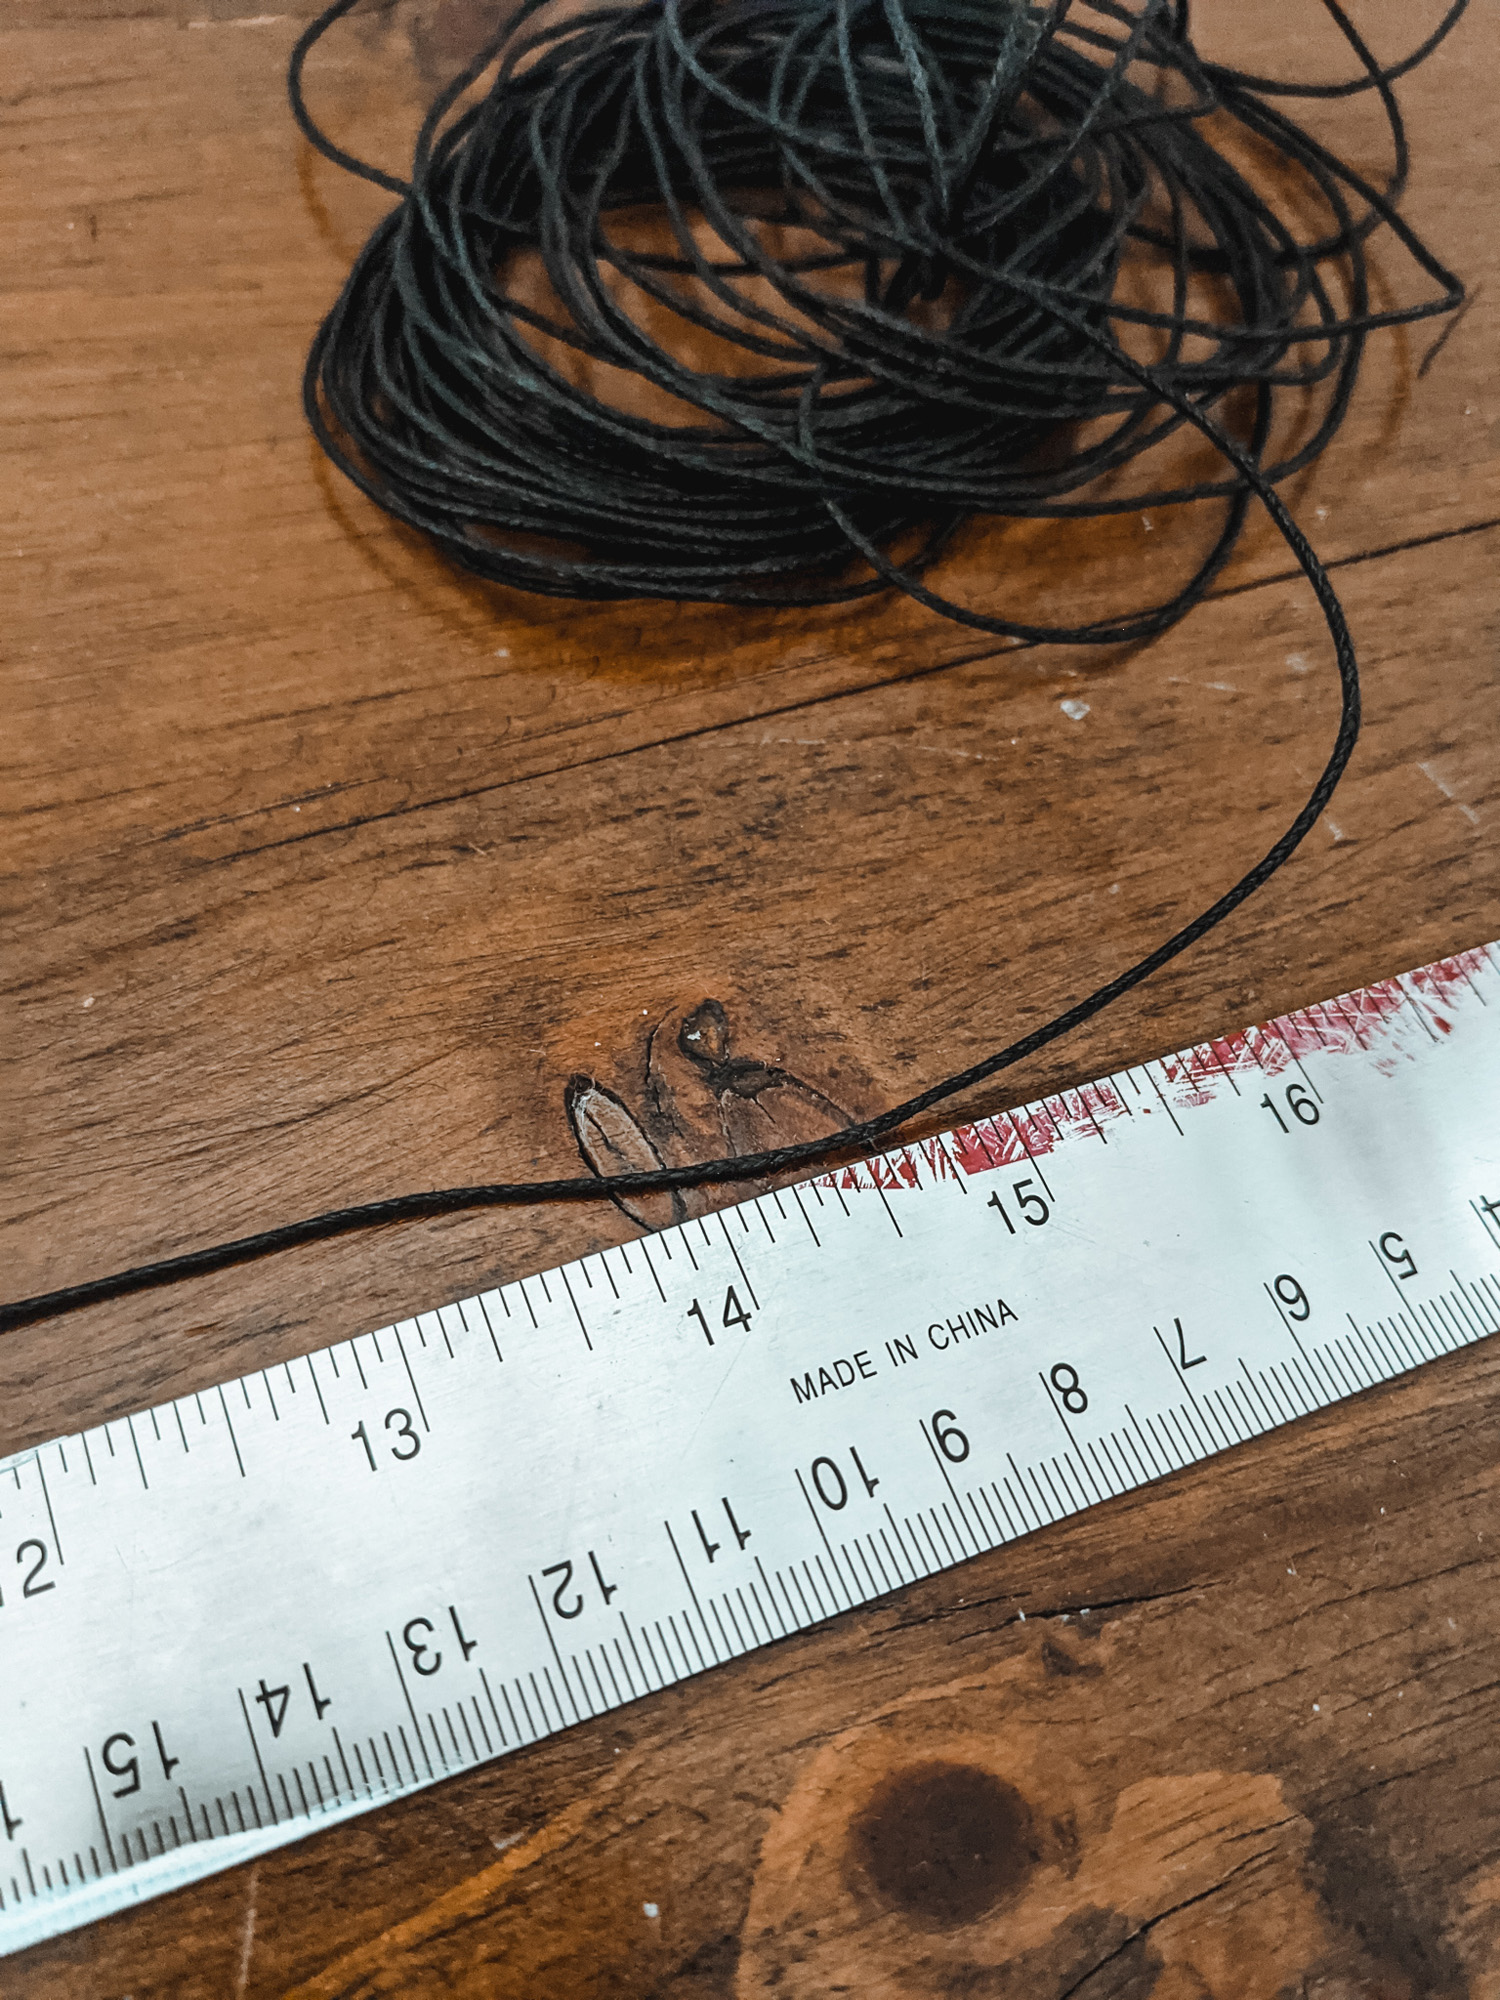
First, you'll need to cut your cording to 14". This should give you enough hang for when the mask is resting on your chest without being too long when you have it on your face. I don't recommend going below 12" or above 18", but everyone is different and what feels comfortable for you is always the right choice. I like it when my beads go from the base of my earlobes to about my shoulder, so that was my measurement for the beading pattern.
Lay your desired pattern on your work surface before you begin stringing, as this will help you focus on the design you'd like. If you're working with a slick surface, grab a towel to lay your beads on to keep them in place. Keep a small amount of space in-between beads to account for the connecting loops. Here is when you'll want to decide if you want to do one on each eyepin, or house multiple beads on an eyepin. I made 4 different designs and had a combination for all of them. My designs all measured about 6"-8" in length.


Thread your eyepins through the holes of your beads. Depending on the beads, you might be able to use one eyepin for 2 beads when cut. To enclose the bead onto the eyepin, use your jewelry pliers to round the end. Wait to close it completely until you can attach the next eyepin, that way you're not compromising the metal bending it back and forth a ton. The noses of jewelry pliers are build for wrapping metal around them and creating almost perfect circles. The closer to the tip you get, the smaller the holes you'll create. I like to stay around a quarter of the way down from the tip as much as possible, because I've found that its the easiest for me. When cutting the eyepins shorter, leave about 1/3" to create the new loop.


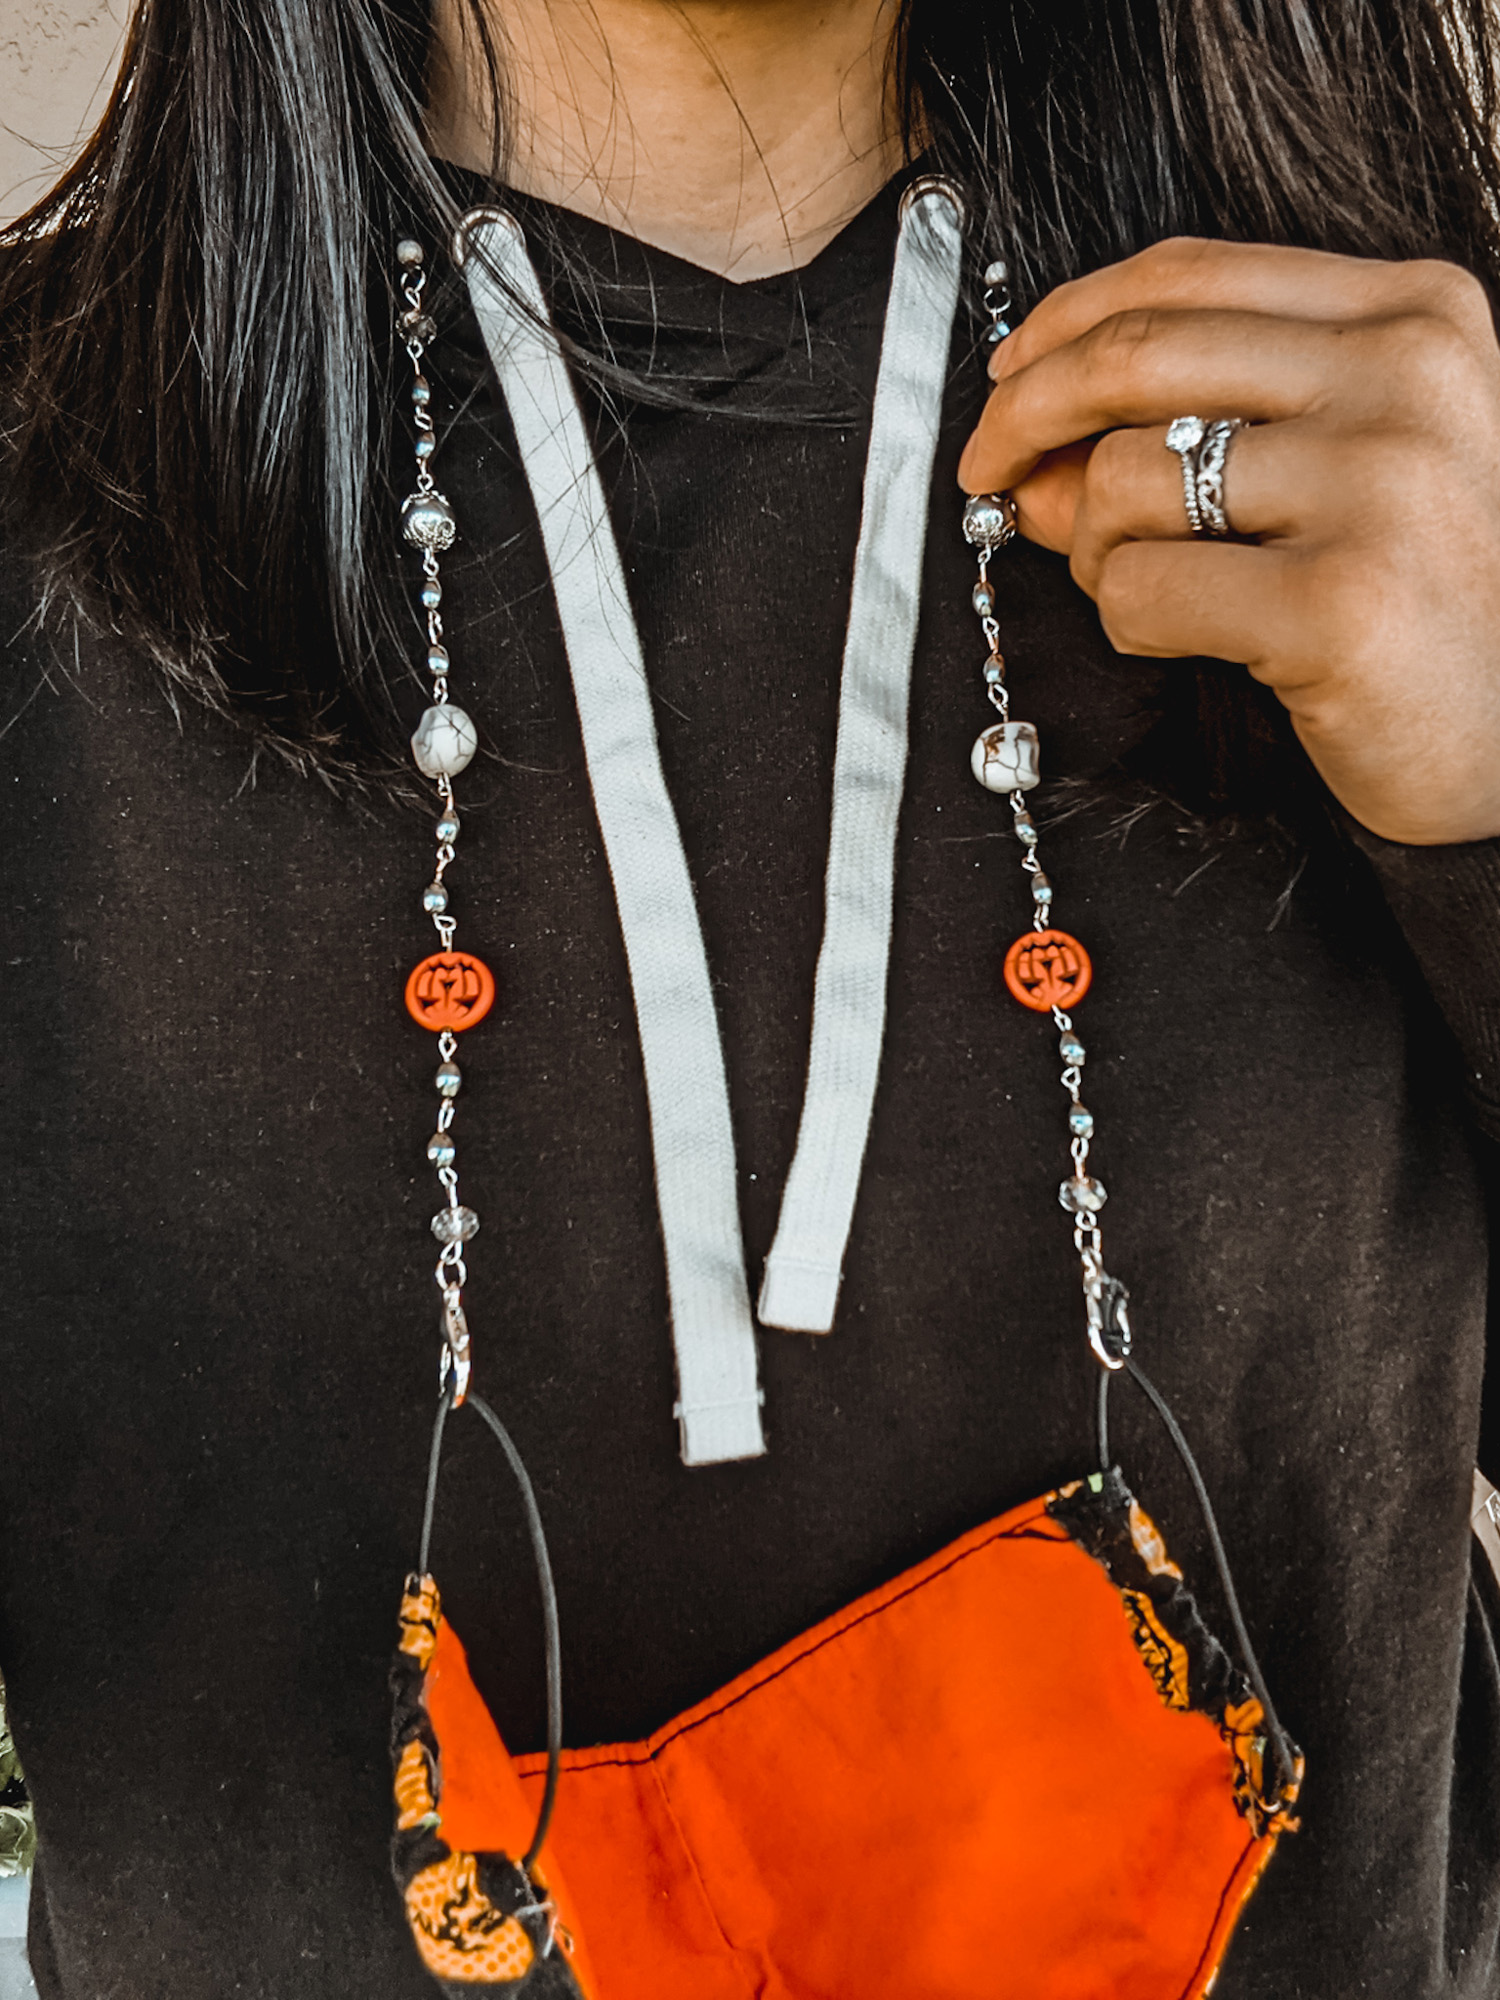
Once all of your beads are connected, you'll need to attach jump rings to each end. Start by attaching the lobster clip to the jump rings at the top. This will be the part that clips onto your mask. Next, take your cording and knot each end. String the cording through the jump rings. This is how the chain will connect together. Grab a metal crimp bead and place the cording into the open space. Use your jewelry pliers to clamp it closed. If it doesn't close when you clamp it, move the pliers around the bead to find a sweet spot. Sometimes it takes a few go's before it'll easily bend in on itself. This will help keep the cording attached to the beading without having an ugly knot connecting it to the jump ring.
Attach to your mask and live your spooky, glamour life!
Overall, this project cost me about $32 as I already had the jump rings and jewelry pliers on hand, and could set you back $50 if you have 0 tools and nothing is on sale. However, you do get 4+ mask chains out of these materials (more if you buy more lobster clips) which is nice if you and friends or family would like matching or coordinating ones. This could make for a really fun craft night project with friends and be pretty wearables for your next group trip!
I absolutely love how all of mine have turned out, and can't wait to make a trip back to the craft store for more lobster clips to finish off my beads! I've been having a ton of fun with them and can't wait to see what beautiful designs each of you come up with. Be sure to tag me on Instagram (@withlovejoey) or comment down below with your website link so I can see what you came up with!
Oh goodness, now I want to make Fall and Christmas themed ones...

