Harry Potter Galaxy Nail Art
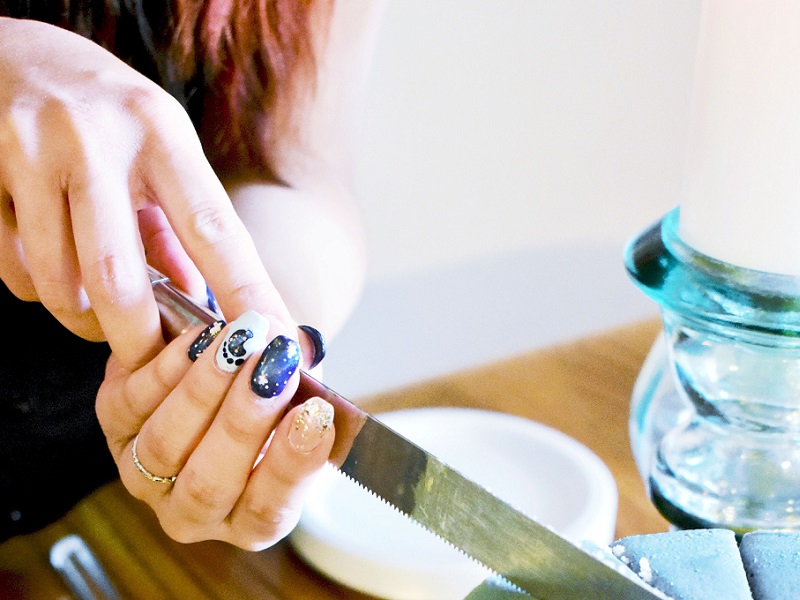
I believe that the best accessory you can have on your person at an event is your nail art, so when I found out I was going to be having a Harry Potter baby shower that would also be incorporating my starry nursery theme I knew exactly how I would be doing my nails. And being the "extra" personality type that I am, my nail art was special for all of my nails.
I started out by doing my own acrylic nails. I don't recommend doing this when you're 7 months pregnant and don't have the electric tools to file the nails down, haha! However, you could really do this nail art with any length of nails. The best items you can have on your side is the right colors, makeup sponges, and a few brushes & dotting tools.
Galaxy Nails
For the galaxy nails, I did the art on the fingers that typically don't have what's called "accent art" and used my wedding nail polish as the base. Using a makeup sponge, I dabbed white nail polish from the outer bottom corner to the inner top corner of my nails. I went over the white with blue and lighter purple.
Don't worry about filling in all the white with color. Remember that this is supposed to be reminiscent of the galaxy design which fades in and out and has start glittered within the deep colors. Any white left uncovered are now bonus stars. Finish up the galaxy using dotting tools to add small and medium star dots and larger star crosses.
Gold Glitter Frenchies
Since I use my first fingers a lot, they usually end up chipping away the earliest and fastest. To combat this, I used a sheer light nude color for my base to even out the color and gold glitter polish to create a fading french tip. This is great if you hate how a chipped polish on your most used nails ruin an entire manicure.
Galaxy Foot and Owl Ring Fingers
My true accent nails were my left ring finger (footprint) and right ring finger (owl). For the footprint, I relied heavily on my dotting tools and sponges to get the design on. If you're using gel polish, the design creation can be much more forgiving. If you're doing this with regular polish like I did, I highly recommend taking a break before tackling. Use the corner of the sponge to dab the galaxy design into the main foot area, and the smaller dotting tools to add small star dots. I really don't recommend adding the galaxy design to the little toes.
I used brushes to do the owl design on the right hand and dotting tools for the eyes. You can't really tell in the photos, but I did lose some of the detail separating the body from the wings. I think the lighting helped work in my favor. You could combat this by using the purple polish to create a border of sorts. For the beak and feet, I did a layer of white polish and topped it with a layer of yellow.
Tips
Always use strong base and top coats! You have applied this much effort, do what you can to protect it. If you're going to have a professional recreate this for you, splurge a little bit for the gel polish. It will help make your investment last much longer and prevent chipping. And it is an investment. Most pros will charge you about $80-$100 for a full set with this much art work, as they should. This, with breaks, tooks me almost 3 hours to do alone because I didn't have any tools to shave or speed up the drying process.
Don't have all the colors or the money to spend on the polishes? Use acrylic paint for the galaxy art. You can get the small bottles for $1-2 anywhere acrylic craft paint is sold (Joann's, Michael's, Hobby Lobby, Target, Walmart, etc.). Same with the brushes. I use the cheap acrylic brushes to do my nail art and they work just fine. Just get the fine tipped ones.
If you like doing nail art, invest in a dotting tool set. They almost always come with a super fine tipped tool which can come in real handy as you get more comfortable with the tools.
Interest in seeing this in action? Let me know in the comments below and I'll put together an Instagram Stories set of me recreating this nail art step-by-step. I'll save it in my highlights for any future visitors to this post interested in a visual how-to!
Polishes & Tools Used:
Base Colors - Navy | Light Blue | Light Nude
Galaxy - White | Purple | Blue
Other - Top Coat | Base Coat | Gold Glitter (their picture is inaccurate) | Yellow
Tools - Makeup Sponges | Brushes | Dotting Tools


